Showing posts with label Lidia. Show all posts

Wednesday, September 8, 2021

Homemade Tagliatelle with Romagnola Tomato Sauce


Making homemade pasta is a bit of a project. But I loved it. This dough is so soft and smooth. Very easy to work with. I busted out my pasta roller for the first time since buying it 15 years ago. Yay!


I went to the best - Lidia Bastianich. She explains things so clearly, so I thought for my first foray, it would be best to use her guidance. This group of tagliatelle I cooked:

While this group of tagliatelle nests, I froze for later use:


Tagliatelle are long flat ribbon noodles that work beautifully with a meat ragu or a pesto. The sauce I went with; however, is a beautiful Romagnola tomato sauce that features fresh in-season tomatoes. I hope you get to make this while the Jersey tomatoes are still in their prime for the next couple of weeks.

You can certainly make this sauce with storebought fresh tagliatelle, but if you do have the time and a pasta roller, I do recommend trying this recipe. The fresh pasta is a such a wonderful texture and flavor. We really enjoyed it. 

This sauce also features fresh rosemary and parsley, so it is a definite change from the classic marinara. 


 Homemade Tagliatelle

From "Lidia Cooks from the Heart of Italy"

By Lidia Bastianich

Makes 1 1/2 lbs. fresh tagliatelle, serving 6

3 cups all-purpose flour, plus more as needed

3 large eggs (cold)

3 large egg yolks (cold)

3 Tbsp. extra virgin olive oil

2 Tbsp. ice water, plus more as needed

Recommended equipment: A food processor fitted with steel blade; a pasta rolling machine

Put the flour in the bowl of the food processor and process for a few seconds to aerate. Mix the whole eggs and egg yolks, olive oil, and ice water in a measuring cup with a spout.

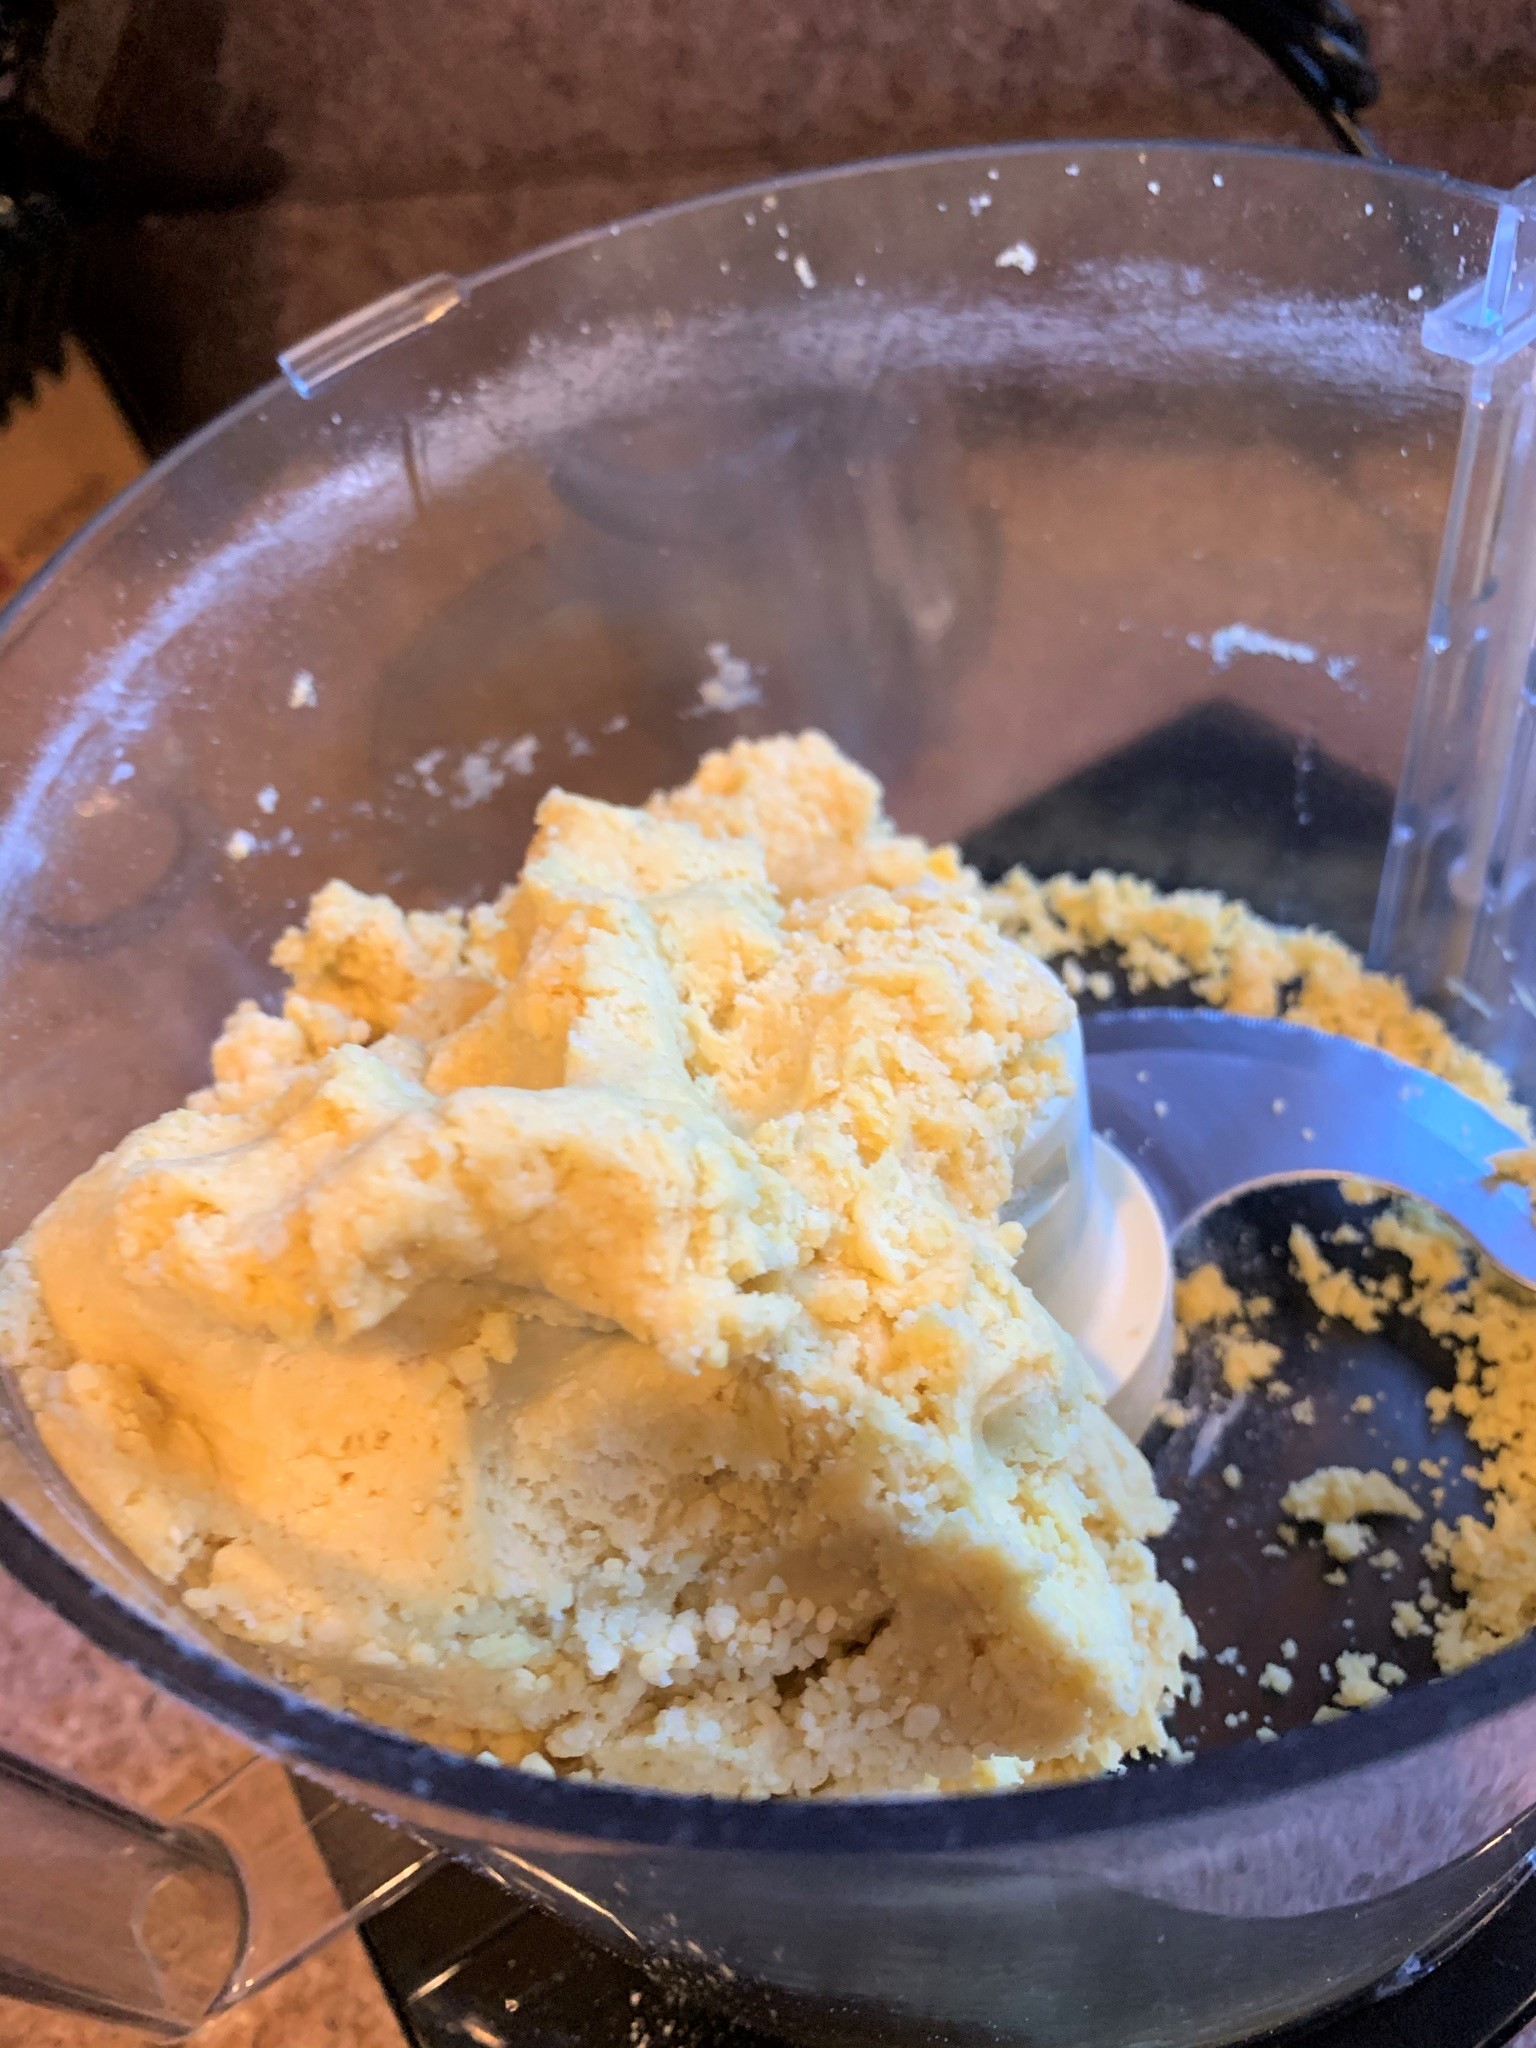
Start the machine running with the feed tube open. Pour in the liquids all at once (scrape in all of the drippings), and process for 30 to 40 seconds, until a dough forms and gathers on the blade. If the dough does not gather on the blade or process easily, it is too wet or too dry. Feel the dough and add either more flour or more ice water, in small amounts. Process briefly, until the dough gathers on the blade, and clear the sides of the bowl. 

Turn the dough out on a lightly floured surface, and knead by hand briefly until it's smooth, soft and stretchy. Press it into a disk, wrap well in plastic wrap, and let it rest at room temperature for 1/2 hour. (You can refrigerate this dough for up to a day, or freeze it for a month or more. Defrost frozen dough in the refrigerator; return it to room temperature before rolling).


To make tagliatelle: Cut the dough in six equal pieces. Keeping it lightly floured, roll each piece through the machine at progressively thinner settings into sheets that are 5 inches wide (or as wide as your machine allows) at at least 20 inches long. Cut the long sheets in half crosswise, giving you twelve strips, each almost a foot long.


One at a time, lightly flour each strip, and fold it over into thirds or quarters, creating a small rectangle with three or four layers of pasta. With a sharp knife, cut cleanly through the folded dough crosswise, at 1/2-inch intervals. Shake the cut pieces, opening them into long ribbons of tagliatelle. Dust them liberally with flour, gather into a loose nest, and set it on a floured towel or tray. Fold, cut and unfurl all the strips this way, piling the tagliatelle in small floured nests. Leave uncovered to air-dry at room temperature, until ready to cook (or freeze the nests on the tray until solid, and pack in airtight ziplock bags).


Tagliatelle with Romagnola Tomato Sauce

From "Lidia Cooks from the Heart of Italy"

By Lidia Bastianich

Makes sauce for 1 batch (1 1/2 pounds) tagliatelle or other pasta, serving 6

For the sauce

3 lbs. ripe tomatoes (round, plum, or cherry varieties are all fine)

4 Tbsp. extra virgin olive oil

4 plump garlic cloves, peeled and thinly sliced

1 sprig fresh rosemary (a short branch with lots of leaves)

1/2 tsp. peperoncino flakes, to taste

2 Tbsp. tomato paste

1 tsp. kosher salt

2 Tbsp. chopped fresh Italian parsley

For the pasta:

1 batch (1 1/2 pounds) homemade tagliatelle (see above)

1/2 cup or so freshly grated Parmigiano-Reggiano cheese, plus more for the table

2 Tbsp. or so extra virgin olive oil for finishing

Recommended equipment: A heavy-bottomed skillet or saute pan, 12-inch diameter or larger

For the sauce: Core the tomatoes, and cut them in half. With round or plum tomatoes, squeeze seeds into a sieve placed over a bowl - save the juices and discard the seeds - then chop the tomatoes into 3/4-inch pieces. Cherry tomatoes need only be cut in half.

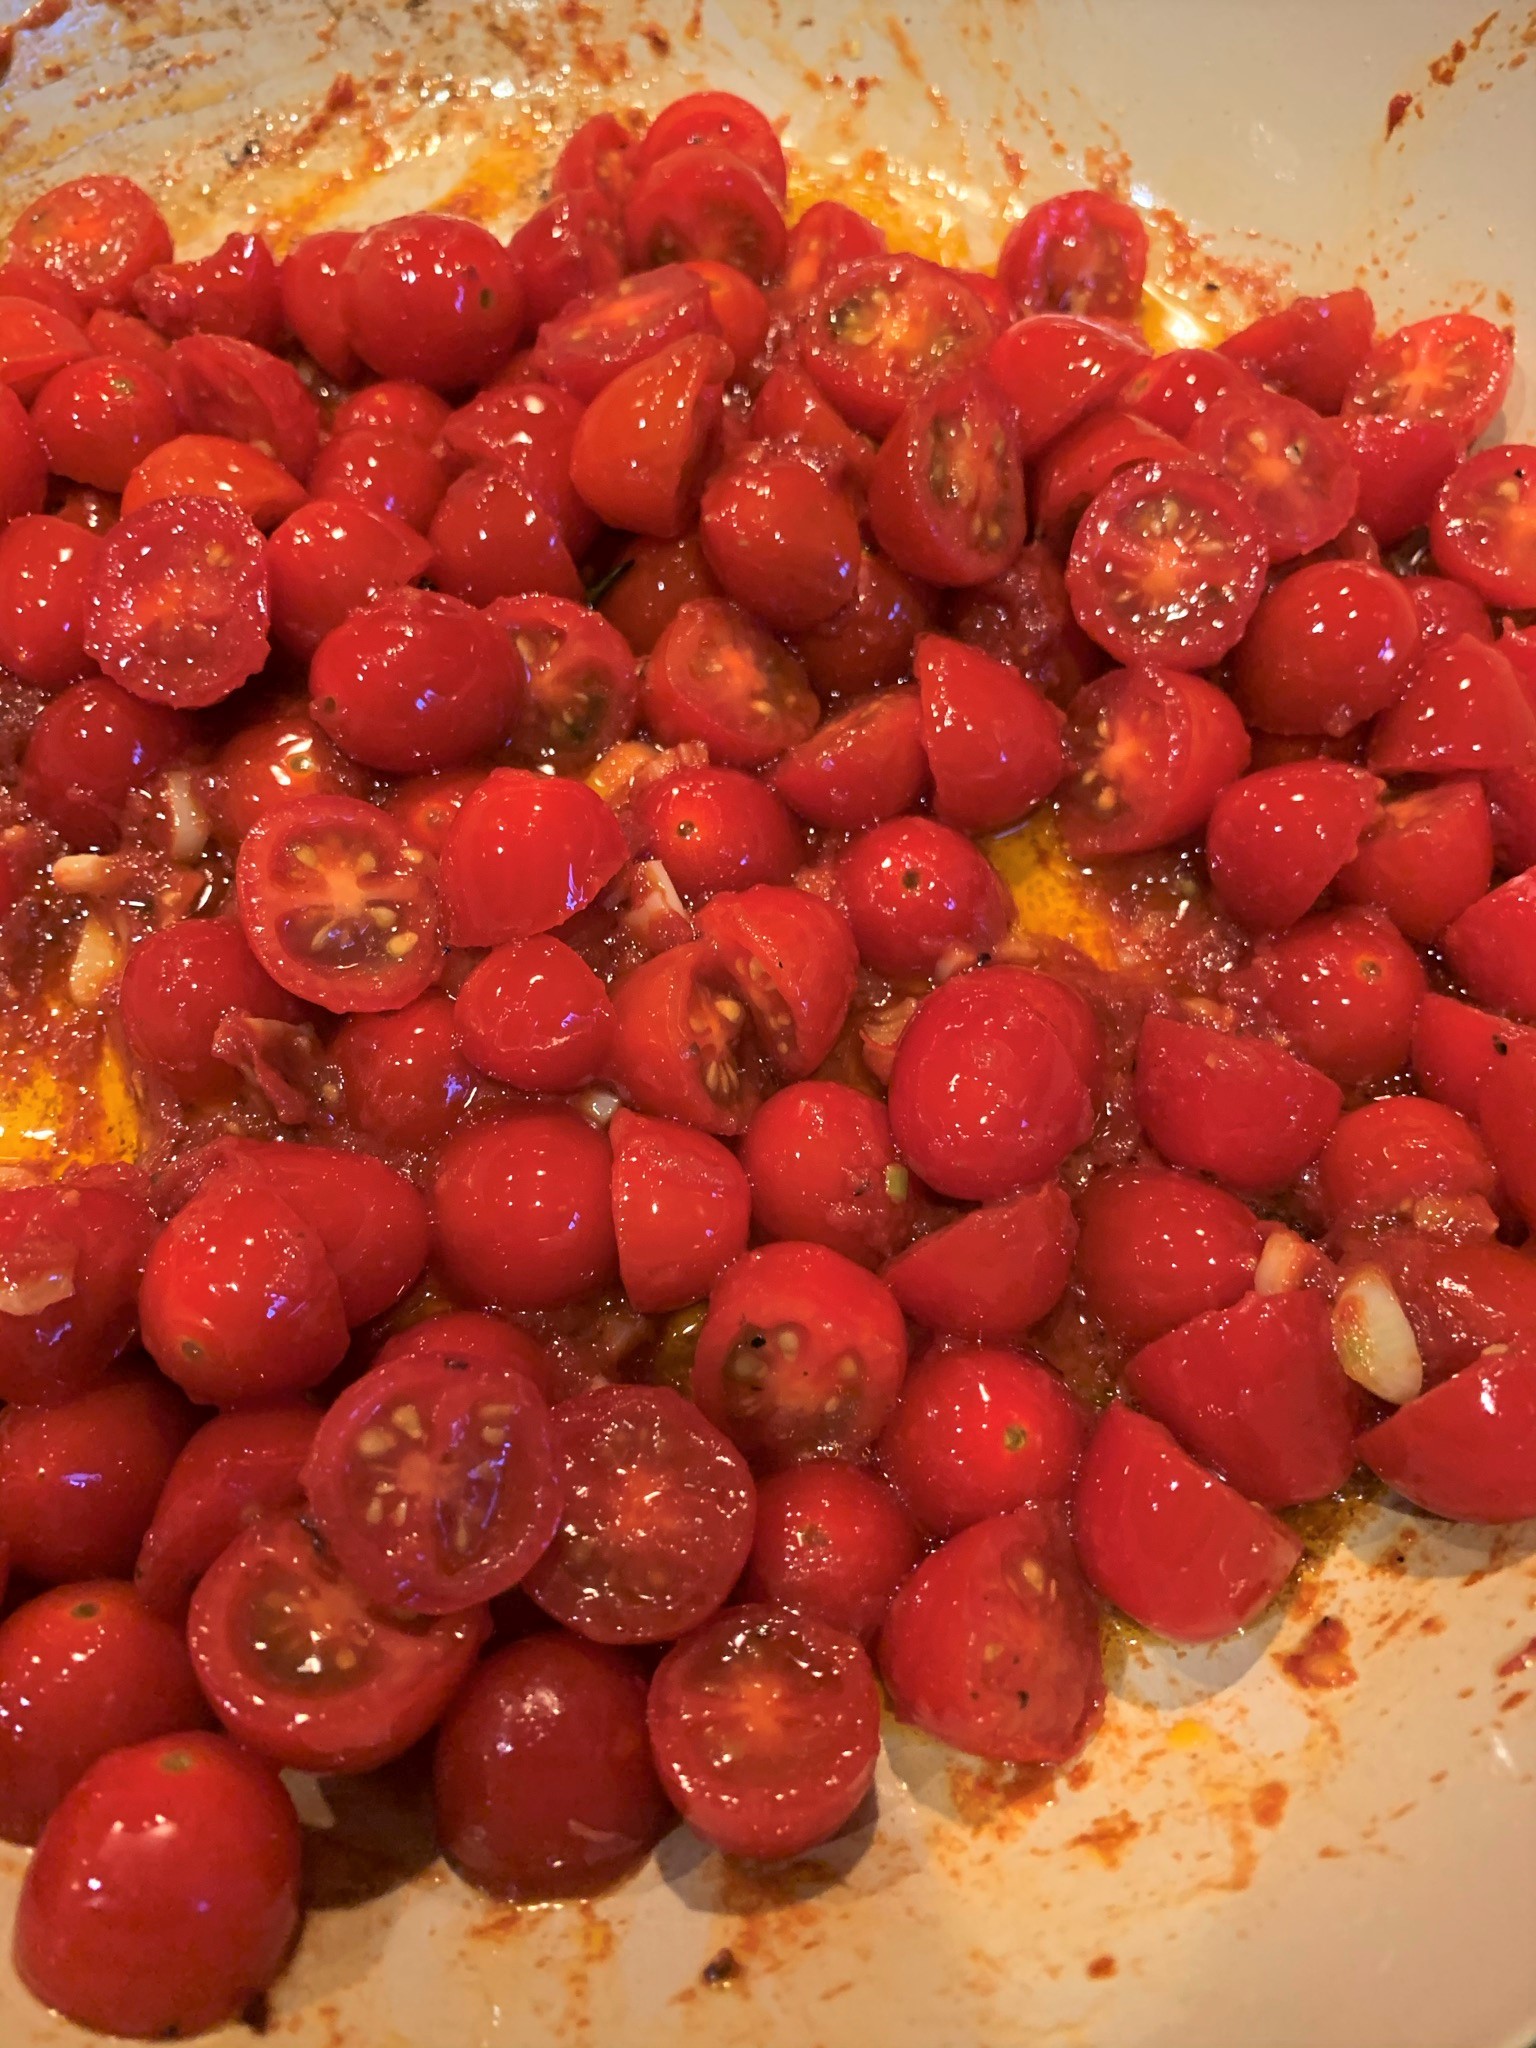
Pour the olive oil into the big skillet, and set it over medium-high heat. Scatter the garlic slices in the pan, and heat for a minute or so, until they start sizzling. Toss in the rosemary sprig and peperoncino, let them heat for a few moments, then drop the tomato paste into a clear hot spot in the pan bottom. Toast the tomato paste for a minute, then pour in the chopped tomatoes, sprinkle on the salt and stir all together.


Cook the tomatoes for a couple of minutes, until the begin to release their liquid. Pour in the reserved tomato juices from the bowl, along with 1/2 cup of water (use it to slosh out the tomato bowl). Bring the sauce to a boil, then adjust heat to keep it perking steadily. Cook, uncovered, until tomatoes break down into a chunky sauce, about 10 to 12 minutes. When the sauce is done, stir in the parsley and turn off the heat (or keep it barely simmering if you are ready to cook the pasta).

To cook the tagliatelle: Bring a large pot of well-salted water to a rolling boil. Shake the nests of tagliatelle in a colander or a strainer to remove excess flour. Drop all the pasta into the pot at once, and stir to loosen and separate the strands. Cover the pot, and return the water to a boil rapidly. Set the cover ajar, and cook the pasta, stirring occasionally, for 2 minutes or more, until barely al dente (it will cook a bit more in the sauce).

Have the tomato sauce at a simmer; if it has cooled and thickened, loosen it with a bit of the hot pasta-cooking water. Lift the tagliatelle from the cooking pot quickly, with a spider and tongs, drain briefly, and drop into the simmering ragu. Toss together, over low heat, for a minute or more, until all the strands are coated and perfectly cooked. Thin the sauce, if necessary, with hot pasta water, or thicken it quickly over higher heat.

Turn off the heat, sprinkle 1/2 cup or so of grated cheese over the tagliatelle, and toss well. Drizzle a couple of tablespoons of olive oil all over and toss again. Heap the pasta in warm bowls, and serve immediately, passing more cheese at the table.


Saturday, September 26, 2020

Deep Dish Pizza

The Husband went to grad school in Chicago so he has a thing for deep dish pizza. I was excited to try this recipe from Lidia Bastianich to make one right at home here in Jersey. While I'm not 100 percent sure it is as authentic as the real thing in the Windy City, The Husband and The Son overwhelmingly approved of my pizza. Yay!


I omitted the pepperoni listed in the ingredients, as both of my cohabitants requested it to be meat free. I think bell peppers and mushrooms would be a fab topping, or I guess filling, too. But I just went with the sauces and the cheeses for the first go-around. When I make it again, I will get experimental.

I used a baking dish since my cast-iron skillet is only 10 inches. 

The dough was so much fun to make. This was so crunchy and delish. I definitely recommend making it as the nights get cooler. I initially made this a few months ago during the Covid lockdown. Now that chillier weather is on its way, I thought now was a good time to share.

While you of course can use a jar or your fave marinara or pizza sauce, I am providing a link to my marinara sauce here and my pizza sauce here. Super delish and you can freeze both!


Chicago Deep-Dish Pizza

From "Lidia's Italy in America"

By Lidia Bastianich

Makes 1 pizza

For the dough:

1/2 tsp. sugar

1 packet instant dry yeast (2 1/4 tsp.)

3 1/2 cups all-purpose flour, plus more for kneading the dough

1/2 cup fine cornmeal

1/2 tsp. kosher salt

1/4 cup extra-virgin olive oil, plus more for bowl and pan

For the topping:

4 ounces provolone, sliced

4 ounces mozzarella, sliced

1 to 1 1/2 cups marinara sauce

2 ounces pepperoni, sliced

1/2 cup grated Grana Padano or Parmigiano-Reggiano

1/2 tsp. dried oregano


To make the dough:

Pour 1 cup plus 3 Tbsp. warm (90 to 110 degrees F) water into a bowl, then stir in the sugar and the yeast. Let sit until the yeast begins to bubble, about 5 minutes.

In an electric mixer fitted with the paddle attachment, mix the flour, cornmeal, and salt on low to combine. Pour in the yeast mixture and the olive oil to combine while still mixing. Once the dough comes together, switch to the dough hook, and knead on medium-high speed to make a smooth dough, about 2 to 3 minutes. Add a little more water or flour as needed to make a soft dough. Put the dough in an oiled bowl, cover and let rise until doubled in size, from 1 1/4 to 1 1/2 hours.


Preheat oven to 400 degrees F. Punch down the dough, and press into a 14-by-10-inch oiled baking pan or an oiled 12-inch cast iron skillet, gently pressing the dough up the sides to make a shell. Fill the shell with an even layer of the provolone and mozzarella, then spread the sauce to cover the cheese completely. Top with the pepperoni, and sprinkle with the grated cheese and oregano. Cover with foil and bake 45 minutes. Then uncover and bake until the crust is deep golden brown and pizza is bubbly, about 20 minutes more. Let sit about 5 to 10 minutes before cutting into wedges and serving. 


Monday, June 29, 2020

Grilled Chicken Caesar

Sometimes a simple classic is all you need. Recently, The Husband requested Grilled Chicken Caesar. 

No problemo, Husband.

I like having this at home because you can control the amounts. In restaurants, it's often drenched and who knows where the dressing came from.

I use Lidia Bastianich's Caesar Salad Dressing recipe. It's my go-to. You don't need to use the whole amount of dressing for this dish. Just store the remaining dressing for use later in the week. Lidia recommends a blender or food processor for making the dressing. I always use my food processor. 

The chicken is easy to prepare. Just marinate in thyme and fresh lemon juice and olive oil. That's it.

Super simple!


Grilled Chicken Caesar Salad
(Makes 4 servings, with some chicken leftover)

For the chicken:
2 lbs. thin cut chicken breast (about 10-12 slices)
1 tsp. dried thyme
Zest and juice of 1 lemon
3 Tbsp. extra virgin olive oil
Salt and pepper

In a medium bowl, whisk together thyme, lemon zest and juice, olive oil, salt and pepper. Place chicken in bowl. Massage marinade into chicken breasts so that all are evenly coated. Set aside in the refrigerator for at least thirty minutes and up to 4 hours.

Preheat a grill pan over medium-high heat. Cook chicken in batches (be sure to not overcrowd the pan). Grill on each side about 3-4 minutes per side. Set aside in a covered dish to keep warm. Repeat until all chicken pieces are grilled.


For the salad:

Romaine lettuce, cleaned and chopped (about 6 cups)
Croutons (optional)

Caesar Salad Dressing
From Lidia's Italian-American Kitchen
By Lidia Bastianich

2 Tbsp. red wine vinegar, plus more for dressing the salad
2 Tbsp. fresh lemon juice
4 cloves garlic
4 anchovy fillets
1/3 cup extra virgin olive oil, or as needed
1 Tbsp. Dijon mustard
1 hard-boiled egg yolk
1/2 tsp. salt
1/2 tsp. Worcestershire sauce
Freshly ground black pepper
1 cup grated Parmigiano-Reggiano cheese,

Combine 2 Tbsp. vinegar, lemon juice, garlic and anchovies in a blender or the work bowl of a food processor. Blend until smooth smooth, adding some of the 1/3 cup olive oil if there isn't enough liquid to move the mixture around the blender jar. Add the mustard, hard-boiled egg yolk, salt, Worcestershire sauce, pepper and remaining olive oil if any. Blend until smooth and creamy. Taste the dressing; if it's a little too tangy, pour in a splash or two of olive oil and blend until incorporated. 


Place romaine leaves in a large bowl, add enough dressing to coat the leaves. Add a splash of extra vinegar if you would like the dressing thinner. Toss with a few handfuls of grated cheese. Season with pepper if desired.

To serve:

Top each plate with prepared romaine leaves. Top each salad with two slices of chicken and croutons if using.


Sunday, February 12, 2017

Marinated Eggplant

It seems many peeps like to get in and get out of the kitchen as fast as they can when conjuring up some eats for the day.  The Jersey Girl, on the other hand, looks forward longingly to those days that I can master a dish that took quite a bit of time, much preparation and above all patience. This is how I set my sights on creating some lovely Marinated Eggplant. It most definitely is not to be rushed.

As is often the case when I make something that is multi-stepped and requires some waiting around, timing things just right and a cooling off period, I so wanted to ring up my Mommom and tell her all about my culinary adventure, hoping to pop by and give her a taste. But that experience in my cooking accomplishments has come and gone. Mommom passed away about a year ago.

She made an amazing marinated eggplant. And I guess that's why it's on my mind. Approaching the anniversary of her death, I can't help but think about the unforgettable dishes she has made throughout the many years of her cooking for all of us.

I don't have a copy of my grandmother's marinated eggplant. I don't really know if she had one. She often stored culinary blueprints in the corners of her brilliant mind with no tangible documentation save for the finished delicious product.

But I tried to replicate it as best I could with this Poached Eggplant with Vinegar, Garlic and Mint recipe by Lidia Bastianich. I used basil instead of mint. I couldn't get my hands on nice mint at the time. I know this isn't peak eggplant season, but I wanted to give it a try before summer hits so I know what I'm doing when I find myself with boatloads of eggplant. (My students, family and friends often bestow me with vast quantities of produce. A fact of life if you live in South Jersey.)

This if magnifico on just really fresh Italian bread. I'm sure it would rock with some grilled meats or swordfish. And of course a wonderful glass or bottle of vino. I know I did my Mommom proud with this one.

Poached Eggplant with Vinegar, Garlic and Mint


Serves 6 or more as a side dish; 12 or more as an antipasto
By Lidia Bastianich
From Lidia's Family Table

For Poaching
2 1/4 pounds small, firm eggplants (preferably 6 to 8 ounces each)
2 cups red wine vinegar, white wine vinegar or cider vinegar

For Marinating
1/2 teaspoon salt
15 to 20 small fresh mint leaves, shredded
3 garlic cloves, thinly sliced
3 Tbsp. extra virgin olive oil

Recommended Equipment
An 8-quart pot or saucepan for poaching
A flat baking sheet or platter for cooling the eggplant

Prepping and Poaching the Eggplant
Trim the stem and bottom (blossom) ends of the eggplants. Slice the eggplant in half lengthwise, then slice each half into wedges, about 1 1/2 inches wide on the outside (peel side). You should have thirty or more wedges.

Pour the vinegar and 20 cups water into the pot, cover and heat quickly until boiling. Drop in all the eggplant slices, cover and return the liquid to the boil rapidly, then set the cover ajar and adjust the heat so it's a moderate boil.


Push the eggplant under the surface frequently, shifting the pieces around a bit so they all poach evenly. After about 10 minutes, reduce the heat so the liquid is perking gently and won't break up the softening wedges. Cook for a total of 15 to 20 minutes, until the flesh of the eggplant appears completely translucent - any opaque streaks means it is not cooked through. Don't cook any longer than necessary; as soon as they are done, turn off the heat and carefully lift the wedges out of the liquid with a wide, perforated spatula or strainer - let the liquid drain off briefly - and lay them on the baking sheet. Spread the slices apart from each other in one layer and let them cool for a few minutes.


Marinating the Eggplant

 Using a paring knife, cut out the stuck-together mass of seeds on each slice and discard, taking care not to tear the flesh; don't worry if a few seeds are left.

As you seed them, lay a third of the wedges in the small gratin dish in one layer, and top them with the seasonings; sprinkle on a third of the salt and a third of the mint-leaf shreds, scatter a third of the garlic slices, and drizzle a third of the oil all over. Arrange and season two more layers of eggplant in the same way.

Marinate the eggplant for about an hour at room temperature before serving or using in a dish (though they will be tasty in 30 minutes if you need them sooner).

If you are making this ahead for serving the next day, seal the dish with plastic wrap and refrigerate; remove at least an hour before using so it comes to room temperature. To keep after the second day, remove the garlic slices from the dish, wrap and refrigerate; use within a week.

Please note: The Jersey Girl used basil instead of mint.


Monday, July 30, 2012

Told Ya So

The true test of culinary greatness is when you can convince someone – in this case the someone is The Husband – that he/she really enjoys consuming an ingredient  - in this case, the ingredient is mushrooms - that he/she mistakenly thinks he doesn’t dig.

God, this husband of mine. Look, I love him with all of my soul. Even when he spills mustard, coffee or some other impossible element to Shout out, scrub out, curse out of his freakin’ million-dollar Ralph Lauren Polo shirts not even an hour – AN HOUR – after The Jersey Girl finishes laundry. Don’t even get me started on the bathroom. And if you must know, yes, he is a snorer.

I know that paragraph was riddled with about 100 husband/wife clichés, but it is SO my reality. What do you want from me?

Meanwhile, my loving better half who moves the earth and the moon and the sun to make my life and that of Baby Evan’s super duper fabulous - (Yes, I’m covering my bootie right now. But The Husband really is awesome despite my griping, pinky swear) – decides to protest the eating of mushrooms. Mushrooms. They’re perfectly harmless. God.

So, what’s your beef with mushrooms, Husband?!

When asked to reveal his inner thoughts on the shroom, The Husband calmly states while swilling his Stella, “You know what it is? It’s the texture.” Then he went on to say something about big mushrooms vs. little mushrooms and that he likes them when they’re in a dish with something else but they shouldn’t be the focus of the dish and he doesn’t like the chewy ones they put in the takeout at the Chinese restaurant….. At this point, as most seasoned wifeys masterfully do, I blocked him out. When he was at a wrap, I informed him that he would be trying stuffed mushrooms with red peppers and scallions, and he would like it.

And……………….

He DID!!!!

In fact, he went back for seconds. AND THIRDS.

God damn, I’m amazing. Well, maybe I’m not that great, but the recipes of Lidia Bastianich are, and I guess really, I should be thanking her.

I strongly believe The Husband was head over heels with this dish due to the above-mentioned sautéed red pepper and scallion. The Husband loves his red peppers and scallions. And beer. And escargot, which is ironic, since the texture of a snail drenched in butter is totally similar to that of many button-sized mushrooms. (The Husband is rolling his eyes right now as he is not a fan of my lectures regarding the similarities between mushrooms and foods he claims to like, or my curseword-laden monologues about how our home is NOT a college dorm and please for the love of God pick up your clothes off the floor, or my subtle reminders that it REALLY is time to bring the mounting pile of castoffs in the spare bedroom to Goodwill. No, really.)

For the record, The Husband is amazing at making the bed, cleaning up the kitchen and tidying up toys. Plus he puts up with me and my questions and my giggles and my worries on a daily basis. So, he really is a saint of sorts. Plus, he rocks out with some fabulous diamond-laden jewels when the time is right i.e, Christmas, birthdays, Labor Day (Just kidding, Husband.) And Evan adores him. And so does The Jersey Girl!!

OK. So below is the recipe. These mushrooms would be fab at a cocktail party. Just stick a toothpick in it. Hee.

There are also some pics of Baby Evan (who is SO not a baby anymore) kicking it at a Phillies game at Citizens Bank Park. The Husband did not understand why I failed to post pics of this event in my last blog entry. And my reason is….. well, I got nothin’.  Maybe I don’t want to remind all of us how bad this year’s team is.

Take it away, Lidia:


Stuffed Mushrooms
From "Lidia's Italian-American Kitchen"
By Lidia Mattichio-Bastianich

24 white or cremini mushrooms
2 Tbsp. extra-virgin olive oil, plus more for the tops of the mushrooms if you like
1/2 cup scallions, finely chopped
1/2 cup red bell pepper, finely chopped
1/2 cup fine dry bread crumbs
1/2 cup Parmigiano-Reggiano, grated
1/4 cup fresh Italian parsley, chopped
Salt
Freshly ground black pepper
4 Tbsp. unsalted butter, softened
½ cup chicken stock
¼ cup dry white wine, optional

Preheat oven to 425 degrees F. Remove the stems from the mushrooms (set the caps aside), and finely chop them.

Heat 2 Tbsp. olive oil in a medium skillet over medium heat. Add the scallions and cook until wilted, about 1 minute. Stir in the red peppers and chopped mushroom stems and cook, stirring, until tender, about 3 minutes. Remove and cool.

Toss the bread crumbs, grated cheese, 2 tablespoons of the parsley and the sautéed vegetables until thoroughly blended. Season with salt and pepper.  Stuff the cavity of each mushroom with the filling, pressing it in with a teaspoon until even with the sides of the mushrooms.

Using 2 Tbsp. of the butter, grease a 12-by-18-inch low-sided baking pan. Arrange the mushrooms side by side in the pan and, using the remaining 2 Tbsp. butter, dot the top of each mushroom with about ¼ tsp. butter. Add the stock, wine if using and remaining 2 Tbsp. parsley to the pan. If you like, drizzle the tops of the mushrooms with olive oil. Bake until the mushrooms are cooked through and the bread crumbs are golden brown, about 20 minutes.

Serve the mushrooms on a warmed platter or divide them among warmed plates. Pour the pan juices into a small saucepan and bring to a boil on top of the stove. Boil until lightly thickened, about 1 to 2 minutes. Spoon the juices over the mushrooms and serve immediately.

Please note: The Jersey Girl did use the optional wine called for in the recipe. She did NOT top each mushroom with a dot of butter, just a drizzle of olive oil. She also did NOT reduce the pan drippings into a sauce.


Hanging with Mommy.


Hanging with Daddy.


Directing Mommy and Daddy.


Checking out the Phanatic.


Taking a break to shout out some letters. 
Evan's obsessed with the alphabet.


Evan loves his Daddy!