Showing posts with label comfort food. Show all posts

Wednesday, August 19, 2020

Rustic Chicken with Garlic Gravy

Rustic Chicken with Garlic Gravy is what we are talking about today. It tastes as fab as it looks:


First of all, it features the lowly chicken thigh. But, honestly the chicken thigh is super delish and affordable, so I encourage you to embrace the thigh!

The dish requires an oven and stovetop ovenproof pan with a lid. It starts on the stove, moves to the oven and makes a return appearance to the stovetop so that you can make the smooth and fabulous gravy that will atop the crispy chicken and your side of choice.  I often make it with mashed potatoes but have also rocked it out with rice, which is way less time consuming and lighter than mashed potatoes. So, whatever you prefer! I always serve a green veg with it as well. Earlier this summer I did asparagus and rice. This week I did mashed potatoes and broccoli rabe.

Just a side note: The recipe calls for 20 cloves of garlic, but I just use 10. I also frequently use olive oil instead of veg oil. And, I do sometimes omit the butter at the end because the sauce is very satisifying even without the butter.

I hope you enjoy making the recipe and dining on this wonderful dish!


Rustic Chicken with Garlic Gravy

From seasonsandsuppers

Makes 6 servings

2 Tbsp. cooking oil such as vegetable or canola

6 pieces skin-on/bone-in chicken thighs

Salt and freshly ground black pepper

20 cloves garlic, separated and peeled

2 Tbsp. all-purpose flour

3/4 cup dry white wine

1 cup chicken broth

1 1/4 tsp. fresh thyme leaves or 3/4 tsp. dried thyme leaves

2 Tbsp. butter


Heat the oven to 400 degrees Fahrenheit with the rack in the center of the oven.

In an oven-safe Dutch oven or oven-safe skillet with a lid, heat the oil over medium high heat. Dry the chicken pieces well by patting them with a paper towel. Sprinkle the chicken pieces with a bit of salt and pepper. Cook the chicken until well browned on all sides, about 8 minutes. Remove chicken to a plate. You can remove some of the fat in the pan if you have lots, but leave enough to cook the garlic in the next step.


Reduce the heat to medium, add the garlic and cook, stirring regularly until the garlic browns, about three minutes. Sprinkle the flour over the garlic and stir until combined. Return the chicken to the pot, cover, and bake for 15 minutes in the pre-heated 400 degree oven. If your pot or skillet doesn't have a lid, tightly cover the top with aluminum foil.


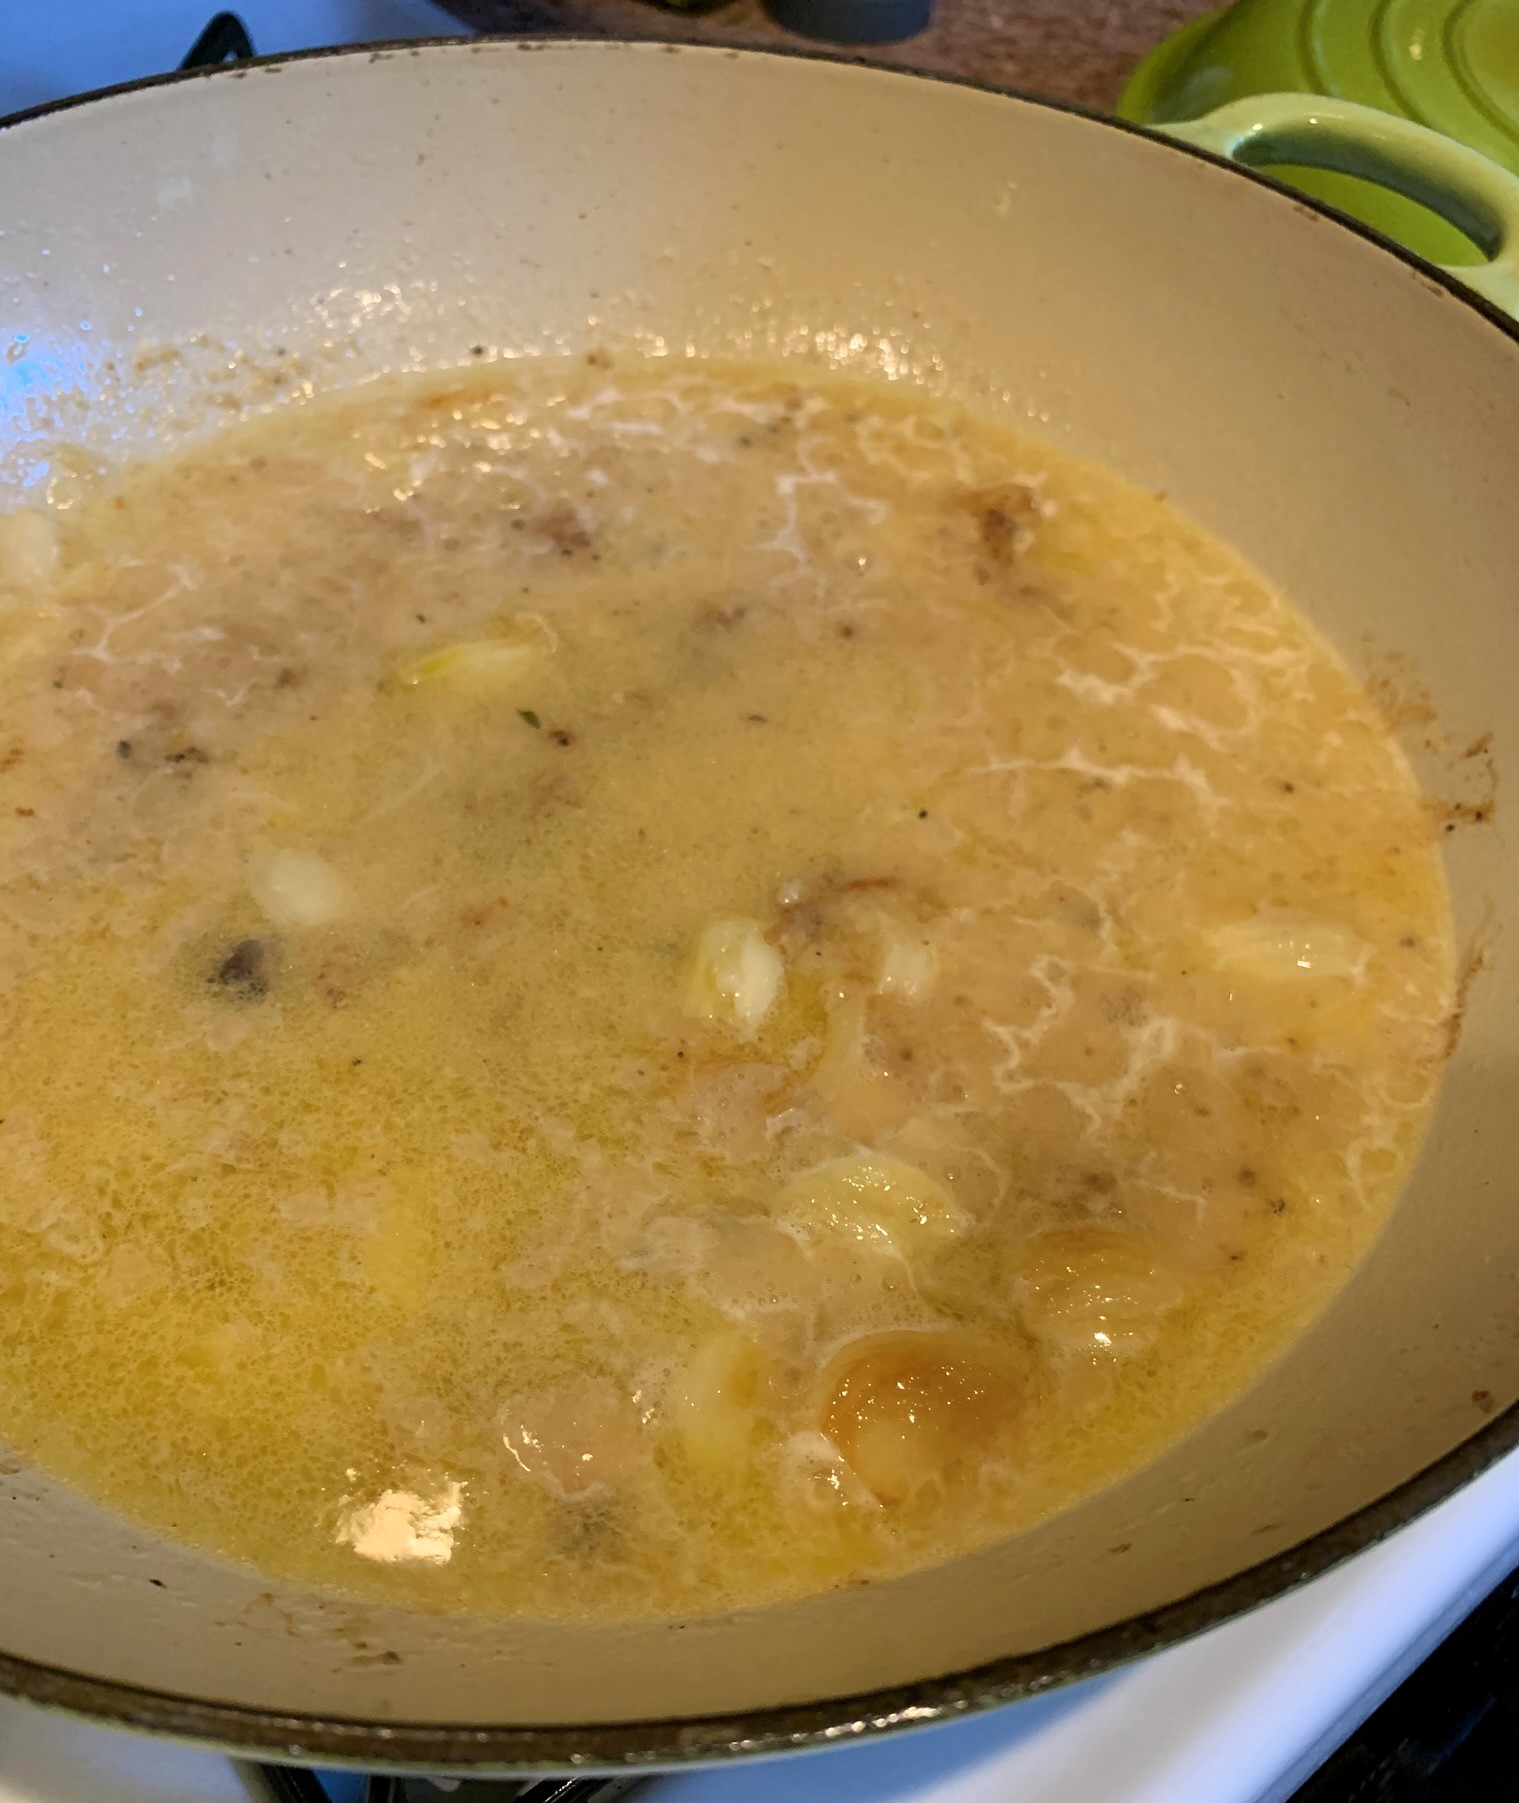
Remove the pot from the oven and put it on a burner. Be careful not to touch the hot pot! Remove the chicken pieces from the pot to a clean plate. Over medium-high heat, whisk in the wine and simmer for 1 minute. Whisk in the broth, thyme and a bit more salt and pepper, then reduce the heat and simmer, stirring regularly, until sauce thickens. Turn the heat off and stir in the butter. Taste sauce and add more salt and pepper, if it needs it. Add the chicken back to the pot to rewarm with sauce. Serve spooned over mashed potatoes, rice or pasta.

Please note: The Jersey Girl uses 10 cloves of garlic instead of 20. She also uses olive oil instead of vegetable oil. She also doesn't always add the butter at the end. 


Friday, March 8, 2019

Pasta e Fagioli

This cold dreary March is proving we still need some comfort food. The perfect solution: Pasta e Fagioli.


For best results, let it simmer for a long time. Give it like 45 minutes. And most importantly, cook the pasta in a separate pot of water. That way, all the wonderful broth isn't soaked up by the spongelike qualities of teeny tiny pasta.

Pancetta is an Italian bacon. In my opinion, it's not as fatty and bacony as American bacon. You can purchase it at Italian grocery stores, but even my good ole' Shoprite carries it. I like to buy a pound of it sliced and store it in the freezer. I just take out a couple of slices when I need them for a dish.

Pasta e fagioli is fabulous topped with a drizzle of olive oil and a bit of parmigiano. Serve with bread and vino, of course!


Pasta e Fagioli
Makes 8 servings

1 Tbsp. olive oil
2 slices pancetta, chopped
1 Tbsp. fresh rosemary, minced
1 tsp dried thyme
1 bay leaf
1 onion, finely chopped
2 small carrots, finely chopped
1 celery rib, finely chopped
4 garlic cloves, minced
Salt and pepper to taste
1 19 ounce can Cento cannellini beans, drained and rinsed
1 14.5 ounce can diced tomatoes
1 inch piece of Parmigiano cheese rind (optional)
4 cups low-salt chicken broth
4 cups water
1 cup ditalini, tubetti or elbow pasta

In a large soup pot, heat olive oil over medium heat. Add pancetta. Stir frequently and cook until lightly browned. With a slotted spoon, remove pancetta to a small dish.

To the soup pot, add onion, carrots and celery. Stir to coat in oil. Add, rosemary, thyme, bay leaf and salt and pepper. Cook for 5-7 minutes. Add garlic. Cook for another minute or two.

Add cannellini beans, diced tomatoes, broth and water. Return pancetta to pot. Add parmigiano cheese rind, if using. Stir. Season with salt and pepper. Bring to a simmer. Cook partially covered for 45 minutes. Stir occasionally.

Fill a separate small pot with water. Bring to a boil and add salt. Cook pasta as directed on package instructions. Drain pasta.

Once soup has finished cooking after 45 minutes, add pasta.


Serve in bowls topped with a drizzle of olive oil and a sprinkle of grated parmigiano cheese.

Please note: You may need to add more water if you would like the soup more brothy.


Sunday, September 23, 2018

Grilled Eggplant Parm

Eggplant Parmesan is one of my fave dishes. Vegetarian. Comforting. I love it.


Oftentimes when ordering the dish out on the restaurant scene, the eggplant is breaded and fried. My way cuts all of that out. The eggplant is brushed with olive oil, seasoned with salt and pepper and grilled on my trusty grill pan.

Because the eggplant is prepared in this way, the true flavor of the vegetable shines through the layers of marinara and cheese. In the traditional way, the breading and frying can mask the texture and the yumminess of the star of the show.

I'm pretty certain grilling the eggplants and eliminating the egg wash and breading cuts calories in some fashion. I'm no nutritionist, but I mean common sense, right?

My recipe for marinara is listed below as well. I served my eggplant parm with some cavatelli in marinara. A perfect duo.


Warning to all of my cooking friends who are looking for a rush job on this: It takes time. From making the sauce, to grilling the eggplant and waiting for things to cool. Bank on a few hours when all is said and done. But it is worth it!

Grilled Eggplant Parm
Makes 8 servings

2 large eggplants, cut into 1/4-inch thick slices (16-20)
48 ounces marinara, warmed (recipe below)
2 cups shredded mozzarella, divided
1/2 cup Parmigiano-Reggiano
Olive oil
Salt and pepper

Drizzle olive oil into a 13 by 9 Pyrex glass baking dish. Coat the bottom and sides with the oil using a paper towel.

Line up eggplant slices on a baking sheet. Drizzle with olive oil and lightly season with salt and pepper on both sides. You will need to do this in batches or use multiple baking sheets.


Meanwhile, heat a grill pan over high heat. Grill eggplant on both sides, about 4-5 minutes per side, in batches. Don't overcrowd the pan. Four to five fit on my pan at a time.


 Remove from grill pan and let cool on another baking sheet.

Spread about a cup of marinara sauce over the bottom of the glass baking dish. Layer half of the eggplant slices on top.


Spread about another cup or so of sauce on top. Sprinkle evenly with a cup of mozzarella and 1/4 cup of Parmigiano-Reggiano. Layer the remaining eggplant on top of the cheese, followed by more sauce and the remaining cheese.


Cover the entire pan with aluminum foil. Poke about 8 to 10 slits throughout the foil to ventilate the dish while it is in the oven.

Bake covered dish in a preheated 375 degree oven for 30 minutes. Remove foil and bake for another 15 minutes uncovered. Remove from oven. Cover with foil again and let set for about 20 minutes.


Serve with your favorite pasta and remaining marinara.

Here's my traditional marinara recipe:

Susan's Marinara
2 Tbsp. olive oil
8 cloves of garlic, finely chopped

1 small onion, minced
1/4 tsp. red pepper flakes
1 can Cento pureed tomatoes (28. oz)
1 can Cento crushed tomatoes (28 oz.)
A little bit of water – probably half a cup
20 fresh basil leaves
Salt and pepper to taste

In a large pot, heat the olive oil over medium-low heat. Add the garlic, onion and red pepper flakes. Cook for about five minutes, until fragrant.


Add the pureed and crushed tomatoes. Use a little bit of water to rinse off the tomato on the sides of the cans and pour into pot.The water should measure to a half cup.

Add salt and pepper to taste. I did 20 grinds of my pepper mill and a scant 1/4 tsp. salt.

Snip basil leaves into pot with cooking shears.

Turn your heat down to low. Simmer partially covered for 45 minutes. Make sure you stir every 5 to 10 minutes.


Thursday, November 4, 2010

The Waiting Game


Patience is a virtue that I usually have, but awaiting the arrival of the Jersey Baby is starting to drive me bananas.

I know, I know – he’s totally not due until Nov. 8. But based on last week’s doctor’s appointment, I was convinced he would be arriving early. So was the doctor. Unless, he was pulling me leg. Or propping up my delusional high hopes. I thought for sure when I was grabbing my belly in pain on Monday night, that the Jersey Baby would be arriving on Election Day. A fitting date, since his Daddy and I are news/politics junkies.

But alas, he’s still not here. And today, the doc started the labor induction talk. Oy.

While waiting, I’ve been getting my cleaning on. And I started Christmas shopping. And, I’ve totally been cooking up a storm. Of course, I had to slow my roll on my culinary concoctions since I only have one mouth to feed, and well, I hate to dispose of good food. There’s only so many leftovers The Husband can eat.

I love this time of year. Especially for cookery purposes. That’s because it’s all about comfort food. And since I’ve been stuck at home, the need to be comfy has taken over my being.

On a recent chilly willy night, I rocked out my Chicken and Dumplings. This dish reminds me of my childhood, when my Moms would make Chicken and Dumplings using Bisquick. I always loved it as a kid, but no offense, Mom, dumplings from scratch are way way way better than the Bisquick variety.

My Chicken and Dumplings dish is super easy to make. You do need cake flour for the dumplings.

This is perfect to eat on a cold dreary fall night. Hope you get a chance to do so!


Chicken and Dumplings
Makes 5 servings

For the soup:

2 lbs. chicken breast or tenders, chopped into 1-inch pieces
1 Tbsp. olive oil
1 Tbsp. butter
1 baking potato, peeled and chopped
2 carrots, peeled and chopped
1 medium onion, chopped
2 celery stalks, chopped
1 dry bay leaf
½ tsp. onion powder
½ tsp. garlic powder
½ tsp. dried thyme
Salt and pepper to taste
2 Tbsp. flour
4 cups chicken broth
2-3 cups water

In a large Dutch oven or soup pot over medium heat, add oil and butter.

When butter melts and begins to bubble, add potatoes, carrots, celery, onion, bay leaf, onion and garlic powders, thyme and salt and pepper. Cook for 7 to 10 minutes, stirring frequently.

Add flour and cook for about 2 minutes. Stir in broth and bring to a boil. Add chicken to the broth. Lower heat to a simmer. Cover partially. Cook for 20 to 30 minutes. Chicken should be cooked through and vegetables should be tender.

At this stage you may add the dumpling batter.

Dumplings
Inspired by “The Joy of Cooking”

1 cup cake flour
2 tsp. baking powder
½ tsp. salt
1 extra large egg
Scant ½ cup milk

In a medium bowl, whisk together cake flour, baking powder and salt.

Whisk together milk and egg. Slowly pour into dry ingredients. Stir together with a spoon.

Return soup mixture to a simmer.

To cook, drop dumpling batter into simmering pot of soup using tablespoons so that the batter is scattered throughout the top of the soup. Once all the batter is in the pot, cover the pot with a tight lid. Simmer for 10 minutes.

You may serve at once, but be careful! The dumplings will be hot.