Showing posts with label ice cream. Show all posts

Wednesday, June 3, 2020

The Freshness: Strawberry Ice Cream

Nothing highlights the freshness of in-season fruit like a homemade frozen treat. This Fresh Strawberry Ice Cream recipe from Betty Crocker will rock your world. Totally.
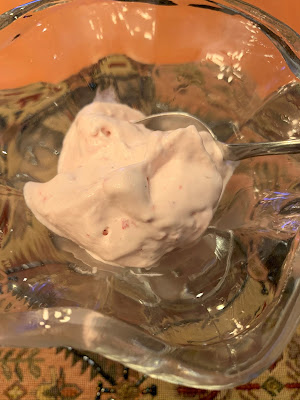

If making ice cream trips you out, here are my tips, my friend. You got this!

1. Chill a glass bowl in the freezer well before you are even going to jump into the ice cream process. Like put it in the freezer the day before.

2. Let the cooked mixture cool in the fridge beyond the recommended 2-3 hours. I usually go at least 4. You need to allot a good amount of time to ice-cream making. Patience, peeps!

3. Be prepared to put the finished product into the freezer for many hours after you churn it in your ice cream device of choice. The ice cream is usually very soft when it is first made. (Although, this recipe so good you'll probably want to sneak some bites straight away.)

4. When adding the final ingredients into the cooled milk mixture, work fast.

5. Finally, I do strongly recommend to use ice cream recipes that require cooking and egg yolks. I made some imposter one-step strawberry ice cream recipe last summer and it was so blah. Like no texture or taste at all. No bueno.

But this sweet stuff below is super bueno!


Fresh Strawberry Ice Cream
From Betty Crocker Cookbook
Makes 1 quart

3 egg yolks, slightly beaten
1 cup sugar, divided into two 1/2 cups 
1 cup milk
1/4 tsp. salt
2 cups whipping cream
1 tsp. vanilla extract
1 pint (2 cups) strawberries


1. In a 2-quart saucepan, stir egg yolks, 1/2 cup of sugar, milk and salt until well mixed. Cook over medium heat just until mixture comes to a boil, stirring constantly (do not allow mixture to continue to boil or it will curdle.) Immediately remove from heat. 

2. Pour milk mixture into chilled bowl. Refrigerate uncovered 2 to 3 hours, stirring occasionally, until room temperature. At this point, mixture can be refrigerated up to 24 hours before completing recipe if desired.


3. Mash strawberries with the remaining 1/2 cup of sugar with a potato masher or process in food processor until slightly chunky (not pureed). 

4. Stir whipping cream and vanilla into milk mixture. Stir strawberries into milk mixture. Stir in a few drops of red food color if desired. Pour into 1-quart ice cream freezer and freeze according to manufacturer's directions.


Thursday, August 1, 2019

Fresh Homemade Ice Cream

Ice cream is easier to make than you think. Sure there are plenty of options in the grocery store or at your fave ice cream shop, but it's so nice to have fresh homemade goodness right in your own freezer.

I've been making homemade chocolate chip ice cream a lot this summer. I follow the recipe for vanilla ice cream in the Betty Crocker Cookbook. After churning, I add mini chocolate chips. 

The star ingredient that really makes my ice cream shine is this: Nielsen-Massey Madagascar Bourbon Vanilla Paste. At $36.95 a pop, it is an investment, for sure. But it really really makes the ice cream so delicious. The flavor is deep. And my favorite part is that you can see flecks of vanilla bean throughout the beautiful soft white cream. Gorgeous! The paste is sold at Williams-Sonoma. You can totally rock this out with regular vanilla extract that you buy at your grocery store if you are not feeling the need to fork over $37 for one ingredient. No worries, at all.

Here's my ice cream in brownie ice cream sundae form. Yummy!


My tips for a strong homemade ice cream game are as follows:

1. Chill a glass bowl in the freezer at least a couple of hours before you cook up the ice cream starter on the stove. (You heard me. Ice cream starts out hot!)

2. Have all your final ingredients measured and ready to go before adding them to the chilled starter that needs to go right into the ice cream maker to churn. This ensures everything stays nice and cold.

3. Set aside time for your ice cream to harden a bit in the freezer after churning. It is quite soft right after churning. At least 2-3 hours is ideal!

4. The Kitchen Aid Stand Mixer Ice Cream Maker Attachment is amazing. It stores nicely in the freezer so it's all ready to go when you need to bust it out for moments like these.

Vanilla Ice Cream
Makes 1 quart
From "Betty Crocker Cookbook"

3 egg yolks, slightly beaten
1/2 cup sugar
1 cup milk
1/4 tsp. salt
2 cups whipping cream,
1 Tbsp. vanilla

In a 2-quart saucepan, stir egg yolks, sugar, milk and salt until well mixed. Cook over medium heat just until mixture comes to a boil, stirring constantly (do not allow mixture to continue to boil or it will curdle). Immediately remove from heat.


Pour milk mixture into chilled bowl. Refrigerate uncovered 2 to 3 hours, stirring occasionally, until room temperature. At this point mixture can be refrigerated up to 24 hours before completing the recipe if desired.

Stir whipping cream and vanilla into milk mixture. Pour into 1-quart ice-cream maker and mix according to manufacturer's instructions. (The Jersey Girl uses the Kitchen Aid Stand Mixer Ice Cream Maker Attachment. She churns the ice cream for 16 minutes.)


If desired, stir in 1/3 cup mini chocolate chips after the ice cream churns and before it is placed into a container to store in the freezer.


Sunday, August 15, 2010

I Scream for Ice Cream

One bowl of Double Chocolate Chip Ice Cream coming up.

This whole pregnancy situation has my eating habits turned upside down.

Among the crazy things going on with my food cravings is the insatiable desire for yummy frozen treats.

This is where my awesome Kitchen Aid attachment ice cream maker comes in super handy. Yes, it was a total non-necessity and I love it.

Let’s be real, I’d much rather eat my homemade ice cream than the stuff bought at the store.

But, truth be told, making ice cream takes up a good chunk of your day. After all the stirring, there is a whole lot of waiting going on. And sometimes, a girl just needs her ice cream fix and she needs her ice cream fix NOW.

Consequently, I have been financially supporting Breyer’s and Turkey Hill when times get a bit desperate or I don’t have enough hours in my day to make a batch of chocolate chip or in today’s case, double chocolate chip.

I still can’t believe I made something that tastes this amazingly AWESOME. Haagen-Dazs, step off!

OK, girl. Enough patting yourself on the back.

My first try at chocolate ice cream was not a success. But, I learned from that experience to produce the creamy straight-from-heaven concoction that I am sharing with you below.

I basically took the recipe from “The Joy of Cooking” for chocolate chip ice cream and added some mini chocolate chips. Cocoa is key to chocolate ice cream, in my opinion. The first recipe I tried just called for melted baking chocolate and it didn’t work at all. For one thing, the chocolate flavor was whimpy. That’s no fun. And, there were flecks of chocolate all throughout my ice cream. Straining the mixture is also very important. Again, lesson learned.

Double Chocolate Chip Ice Cream
5 cups
Based on the Chocolate Chip Ice Cream recipe from "The Joy of Cooking"

Combine in a medium saucepan and bring to a simmer over medium-low heat, stirring occasionally to dissolve sugar:
2 cups whole milk
½ cup sugar

Combine and whisk in a medium bowl:
4 large egg yolks
¼ cup sugar

Whisk in:
1/3 cup Dutch-process cocoa powder

Slowly pour about half the hot milk mixture into the eggs, whisking constantly. Pour this mixture back into the saucepan and cook over low heat, stirring constantly, until the custard reaches 175 degrees Fahrenheit on a thermometer and coats the back of a wooden spoon. Do not allow the mixture to boil. Remove the pan from the heat and strain the custard through a fine sieve into a bowl. Stir in:
1 cup heavy cream
1 tsp. vanilla

Refrigerate until cold. Pour into an ice cream maker and freeze as directed.

Transfer ice cream to a container. Stir in 1/3 cup mini chocolate chips before placing in the freezer to firm up.