Thursday, March 17, 2022

Molten Chocolate Cakes

 If you are looking for a dessert to celebrate a special day - anniversary, bday, promotion, awesome report card - these Molten Chocolate Cakes are just for you. But if you want them on any ordinary day, they totally work for that, too!!!


You do need baking ramekins for this dish. I only have 4, but the recipe calls for six. I was able to bake the remaining batter a day later in my clean ramekins, and they turned out just as awesome as on day one. The batter did firm up quite a bit, but that was the only change. Side note: I must order more ramekins!

These little cakes would go perfectly with ice cream or whipped cream. We just sprinkled some powdered sugar on top. My son absolutely loved them. 

Handle with care when flipping them from the ramekin to the plate. I used a spatula to get under the ramekins and used kitchen mitts as the ramekins are hot when plating.

Check out my son Evan digging in! What a treat!


Molten Chocolate Cakes

From Betty Crocker's Cookbook

Serves 6

Unsweetened baking cocoa

6 oz. semisweet baking chocolate, chopped

1/2 cup plus 2 Tbsp. butter

3 whole eggs

3 egg yolks

1 1/2 cups powdered sugar

1/2 cup all-purpose flour

1. Heat oven to 450 degrees F. Grease bottoms and sides of 6 (6-ounce) custard cups with shortening; dust with cocoa.


2. In a 2-quart saucepan, melt chocolate and butter over low heat, stirring frequently. Cool slightly.


3. In large bowl, beat whole eggs and egg yolks with wire whisk or hand beater until well blended. Beat in 1 1/2 cups powdered sugar. Beat in melted chocolate mixture and flour. Divide batter evenly among custard cups. Place cups on cookie sheet with sides.


4. Bake 12 to 14 minutes or until sides are set and centers are still soft (tops will be puffed and cracked.) Let stand about 3 minutes. Run small knife or metal spatula around side of each cake to loosen. Immediately place heatproof serving plates upside down onto each cup, turn plate and cup over and remove cup. Sprinkle with additional powdered sugar. Serve warm.


Make ahead directions: Batter can be made up to 24 hours ahead. After pouring batter into custard cups, cover with plastic wrap and refrigerate up to 24 hours. You may need to bake the cakes 1 to 2 minutes longer.


Tuesday, March 8, 2022

Pasta with Marinated Grape Tomatoes

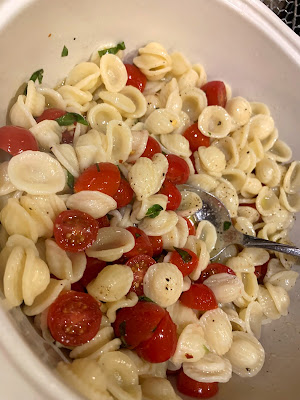
Pasta with Marinated Grape Tomatoes is a total necessity. I make this all year, but it's really a blessing for the summer when you don't feel like cooking a big thing but need your pasta fix.

The beauty of the dish is it requires zero cooking time or energy for the sauce. Just toss all the ingredients together in a serving bowl and set aside for at least 30 min. Cook the pasta, add it the sauce with some pasta water and voila! Perfection. 

Top with mozzarella or goat cheese if you like.


Pasta with Marinated Grape Tomatoes

Makes 4 side dish servings

 1/2 pound orecchiette or other short pasta

1 cup grape tomatoes, halved

1 clove garlic, minced

1/4 tsp. crushed red pepper

1/8 tsp. black pepper

1/4 tsp. salt

3 Tbsp. fresh basil, minced, plus more for garnish

1/4 cup olive oil, plus more for garnish

Fresh mozzarella, diced, or crumbled goat cheese

In a medium serving bowl, combine grape tomatoes, garlic, red pepper, black pepper, salt, basil and olive oil. Stir gently. Set aside for at least 30 minutes.

Bring a pot of salted water to a boil and cook orecchiette as directed by the package. Once cooked, transfer cooked pasta with a spider ladle to the bowl of marinated tomatoes. Add a ladle or two of pasta water.  Drizzle with olive oil, check for seasonings and garnish with more basil, if desired.

Serve hot or at room temperature with mozzarella or goat cheese, if desired. 

Saturday, March 5, 2022

Herb-Roasted Onions

A cook can never have too many side dish options, and this Herb Roasted Onions recipe from the Barefoot Contessa is a total hit.


The hardest part of preparation is not crying while peeling and quartering onions. (I run water in the faucet and look up and take breaks and pray).

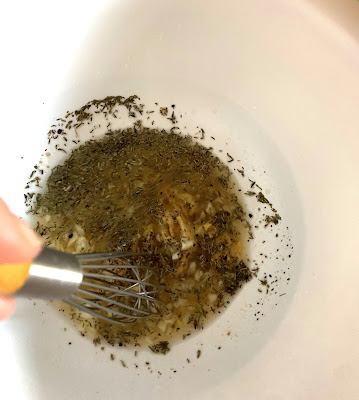
I actually whisked together the vinaigrette in the big bowl first, then just placed the onions on top. Ina says to cut the onions first and place in a big bowl, and then whisk the vinaigrette in a small bowl and then pour the vinaigrette over them. But honey, that means more things to wash up. So, I'll keep my way. LOL.

This dish can be made ahead and would go wonderfully with any kind of roast: turkey, chicken, ham, lamb or beef. 


I served the onions with another Barefoot Contessa hit: Herb Roasted Turkey Breast and also my grandmother's amazing string beans.  And of course, mashed potatoes are always a side with any roast in this house. So delish. 


I used leftovers to make a quick pizza the next night. So good.

Here you go:

Herb-Roasted Onions

From "Barefoot At Home"

By Ina Garten

Serves 6

4 red onions

3 yellow onions

1/4 cup freshly squeezed lemon juice (2 lemons)

2 tsp. Dijon mustard

2 tsp. minced garlic (2 cloves)

1 Tbsp. minced fresh thyme leaves

1 1/2 tsp. kosher salt

1/2 tsp. freshly ground black pepper

1/2 cup good olive oil

1 Tbsp. minced fresh flat leaf parsley

Preheat the oven to 400 degrees Fahrenheit.


Remove the stem end of each onion and carefully slice off the brown part of the root end, leaving the root intact. Peel the onions. Stand each onion root end up on a cutting board and cut the onions in wedges through the root. Place the wedges in a large bowl.


Combine the lemon juice, mustard, garlic, thyme, salt and pepper in a small bowl. Slowly whisk in the olive oil. Pour the dressing over the onions and toss well.


With a slotted spoon, transfer the onions to a sheet pan, reserving the vinaigrette that remains in the bowl. Bake the onions for 30 to 45 minutes, until tender and browned. Toss the onions once during cooking. Remove from the oven and drizzle with the reserved dressing. Sprinkle with parsley, season to taste, and serve warm or at room temperature. 

Friday, February 25, 2022

Pork Chops Jubilee Style


Pork Chops with Rich Caper Sauce is magnifico! This recipe from the amazing cookbook "Jubilee" is intended for bone-in pork chops, but when I made it I only had thin boneless cutlets on hand. The dish worked beautifully with the thinner cut of meat. I just skipped placing the pork chops in the oven. 

This cookbook is such a treat. It focuses on the history and impact of the African-American community on the cuisine of the United States. I'm so glad to add this book to my collection and I look forward to cooking more from it.

This dish was enjoyed by my family. I will definitely try it again! The sauce is very flavorful.

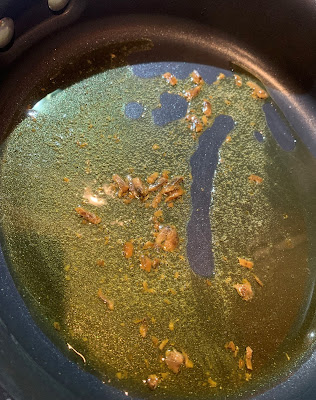
It's a good plan to prep the sauce ingredients before cooking:


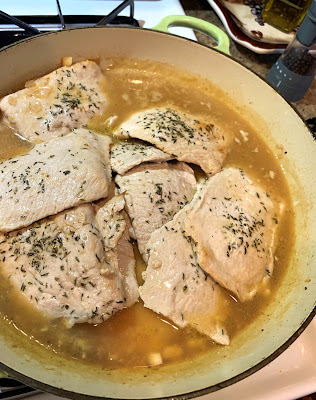
I also like to line up the chops and season them like so:


Be sure to cook in batches so that the meat browns nicely:


Pork Chops with Rich Caper Sauce

Serves 4

From "Jubilee" by Toni Tipton-Martin

4 bone-in pork loin chops (about 8 ounces each)

1 tsp. salt, plus more to taste

1/4 tsp. black pepper, plus more to taste

1/2 tsp. dried thyme

2 Tbsp. olive oil

4 Tbsp. (1/2 stick) butter, at room temperature

1 tsp. minced garlic

1Tbsp. minced shallot

1 1/2 tsp. all-purpose flour

1 cup white wine

1 1/2 cups chicken stock

2 Tbsp. capers, drained

1 tsp. freshly grated lemon zest

2 Tbsp. fresh lemon juice

1/2 tsp. hot pepper sauce (optional)

2 Tbsp. minced fresh parsley

1. Preheat the oven to 400 degrees Fahrenheit.

2. Place the chops on a board and pat dry with paper towels. Season with salt, pepper and thyme, rubbing with your fingers to press the seasonings into the meat. In a large ovenproof skillet, heat the oil over medium-high heat until shimmering. Add the chops and cook until well browned, 3 to 4 minutes per side, Transfer the skillet to the oven and roast until a meat thermometer inserted in the chops registers 145 degrees Fahrenheit, 5 to 7 minutes, depending upon the thickness. Remove the chops from the oven, transfer to a plate, and cover to keep warm. Drain off and discard the fat.

3. In the same skillet, heat 2 Tbsp. of the butter until sizzling. Add the garlic and the shallot and saute until tender, about 1 minute. Sprinkle in the flour and cook for 2 minutes more. Whisk in the wine and the chicken stock and bring to a boil over high heat, scraping up the browned bits in the bottom of the pan. Reduce the heat to medium high and cook, uncovered, until the liquid is reduced by half, about 5 minutes. Stir in the capers, lemon zest, lemon juice, hot pepper sauce (if using), and parsley and simmer 1 to 2 minutes more. Add the remaining 2 Tbsp. butter to the pan 1/2 Tbsp. at a time, shaking the pan between additions until the butter melts and the sauce looks smooth. Season to taste with salt and pepper. Pour the sauce over the pan-roasted chops and serve. 


Please note: The Jersey Girl made this dish with thin boneless pork cutlets. Cutlets cooked 2-3 minutes per side. If using cutlets, you may omit transferring the skillet to the oven to further roast the meat. Cutlets may be set aside, covered, while you make the sauce. 

Wednesday, February 2, 2022

Gemelli with Anchovies, Tomatoes and Mascarpone

On paper, this may seem like an odd mix. But in the finished dish, it is magic.

Gemelli with Anchovies, Tomatoes and Mascarpone comes together in mere minutes, and it uses staples from the pantry with some fresh grape tomatoes, flat leaf parsley and mascarpone thrown in.  I was thrilled to use up some of the dry vermouth that has been in my bar cabinet for a good 10 years.

If you have a fear of anchovies, I recommend you get over it. They really are a flavor enhancer in this dish. They just add that little salty spark that is oh so good.

This recipe comes from my fave Nigella Lawson. I hope you love it!

Here you go:


Gemelli with Anchovies, Tomatoes and Mascarpone

Serves 2

From "At my Table"

By Nigella Lawson

Gemelli pasta, 6 ounces

Salt for pasta water

1 Tbsp. olive oil

6 anchovy fillets, finely chopped

1 clove garlic, peeled and minced

1/4 tsp. crushed red pepper flakes

6 ounces (1 cup) cherry or grape tomatoes, halved

1/4 cup dry white vermouth

2 Tbsp. mascarpone cheese

1 Tbsp. plus more to serve Parmesan cheese

2 Tbsp. Italian flat-leaf parsley, finely chopped, plus more to serve

1. Put a saucepan of water on to boil for the pasta. (Although you don't need to start cooking your sauce until the pasta is in, I'd get everything ready for it while you wait.) Once it comes to a boil, salt generously and add the pasta. Check the pasta package for the advised cooking times, but do start tasting a good 2 minutes before you're told it should be ready.

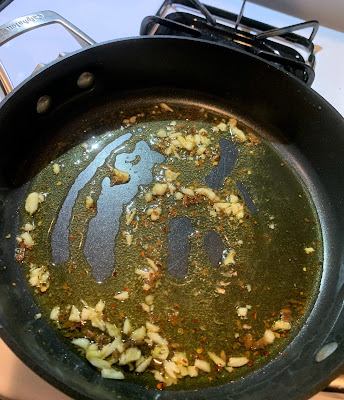
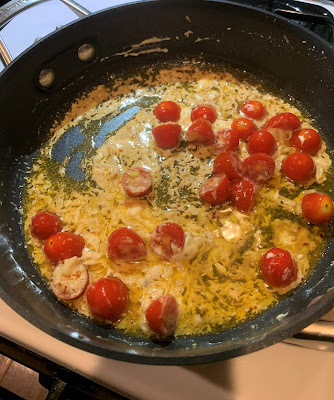
2. Once the pasta is in, put the oil and the finely chopped anchovies into a heavy-based wok or, or other capacious pan, and cook, stirring over medium heat for about a minute, or until the anchovies have almost dissolved into the oil. Stir in the garlic and red pepper flakes, then turn up the heat a little and tumble in the tomatoes, stirring them gently for about 2 minutes, or until they are beginning to soften.


3. Pour in the vermouth, let it bubble up, then stir and push the tomatoes about in the pan for around another 2 minutes or until they have broken down a little in the thickened, reduced, now orange-tinted liquid. Take the pan off the heat, stir in the mascarpone and, when it's all melted into the sauce, duly stir in the Parmesan and parsley.


4. Before you drain the pasta, lower in a cup to remove some of the cooking water. Or use a mesh ladle or pasta claw to transfer the gemelli directly. Add a Tbsp. or so or the cooking water to the pasta sauce; this will help the sauce coat the pasta. Drain the pasta, add it to the sauce and toss well to mix, adding more of the pasta cooking water if needed. Sprinkle with a little parsley and take the Parmesan to the table to serve. 


Thursday, January 20, 2022

White Chocolate Chip Cranberry Cookies


White chocolate and dried cranberries are a culinary union that will withstand the test of the time. Literal taste perfection.

These Soft White Chocolate Chip Cranberry Cookies from Sally's Baking Addiction are a delightful addition to your dessert table for any fall or winter celebration. They have a browned butter taste that will send you over the moon. The tartness of the cranberries and the smoothness of the white chocolate chips are such a fab combo. I will definitely make these again.

I used dark brown sugar for these. Be sure to not overcrowd your baking sheets. I did not use extra chips or cranberries for garnish.


Soft White Chocolate Chip Cranberry Cookies

From sallysbakingaddiction.com

3/4 cup (1.5 sticks to 170g) unsalted butter, softened to room temperature

3/4 cup (150g) packed light or dark brown sugar (I use dark)

1/4 cup (50g) granulated sugar

1 large egg, at room temperature

2 teaspoons pure vanilla extract

2 cups (250g) all-purpose flour (spoon & leveled)

2 teaspoons cornstarch (cornflour)

1 teaspoon baking soda

1/2 teaspoon salt

3/4 cup (135g) white chocolate chips, plus a few extra for garnish

1 cup (140g) dried cranberries, plus a few extra for garnish

1. In a large bowl using a hand-held mixer or stand mixer with paddle attachment, beat the butter, brown sugar, and granulated sugar together on medium speed until combined and creamy, about 2 minutes. Beat in the egg and vanilla. Scrape down the sides and bottom of the bowl and beat again as needed to combine.

2. In a separate bowl, whisk the flour, cornstarch, baking soda and salt together. On low speed, slowly mix into the wet ingredients until combined. The cookie dough will be soft and thick. Add the white chocolate chips and dried cranberries and beat on low speed until combined. Cover dough tightly and chill in the refrigerator for at least 1 hour and up to 3-4 days. Chilling is imperative to prevent the cookies from over-spreading.


3. Remove cookie dough from the refrigerator. If the cookie dough chilled longer than 3-4 hours, let it sit at room temperature for about 30 minutes. This makes the firm cookie dough easier to scoop and roll.

4. Preheat oven to 350°F (177°C). Line large baking sheets with parchment paper or silicone baking mats. Set aside.

5. As the oven preheats, scoop and roll dough, about 1.5 Tablespoons of dough each, into balls. The dough may be slightly crumbly, but it will come together as you work it with your hands. Arrange dough balls 3 inches apart on the prepared baking sheets.

6. Bake for 11-12 minutes or until lightly browned around the edges. The centers will still look soft. If cookies didn’t spread much, lightly bang the baking sheets on the counter a couple times while the cookies are still warm. They’ll stretch and deflate.

7. Allow cookies to cool on the baking sheet for 5 minutes. During this time, press extra white chocolate chips and dried cranberries into the warm tops. This is optional and only for looks. After 5 minutes, transfer to a wire rack to cool completely.

Cookies stay fresh covered at room temperature for up to 1 week.

Please note: The Jersey Girl did not use extra cranberries or chips for garnish. She did use dark brown sugar.