Sunday, September 13, 2015

Caesar Roasted Swordfish

Check it. Caesar Roasted Swordfish is so so so necessary in your life. It's like restaurant food straight up in your house. And you made it. Whenever I taste a dish and think, "Holy cannoli, Susan, YOU made THIS?!?!," I know it is the good stuff.


I followed the recipe exactly, but I cut it in halfsies since two full grown peeps and one little peep make up my fam. Although, the fish monger at Shop Rite totally wanted to come home and have dinner with us.

Any recipe that lets you prep in advance is a winner in my book. You can definitely make the sauce way early in the day and stick it in the refrigerator. A no-brainer win win.

The sizzling caper addition at the end is a super awesome touch. It made me very happy.

We ate the swordfish with rice, arugula salad and garlic bread just because I had some bread heading toward death in the cupboard and some pesto in the freezer that was just asking to be used. I'm usually not so carbtastic, but what the hey. My little man loves some garlic bread. And he tasted the swordfish without terrorist negotiations while eating loads of garlic bread and rice and salad.

Caesar Roasted Swordfish
From "Barefoot Contessa: How Easy is That?"
By Ina Garten
Serves 6

2 large garlic cloves, chopped
1/4 cup chopped fresh parsley
1 Tbsp. anchovy paste
2 tsp. Dijon mustard
1 cup good mayonnaise
1 Tbsp. grated lemon zest (2 lemons)
3 Tbsp. freshly squeezed lemon juice
Kosher salt and freshly ground black pepper
3 pounds center cut swordfish steaks, 3/4 to 1 inch thick, cut into 6 portions
1/2 cup chopped scallions, white and green parts (4 scallions)
2 Tbsp. good olive oil
3 Tbsp. drained capers
Lemon wedges, for serving

Preheat the oven to 500 degrees. (Be sure your oven is very clean.) Line a sheet pan with aluminum foil.

For the Caesar sauce, place the garlic, parsley, anchovy paste, and mustard in the bowl of a food processor fitted with the steel blade and pulse until the garlic is minced. Add the mayonnaise, lemon zest, lemon juice, 1 tsp. salt and 1/2 tsp. pepper and pulse to make a smooth sauce.

Place the swordfish steaks on the pan and sprinkle both sides generously with salt and pepper. Set aside one-third of the sauce to serve the with cooked fish. Spread the fish on one side with half the remaining sauce, turn the fish, and spread the remaining sauce on the second side. Sprinkle with the scallions and allow to stand for 10 minutes.


Here the swordfish awaits its time in the oven. 
All lined up and ready to go.

Roast the fish for 10 to 12 minutes, until the center is just barely cooked. Cover the fish with the aluminum foil and allow to rest on the pan for 10 minutes.

Meanwhile, heat the oil in a small saute pan until very hot, add the capers, and cook for 30 to 60 seconds, until they start to pop and are a little crisp. Serve the swordfish hot with the lemon wedges, frizzled capers, and the reserved Caesar sauce.

Thursday, September 10, 2015

A Bowl Full of Stars

My little big man had his first day of Pre-K this week. School rocked, according to my 4-year-old's report. From bus rides to circle time to singing with his friends, he loved the whole shabang. Yay!


Ironically, my usually very hungry fella barely ate anything at all upon coming home. But he did request that I cook up one of his favorite soups: Star Soup with Carrots and Peas. And he asked for extra peas. Weird. Who likes peas?


The 95-degree temp and insane humidity taking place upon my little scholar's arrival home did not seem to deter his hankering for soup. I guess a kid needs his comfort food on the first day of school. Especially after an epic meltdown involving a Lego masterpiece that slipped out of his paws in mid construction. Take a deep breath, Babydoll.

This is a great soup to make because I always have all the ingredients on hand: Frozen peas, fresh carrots, celery, shallots, some cheese and of course pastina. If you don't have fresh thyme, dried works just fine. And it's fast. And it's super yummy. The lemon zest is a nice touch. I so forgot to add it this time, Go, Mom! Haha.


Pastina Soup
By Giada DeLaurentiis

1 tablespoon extra virgin olive oil
1 stalk celery, chopped fine
1 carrot, peeled and chopped fine
2 shallots, minced
3 sprigs thyme
3/4 teaspoon kosher salt
1 (2 inch) piece of Parmesan rind
4 cups low sodium chicken broth
1 cup water
1 1/4 cup little star pasta
1 cup frozen peas, thawed
1/2 cup freshly grated Parmesan cheese
1 teaspoon lemon zest, from one large lemon (optional)

Heat a medium-sized saucepan over medium heat. Add the olive oil, celery, carrot, and shallots and cook, stirring often for about 5 minutes or until softened. Add the sprigs of thyme, Parmesan rind, salt, chicken broth, and water.

Bring to a simmer and cook for 10 minutes. Add the pasta and stir with a wooden spoon to prevent sticking to the pan.

Return to a simmer and continue to cook for 8 to 10 minutes longer or until the pasta is cooked and the liquid is slightly thickened. Remove the thyme sprigs and Parmesan rind. Stir in the peas.

Ladle the soup into bowls and top with grated cheese and lemon zest if desired.

Wednesday, September 2, 2015

Tomato Pie: Let's Do This

When life - or a green-thumbed friend with a thriving garden - gives you a heaping pile of gorgeous Jersey tomatoes, you of course make a Tomato Pie.


OK. That's what I do. Shoutout to Tom and Sandra for the yummy goods from the garden.


Diet food, this is not. The crust boasts two sticks of butter AND a fair amount of sour cream. And like many traditional Southern tomato pie recipes, mayo is a key component to the cheese filling in between all the tomato craziness. Please do not let The Husband in on the mayo factor.

In addition, this pie is THREE layers. Slices are gigantic. I so did not finish mine. Bursting with deliciousness, this is GIGANTIC food. For reals.

Since I speak the truths to my blogger following, you must know: The Jersey Girl eats portions fit for a doll. I try to eat big. It just doesn't work out. The plus side of that is that I can get down with some of this pie and not really care that each slice is probably 10,000 calories. That's an estimate, dear loyal readers.

For all you nervous nellies re: homemade pie crust. This one worked out really nicely. The sour cream element makes the dough very easy to roll out. It had a smoothness to it. Always, a plus.

A few tips for making pie dough are:

1. Stick your butter in the freezer for at least 30 minutes after cubing it. The chillier, the better. That's because it needs to be super cold when you roll it so that when you bake the crust it's flaky. It's science, people!
2. A food processor is your friend. Yeah, yeah. You could go the pastry cutter route, but why? WHY?! Just pulse baby, pulse.


3. Use your eyes. Don't overmix! Overmixing leads to tough pie crust. Eek.
4. Work fast. Have all your ingredients in place. And stick the iPad in your kid's hands.
5. Use your hands when you get to the ice water step. You're gonna get dirty. Get over it! A wooden spoon - while I love them - is a big waste of time here. Here's what my dough looked like after three tablespoons of water:


6. As soon as it all comes together get the dough in the fridge FAST. Resist the urge to keep mixing. Just stop!


A few tips for rolling out pie dough are:

1. Work fast but patiently. Don't let that dough beat down your soul.


2. Keep your surface and your rolling pin very well floured.
3. Turn your dough 90 degrees after every few rolls so that it doesn't stick to the surface. Flipping it over a few times is a good idea, too.


4. Have fun with it. Pie crust doesn't need to look Williams-Sonoma catalog worthy to taste good (See below). You know all those food porn pics are courtesy of lighting, stylists and fakery!


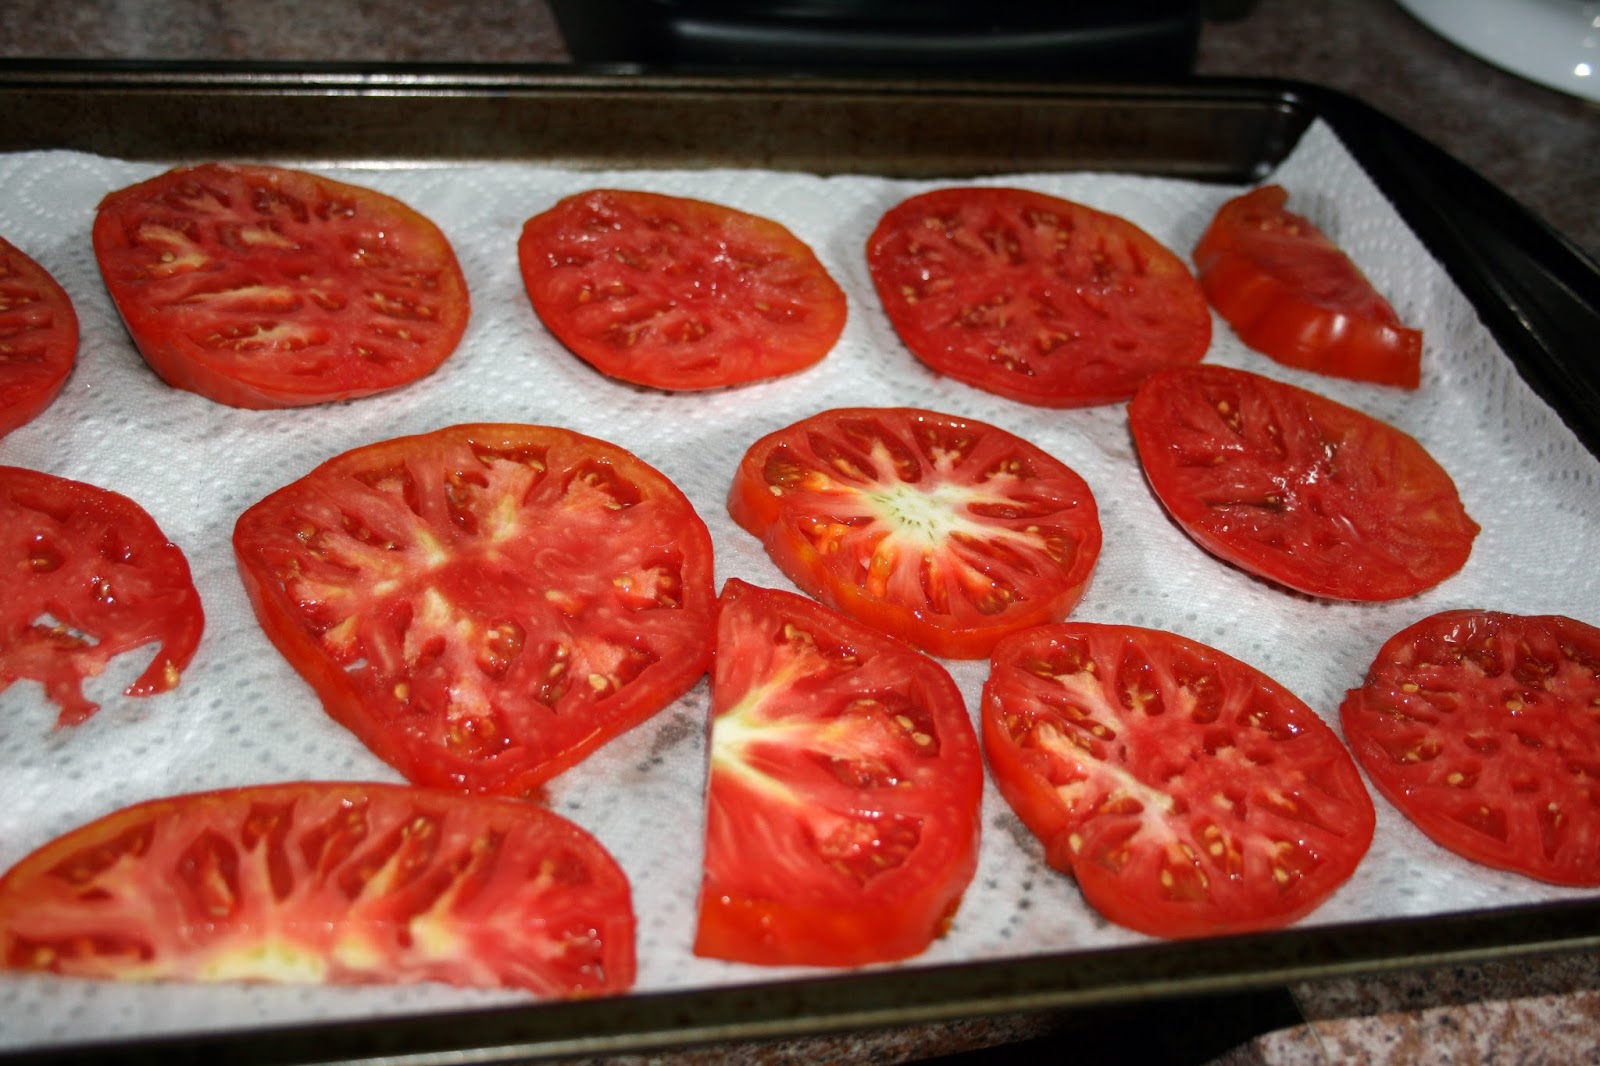
I made this tomato pie with literally perfect Jersey tomatoes overflowing in juiciness. Be sure to salt and let hang out on paper towels:


Definitely place in the oven with a baking sheet underneath underneath your pie dish so that you A. Don't muck up your uber clean oven (ha) and B. You don't start a smoke detector frenzy. Those are SUCH buzz kills, right? Look how large and in charge this is before putting in the oven:


I made my pie in a tart pan with removable sides, but a regular pie pan works just fine. And honestly, after being being knee deep in a bottle of cabernet sauvignon removing a gigantic pie from a pesky pretentious tart pan is NOT an easy task. My inner truck driver may have made a guest appearance during that portion of the evening.

Upon cutting into this monstrosity of a baked good, I thought for sure the crust would be a soggy mess, but I was so so wrong.  I am a pessimist trapped inside an optimist. Or the other way.

Actually, the crust held up nicely to the mounds of tomato slices piled up like a mountain.

I found this recipe on Pinterest. I will definitely make it again. And sidenote: The leftovers tasted fab the next day. That crust still rocked!

Tomato Pie with Basil and Gruyere
From southernboydishes.com

For the crust:
2 1/4 cups unbleached all-purpose flour1 teaspoon salt2 sticks unsalted butter, cubed and very cold3/4 cups sour cream4 to 5 tablespoons ice water

For the filling:
2 1/2 pounds assorted tomatoes
2 teaspoon salt (separated)
1 cup chopped Vidalia onion
1 3/4 cups grated Gruyere cheese
1/2 cup grated Parmesan cheese
3/4 cup Hellmann's mayonnaise
1/2 cup basil chiffonade
1 tablespoon chopped fresh thyme
1/4 teaspoon pepper
1 egg, beaten

For the crust:
1. Mix flour and salt together. In the bowl of a food processor, pulse flour and butter until mixture resembles coarse meal. Larger pieces of butter are fine.

2. Transfer mixture to a bowl and add sour cream. Mix until combined. Add 1 tablespoon of water at a time and mix until dough comes together into a ball. Knead dough four or five times, wrap dough in plastic wrap, and refrigerate for 30 minutes.

3. Transfer dough to a floured surface and roll to a 13-inch round. Gently place dough in a 9-inch fluted tart pan with 2-inch sides and a removable bottom. Press dough into pan; trim off excess dough along edges. Refrigerate for 30 minutes.


For the filling: 
1. Cut two pounds of tomatoes into 1/4 inch slices and remove seeds. Lay slices on paper towel and sprinkle with one teaspoon of salt. Let sit for 30 minutes.

2. Combine Gruyere and Parmesan cheeses, mayonnaise, basil, thyme, one teaspoon salt, pepper, and egg.

To Assemble Pie:
1. Preheat oven to 425 degrees.

2. With additional paper towel, pat tomato slices to remove excess moisture.

3. Add onion to bottom of pie crust. Top onion with 1/3 of the cheese mixture. Layer half of tomatoes over cheese mixture in overlapping pattern. Top tomatoes with 1/3 of cheese mixture. Repeat with another layer of tomatoes and cheese mixture.

4. Cut remaining tomatoes into 1/4 inch slices and arrange on top of pie in an overlapping pattern.

5. Place pie on baking sheet and place in oven. Bake for 40 to 45 minutes.

6. Cool completely before cutting. Serve at room temperature.

Sunday, August 30, 2015

Eggplant Rollatini

Tis the season of eggplant.

My Eggplant Rollatini is a great main dish for vegetarians or if you just feel like going meatless for a night.

I prefer this over Eggplant Parm - not that there's anything wrong with a little Eggplant Parm now and again. But in this recipe, because the veg is grilled not fried. And there is no need for dipping and dabbling in eggs and breadcrumbs.

Nonetheless, preparing the rollatini is a bit time consuming. This isn't a 30-minute meal. So crack open some wine and put on some tunes. Enjoy the process.

You of course could take a shortcut and use jarred marinara, but The Jersey Girl just so happened to have a batch of homemade sauce chilling out in the freezer. This is a great time of year to rock out some marinara with the abundance of fresh basil everywhere. And jarred sauces don't exist in my house. Once a snob, always a snob. Here's my marinara recipe, in case you are inspired to rock some out.

And onto the main event: Eggplant.

Eggplant Rollatini
Makes 8 to 10 rolls

2 large eggplants, sliced lengthwise 1/2 inchwide. Each eggplant should yield 4 to 5 slices
Salt
16 ounces ricotta cheese
1 egg, lightly beaten
3/4 cup fresh mozzarella, diced
3 Tbsp.grated parmigiano
1 Tbsp. chopped fresh basil
2 cups marinara
Olive oil
Salt and pepper to taste

Lay eggplant slices on two baking sheets. Sprinkle each with a pinch of salt on both sides. Let rest for 15 minutes. This process will extract extra water.


Once the 15 minutes is up, rinse each piece under water and dry on kitchen towels.

Line up eggplant on baking sheets, and brush each side with olive oil.

Heat a grill pan over medium high heat. Working in batches, grill eggplant for about five minutes per side. Eggplant should have gorgeous grill marks and should be pliable, as we see here:


Remove from pan and let cool on baking sheets. Repeat until all are cooked.

Meanwhile, in a bowl combine ricotta cheese and egg gently with a whisk. Using a rubber spatula, fold in mozzarella, parmigiano and basil. Set aside.

One the eggplant slices are cooled, sprinkle each with salt and fresh pepper. Lightly oil a 13 by 9 inch glass baking dish.

Evenly divide ricotta filling among the 8 to 10 slices of eggplant starting on the narrow end of each slice. The filling should not go up about 1/4 of the length of each slice.


 Gently wrap each eggplant into a roll over the filling and line up each roll in the prepared baking dish. So orderly!


Top each roll with a generous spoonful of marinara sauce. Now we're talking.


Bake for 15 minutes uncovered in a preheated 375 degree oven. And enjoy, all you wild and crazy vegetarians!

Thursday, March 5, 2015

Zucchini and Goat Cheese Tart

On the outside, it's a winter wonderland - or nightmare - depending on your perspective. But in my kitchen, spring has sprung, baby.

This Zucchini and Goat Cheese Tart  by Ina Garten should lift you from the doldrums of winter. Plus, it gives you a purpose while trapped inside the confines of your home.

This is actually the first winter since becoming a baby momma that I have not turned to The Husband on a Saturday night and declared, "We are the lamest people I have ever met. Take me out immediately."

This recipe involves multiple steps with some waiting in between. So you should give it a whirl when time is on your side. Layering the zucchini slices is quite relaxing. I sliced mine with the slicer attachment of my Cuisinart food processor. Layer them on top of the dough very very closely because they shrink in the oven.

Be sure to roll out the dough when it is really cold. Keep flouring your surface and the dough as needed while turning the dough 90 degrees after a few rolls so that the dough does not stick to your surface. Do it patiently, but with a purpose. You don't want your dough to go all room temp and sticky on you. That will ruin your baking zen, trust me.

I baked mine on a rockin' circular baking sheet that my Mommom hooked me up with from one of her friends who owned a pizza shop waaaaay back in the day. But Ina Garten says you can bake this on a good old rectangular baking sheet.


Zucchini and Goat Cheese Tart
Serves 6
From "Make it Ahead"
By Ina Garten

1 1/2 cups all-purpose flour
Kosher salt and freshly ground black pepper
10 Tbsp. (1 1/4 sticks) cold, unsalted butter, 1/2-inch dice
1/2 tsp. white wine vinegar
5 Tbsp. ice water
1 1/2 pounds zucchini, unpeeled and sliced 1/8-inch thick
2 Tbsp. good olive oil, divided
8 ounces plain creamy goat cheese at room temperature
1 tsp. minced fresh thyme leaves
1/4 tsp. grated lemon zest

Place the flour, 3/4 tsp. of salt and butter in the bowl of a food processor fitted with the steel blade and pulse 12 to 14 times, until the butter is the size of peas. With the processor running, pour the vinegar and ice water through the feed and continue to process and pulse until the dough just comes together. Dump out on a floured board, form into a disk, wrap in plastic and chill for 30 minutes.

Meanwhile, place the zucchini in a colander set over a plate. Toss it with 2 teaspoons of salt and set aside for 30 minutes. Spread the zucchini out on a clean dish towel, roll it up, and squeeze gently to remove some of the liquid. Put the zucchini slices into a bowl and toss with 1 Tbsp. olive oil. With a fork, mash together the goat cheese, thyme, lemon zest and 1/2 tsp. of salt and 1/4 tsp. of pepper and set aside.

Preheat the oven to 400 degrees. Roll the dough out on a floured board to an 11 inch circle and place on a sheet pan lined with parchment paper. Spread the dough with the goat cheese mixture, leaving a 1/2-inch border. Lay the zucchini slices in tightly overlapping circles, start at the very edge of the pastry (the zucchini will shrink when it bakes). Continue overlapping circles of zucchini until the whole tart is covered. Drizzle with remaining Tbsp. of olive oil and sprinkle with pepper. Bake for 40 to 50 minutes, until the dough is golden brown. Cut in wedges and serve hot, warm or at room temperature.

Sunday, February 8, 2015

Potato Gratin: Go for it!

We live in a world in which carbs are made of evil. Especially the lowly potato. Layered in cream and cheese.

Soooooooo, if you are one to live in sin, you MUST rock out the fabulous fabulous fabulous Potatoes Gratin. The recipe comes from Tyler Florence. It is perfection!

When I tell you that there was not a sliver left behind this past New Year's Eve, I kid you not.

Sure, New Year's is supposed to be all about how to be a better you. And more often than not, a delusional well-meaning person vows to take on a life of health and exercise and do-gooding.

Whatever. Who you kidding?

OK. OK. I did kinda fast for like the entire month of January. Don't the holidays just make you feel disgusting?

I digress.

Perhaps, you can whip this up for Valentine's Day din dins for your lovies. It is decadent and divine, and really, isn't that what this holiday is all about?

If you have a food processor with a slicing attachment, the prep on this dish is super easy. And, of course a mandoline slicer will work just fine if you are not a piano teacher who fears such gadgets.

I think what really gives the dish that touch of deliciousness that pushes it over the edge is the simmering saucepan of cream, nutmeg, garlic and thyme:


Can't you just smell the amazingness while gazing at this gorgeous concoction?!

The potatoes go perfectly with a roast or a steak. I'm sure the dish would complement salmon quite well, too.

I highly recommend whipping up the gratin for your next fancy pancy dinner party in which you are trying to woo the crowd without stressing out. And, this one can be made way ahead of time, which is always a plus when planning a party! So they say.


Scalloped Potato Gratin
By Tyler Florence
Serves 4 to 6

1 1/2 cups heavy cream
1 sprig fresh thyme
2 garlic cloves, chopped
1/2 teaspoon ground nutmeg
Butter
2 pounds, russet potatoes, peeled and cut into 1/8-inch thick slices
Salt and freshly ground black pepper
1/2 cup grated Parmesan, plus more for broiling

Preheat the oven to 375 degrees Fahrenheit.

In a saucepan, heat up the cream with a sprig of thyme, chopped garlic and nutmeg.

While cream is heating up, butter a casserole dish. Place a layer of potato in an overlapping pattern and season with salt and pepper. Remove cream from heat, then pour a little over the potatoes. Top with some grated Parmesan. Make 2 more layers. Bake, uncovered, for 45 minutes. Sprinkle some more Parmesan and broil until cheese browns, about 5 minutes.


Sunday, January 25, 2015

One Woman Show


The Husband travels for work, which does have some perks for moi: Trash TV-watching in solitude without judgement; a maj stash of wine that he lovingly sets up for me; sleeping in my big-ass fluffy king-size bed in complete silence (The Husband is a notorious snorer. And I am a notorious insomniac); and of course the opportunity to cook up some eats that The Husband doesn't really groove on.

For example, a soba noodle extravaganza starring spinach and mushrooms.


Ooooh. I love this bowl of deliciousness. It's officially called Soba Soup with Spinach and it comes from marthastewart.com. 

The Husband would no doubt taste my big ole pot of Asian-flavored vegtastic yum-yums, but he would probably dig it more with a fish or meat of sorts. Me, when I'm single girling it, I could eat pasta and a salad all day, every day.

I got this one off Pinterest. I used just a basic box of Barilla whole wheat linguine since my Sur La Table in Marlton stopped carrying my most fave soba noodles eva and because my lowgrade Shop Rite doesn't even carry soba noodles. The whole wheat pasta works just as well.

This is also a fab dish to make when you are short on time and sanity. It all comes together in less than 30 minutes. For reals. And the lime juice, spinach and mushrooms. Just divine!

Have at it!

Soba Soup with Spinach
From marthastewart.com

2 tablespoons vegetable oil
12 ounces shiitake mushrooms (stems removed), caps thinly sliced
4 scallions, white and green parts separated and thinly sliced
1 garlic clove, minced
1 tablespoon peeled and minced fresh ginger
Coarse salt
2 cans (14.5 ounces each) reduced-sodium chicken broth
1/2 package (4.4 ounces) soba (Japanese buckwheat noodles)
1 bunch flat-leaf spinach, torn
2 tablespoons fresh lime juice
1 tablespoon soy sauce

In a large saucepan, heat oil over medium. Add mushrooms, scallion whites, garlic, and ginger; season with salt. Cook, stirring occasionally, until mushrooms are tender, 6 minutes.

Add broth and 3 cups water; bring to a boil. Add soba; reduce to a simmer, and cook 5 minutes. Add spinach; cook just until tender, about 1 minute. Add lime juice and soy sauce. Serve topped with scallion greens.

Sunday, January 4, 2015

Hot and Sour Soup

One of the side effects of being a food snob is that takeout eats make a rare appearance on my kitchen table. This is also the result of being a control freak, a lova of cooking and a gal who rocks some killer food allergies.

But, a hankering for Chinese food hits the best and worst of us at any given time. And so, a pot of Hot and Sour Soup just NEEDED to be concocted. To hell with deChristmasing, decluttering and decompressing!!

I absolutely LOVE this soup. It tasted so much lighter and refreshing than what I get in a restaurant. And that is exactly what I was looking for after weeks of holiday eats and parties and drinking. (Well, I'm still drinking. Let's just keep it real.)

One of the highlights of the soup is that my little man Evan James, HOUSED it. Two bowls! And he declared a love for tofu and mushrooms that warmed my foodie heart.

This was fairly easy to make. I suppose the hardest part was dealing with the fresh ginger, which you need to peel, then grate and then press through a sieve to get the ginger juice all up in your pot of warm delicious goodness. I grated my ginger with my Microplane, but a box grater will work just fine.

And just to warn you, be sure to discard the stems from the shiitake mushrooms you use. The stems are very tough. You just want to use the caps in this.

I used low sodium chicken broth and low sodium soy sauce.


Hot and Sour Soup
From Martha Stewart Living, April 2004


  • 2 cans (14.5 ounces each) reduced-sodium chicken broth
  • 2 tablespoons soy sauce
  • 1/4 to 1/2 teaspoon crushed red pepper
  • 8 ounces fresh shiitake mushrooms (about 4 cups), stemmed, caps thinly sliced
  • 3 to 4 tablespoons rice vinegar
  • 2 tablespoons cornstarch
  • 1 large egg, lightly beaten
  • 1/2 package (7 ounces) soft or firm tofu, cut into 1/4-inch cubes, drained
  • 2 tablespoons finely grated fresh ginger
  • 3 scallions, thinly sliced
  • In a large (5-quart) pot, combine broth, soy sauce, crushed red pepper, and 2 cups water. Bring to a boil over medium heat. Add mushrooms; reduce heat, and simmer until tender, about 10 minutes.
  • In a small bowl, whisk together 3 tablespoons vinegar and cornstarch. Add to pot; simmer, stirring, until soup is thickened, about 1 minute.
  • Add egg through a slotted spoon, and stir to form ribbons. Stir in tofu. Remove from heat; let stand, covered, 1 minute. Put ginger in a small sieve, and squeeze to release juice into soup (discard solids). Taste; add remaining tablespoon vinegar, if desired. Serve sprinkled with scallions.