Showing posts with label Jersey Fresh. Show all posts

Monday, May 16, 2022

Roasted Mexican Zucchini


This is a great recipe to have for when the zucchini crop is bumpin: Roasted Mexican Zucchini. It's simple and full of great, earthy flavors. The lime juice and fresh cilantro add a pop of brightness.

I always have garlic powder, onion powder and cumin in my pantry. If you can't get fresh cilantro, just use fresh parsley. I omit the cheese, but I'm sure it's fab.

This is perfect for Mexican night at home! My son absolutely loves zucchini prepared this way.


Roasted Mexican Zucchini

From Isabel Eats

Makes 4 servings

Ingredients:

4 medium zucchini, sliced into 1/2-inch half moon

1 1/2 Tbsp. olive oil

1 tsp. kosher salt

1/2 tsp. chili powder

1/2 tsp. garlic powder

1/2 tsp. black powder

1/2 tsp. onion powder

1/4tsp.ground cumin

Juice of 1/2 lime

2 Tbsp. chopped cilantro

2 Tbsp. crumbled cojita cheese (optional)

Instructions:

1. Preheat the oven to 450 degrees Fahrenheit. Line a large baking sheet with aluminum foil for easy cleanup. Set aside.

2. In a large bowl, add the diced zucchini, olive oil, salt, chili powder, garlic powder, black pepper, onion powder and ground cumin. Toss until evenly coated.


3. Transfer to the prepared baking sheet and spread evenly in a single layer.


4. Roast for 10-15 minutes, flipping halfway through, until zucchini is fork tender.

5. Top with lime juice and fresh cilantro and cojito cheese (if using). Serve immediately.


Sunday, August 1, 2021

Cherry Pepper Salad

For all my hot pepper lovers out there, this one is for you.

Fresh Cherry Pepper Salad is full of color, crunch and SPICE. 

Cherry peppers are super cute and super HOT. If heat isn't your thing, you may want to skip this dish. This salad uses fresh peppers, so the spice is really in your face. My husband absolutely loved it.

This salad goes great with whatever you are grilling. I also think the peppers would be a great topping on a sandwich. 

You could make this with those cute baby bell peppers that are sold in the grocery store. Those guys are sweet!


But if fiery is your flavor, go for the cherry peppers. Here you go:

Fresh Cherry Pepper Salad

Makes 6-8 servings as a garnish

12-14 red and green cherry peppers, quartered and seeded

1 rib celery, finely diced

1 garlic clove, minced

Juice of half a lemon

1/4 cup extra virgin olive oil

2 tsp fresh oregano, minced

2 tsp fresh basil, minced

Salt and pepper to taste

Combine all ingredients in a bowl, mix and set aside for at least an hour.


Serve with fresh Italian bread.

Please note: You may want to wear plastic gloves while cutting and seeding the peppers. Be careful as to not touch your eyes.


Friday, July 30, 2021

Fusilli with Roasted Grape Tomatoes and Burrata

Tomatoes and pasta are the perfect combo. Add burrata to the mix and WOW!

If you aren't familiar with burrata it is a mozzarella type cheese filled with a spectacular cream inside. It works perfectly with this dish. If you can't find it, I recommend tossing some boccacini mozzarella in its place. But if you get your hands on some, make this dish!!

This is a perfect summer dinner to me. Easy prep and just enough to fill you up.

Enjoy!


Fusilli with Roasted Grape Tomatoes and Burrata

Makes 2 generous servings

 1 pint grape tomatoes

4 cloves garlic, minced

1/4 tsp. crushed red pepper flakes

4 Tbsp extra virgin olive oil, divided, plus more to drizzle before serving

1/4 cup fresh basil leaves, chiffonade

Salt and pepper to taste

1/2 pound fusilli or other favorite pasta

Pasta water

2 4-ounce burrata balls

Preheat oven to 400 degrees Fahrenheit. 

On a baking sheet, toss grape tomatoes with 2 Tbsp. olive oil, salt and pepper to taste. Roast in oven for 20 minutes. Remove from oven and set aside.

In a large pot of salted boiling water, cook fusilli to al dente according to the cooking time on the box of pasta. Usually about 8 minutes.

In a pan over medium heat, add olive oil, garlic and crushed red pepper flakes. Saute for a minute or two. Add roasted tomatoes. Gently crush tomatoes with a fork or the back of a cooking spoon while cooking in pan. 

Using a spider ladle or slotted spoon, transfer cooked pasta directly from the pot into the pan with tomato and garlic mixture. Ladle some pasta water into the pan with pasta, tomatoes and garlic. About 1/2 cup to 1 cup, depending on how saucy you like your sauce. Stir in fresh basil. Remove from heat.

To serve: Divide pasta between two pasta bowls. Top each with one ball of burrata. Drizzle olive oil, a turn of pepper and a dash of salt. Garnish with more olive oil and fresh basil, if desired.


Sunday, October 18, 2020

Margherita Pizza

 Homemade pizza night is popular at my house.

Pre child, I would make some more outlandish pizzas. But these days I usually stick with the classics such as Margherita style. Just some mozzarella, fresh tomatoes, garlic and basil. This is as fresh and pure as it gets.

My tips for making Margherita pizza are as follows: Remember to space out your fresh mozzarella and tomatoes so that the pizza doesn't get soggy. The more garlic the better. Fresh basil at the end is key. Let your pizza rest for a few minutes before serving.


Margherita Pizza
Pizza dough, 1 ball
Fresh tomatoes, regular or plum, sliced
Fresh mozzarella, not in water, sliced
10 or more cloves of garlic, minced
12 to 20 basil leaves
Salt and pepper to taste
Olive oil

Drizzle olive oil over a heavy rectangle baking sheet pan. Using a paper towel, grease the entire pan. This is to prevent the dough from sticking.

Roll out pizza dough on a well-floured surface with a rolling pin. You will need to turn the dough frequently so that it doesn't stick as you roll it out. The dimensions of the rolled out dough will be about 17 inches by 11 inches. Fold the dough in half and fit gently onto the baking sheet. 

Poke the dough all over with the tines of a fork. This prevents the dough from getting air and puffing up. Cover your stretched dough with a clean kitchen towel until you’re ready to make the pizza. I usually stretch the dough in the morning and let it rest covered until I make it for dinner.

When you are ready to make the pizza: Preheat oven to 400 degrees.

Remove kitchen towel. Place tray with pizza dough in oven and bake for 5 to 7 minutes to lightly brown the bottom of the crust. (You can check to see if the bottom browned by gently lifting with a spatula). Remove browned crust from oven.

Scatter chopped garlic all over the crust. On top of the garlic, alternate tomatoes and mozzarella. (IMPORTANT: Do not overlap tomatoes and mozzarella. This will lead to soggy pizza). Be sure the tomatoes and mozzarella are side-by-side, not on top of one another.

Drizzle with olive oil. Season with salt and pepper. Bake for about 15 to 18 minutes, until crust is golden brown. Remove pan from oven and top pizza with whole basil leaves. After about five minutes, cut and serve.

Monday, September 7, 2020

Tomato's Last Hurrah

This is one of my fave recipes of the summer: Heirloom Tomatoes with Herbed Ricotta. I'm getting it in under the wire. Tomatoes are still pretty rocking in September, so if you get your hands on some good ones, please make this.

This is perfect for everything: Breakfast, lunch or a light dinner. I will admit, I replaced the dill with my basil as dill was one of my gardening fails of 2020. You win some; you lose some. 

I did not make homemade ricotta. Just a container of Maggio and all was good in the hood. 

This is a Barefoot Contessa recipe. She calls for heirloom tomatoes, which I'm sure are available at every schi schi market along the coast and quant streets of the high-falutin Hamptons, where she resides. But I made this dish with the good ole' Jersey tomato from my fave farmer's market in South Jersey. There's nothing fancy about it, but the taste is aces.

I enjoyed my tomatoes and ricotta on a slice of toasted Italian bread. It was fantastico.


Heirloom Tomatoes with Herbed Ricotta

Serves 6

From "Cook Like a Pro" by Ina Garten

2 cups fresh ricotta, preferably homemade

3 Tbsp. minced scallions, white and green parts (2 scallions)

2 Tbsp. minced fresh dill

1 Tbsp. minced fresh chives

Kosher salt and fresh ground black pepper

2 pints assorted heirloom tomatoes

1 tsp. minced garlic

1 Tbsp. good olive oil, plus more for drizzling

1/2 cup julienned fresh basil leaves, plus extra for garnish

Fleur de sel

In a medium bowl, combine the ricotta, scallions, dill, chives, 1 tsp. salt and 1/2 tsp. pepper and set aside for up to 30 minutes.


With a small serrated knife, cut the larger tomatoes in wedges through the stem and the smaller tomatoes in half through the stem. Place them in a medium bowl with the garlic, olive oil, 1 tsp. salt and 1/2 tsp. pepper and set aside.

When ready to serve, add the basil to the tomatoes and combine. Pile the ricotta in a large (12-inch) round shallow bowl or oval platter. Using a slotted spoon, place the tomatoes around the ricotta, discarding any liquid. Drizzle the tomatoes and ricotta with olive oil, sprinkle with the reserved basil and fleur de sel, and serve at room temperature.

Tuesday, September 1, 2020

Presto Pesto Pasta

 Easy pasta recipes are my fave. Especially when you can use up delish homemade pesto.

This silky smooth pesto sauce has a touch of cream or half and half. The grape tomatoes add a pop of color and spinach is just a power food, so I put some in as well.

This comes together in minutes. And it's nut-free, so the Jersey Girl can eat and still live to talk about it.

For my pesto recipe, click here or see below.

When it comes to any dish that includes pesto, I recommend starting out with small quantities of pesto and then add more if you want a bolder pesto sauce. In my opinion, a little pesto goes a looooong way. But you do you, Boo. If you want to add more than my two tablespoons listed in the recipe, go for it!


Fettucine with Pesto, Spinach and Grape Tomatoes

Makes 4 servings

3/4 pound fettucine pasta

2 Tbsp. pesto (recipe is below) or more if you want a stronger pesto flavor

1 pint grape tomatoes, halved

5 ounces baby spinach

1/2 cup half and half or cream

1 1/2 cups, plus more if needed, of pasta cooking water

2 Tbsp. olive oil, plus more for drizzling

1/4 cup grated parmigiano cheese, plus for more for serving

Salt and pepper to taste

In a large pot of salted boiling water, cook fettucine according to instructions on the box. About halfway through cooking the pasta, ladle out 3 cups of pasta cooking water into a measuring cup or bowl and set aside.

Once pasta is cooked, drain.

Return the pasta pot to a burner over medium heat. Add 1 cup pasta water, olive oil and pesto. Stir until well combined. Add half and half, a pinch of salt and pepper to taste. Stir until combined. Return pasta to sauce, stir to coat. Add cheese. Add more pasta water if sauce is being absorbed quickly. Stir again. Add grape tomatoes and spinach. Stir so that veggies are evenly distributed. Cover with lid so that spinach wilts, about 3-5 minutes. 

Serve with a drizzle of olive oil and more cheese! 


Pesto Jersey Girl Style (No Nuts!)

Yields 1/2 cup

2 cups fresh basil leaves

1/4 cup extra virgin olive oil

2 cloves garlic

1/4 cup grated parmigiano cheese

A pinch of salt

Freshly ground black pepper

In a bowl of a food processor, add all ingredients. Process until smooth. Add more olive oil if necessary. Store in refrigerator in a sealed container for up to 3 days or freeze for up to six months. You may freeze in ice cube trays for pre-made portions.

Thursday, August 27, 2020

Nut Free Pesto

 My family has always made pesto - a tasty puree featuring basil - without nuts. This is good news for me, since I've been deathly allergic to nuts since early childhood. 

I'm sharing with you the way my family does it since your basil plants may be bursting with gorgeous leaves currently.

To clean such a large quantity of basil needed for pesto (about 2 cups), place leaves in a colander and rinse under cool water. Spread out on a sheet pan to dry. This may take a few hours


This puree is perfect for making a pasta sauce with pasta water, olive oil and a splash of cream. It also is fantastic to swirl into melted butter and olive oil to top on day-old bread to make the best garlic bread ever. Literally. Just remember a little goes a long way. A tablespoon or two provides enough flavor for most dishes. 

You can also use this pesto when you are making marinara or meatballs and sauce in the winter, when it may be hard to find fresh basil at the store.

Store it in the freezer in ice cube trays for perfect portion sizes.


Pesto Jersey Girl Style (No Nuts!)

Yields 1/2 cup

2 cups fresh basil leaves

1/4 cup extra virgin olive oil

2 cloves garlic

1/4 cup grated parmigiano cheese

A pinch of salt

Freshly ground black pepper

In a bowl of a food processor, add all ingredients. Process until smooth. Add more olive oil if necessary. Store in refrigerator in a sealed container for up to 3 days or freeze for up to six months. You may freeze in ice cube trays for pre-made portions.


Sunday, August 9, 2020

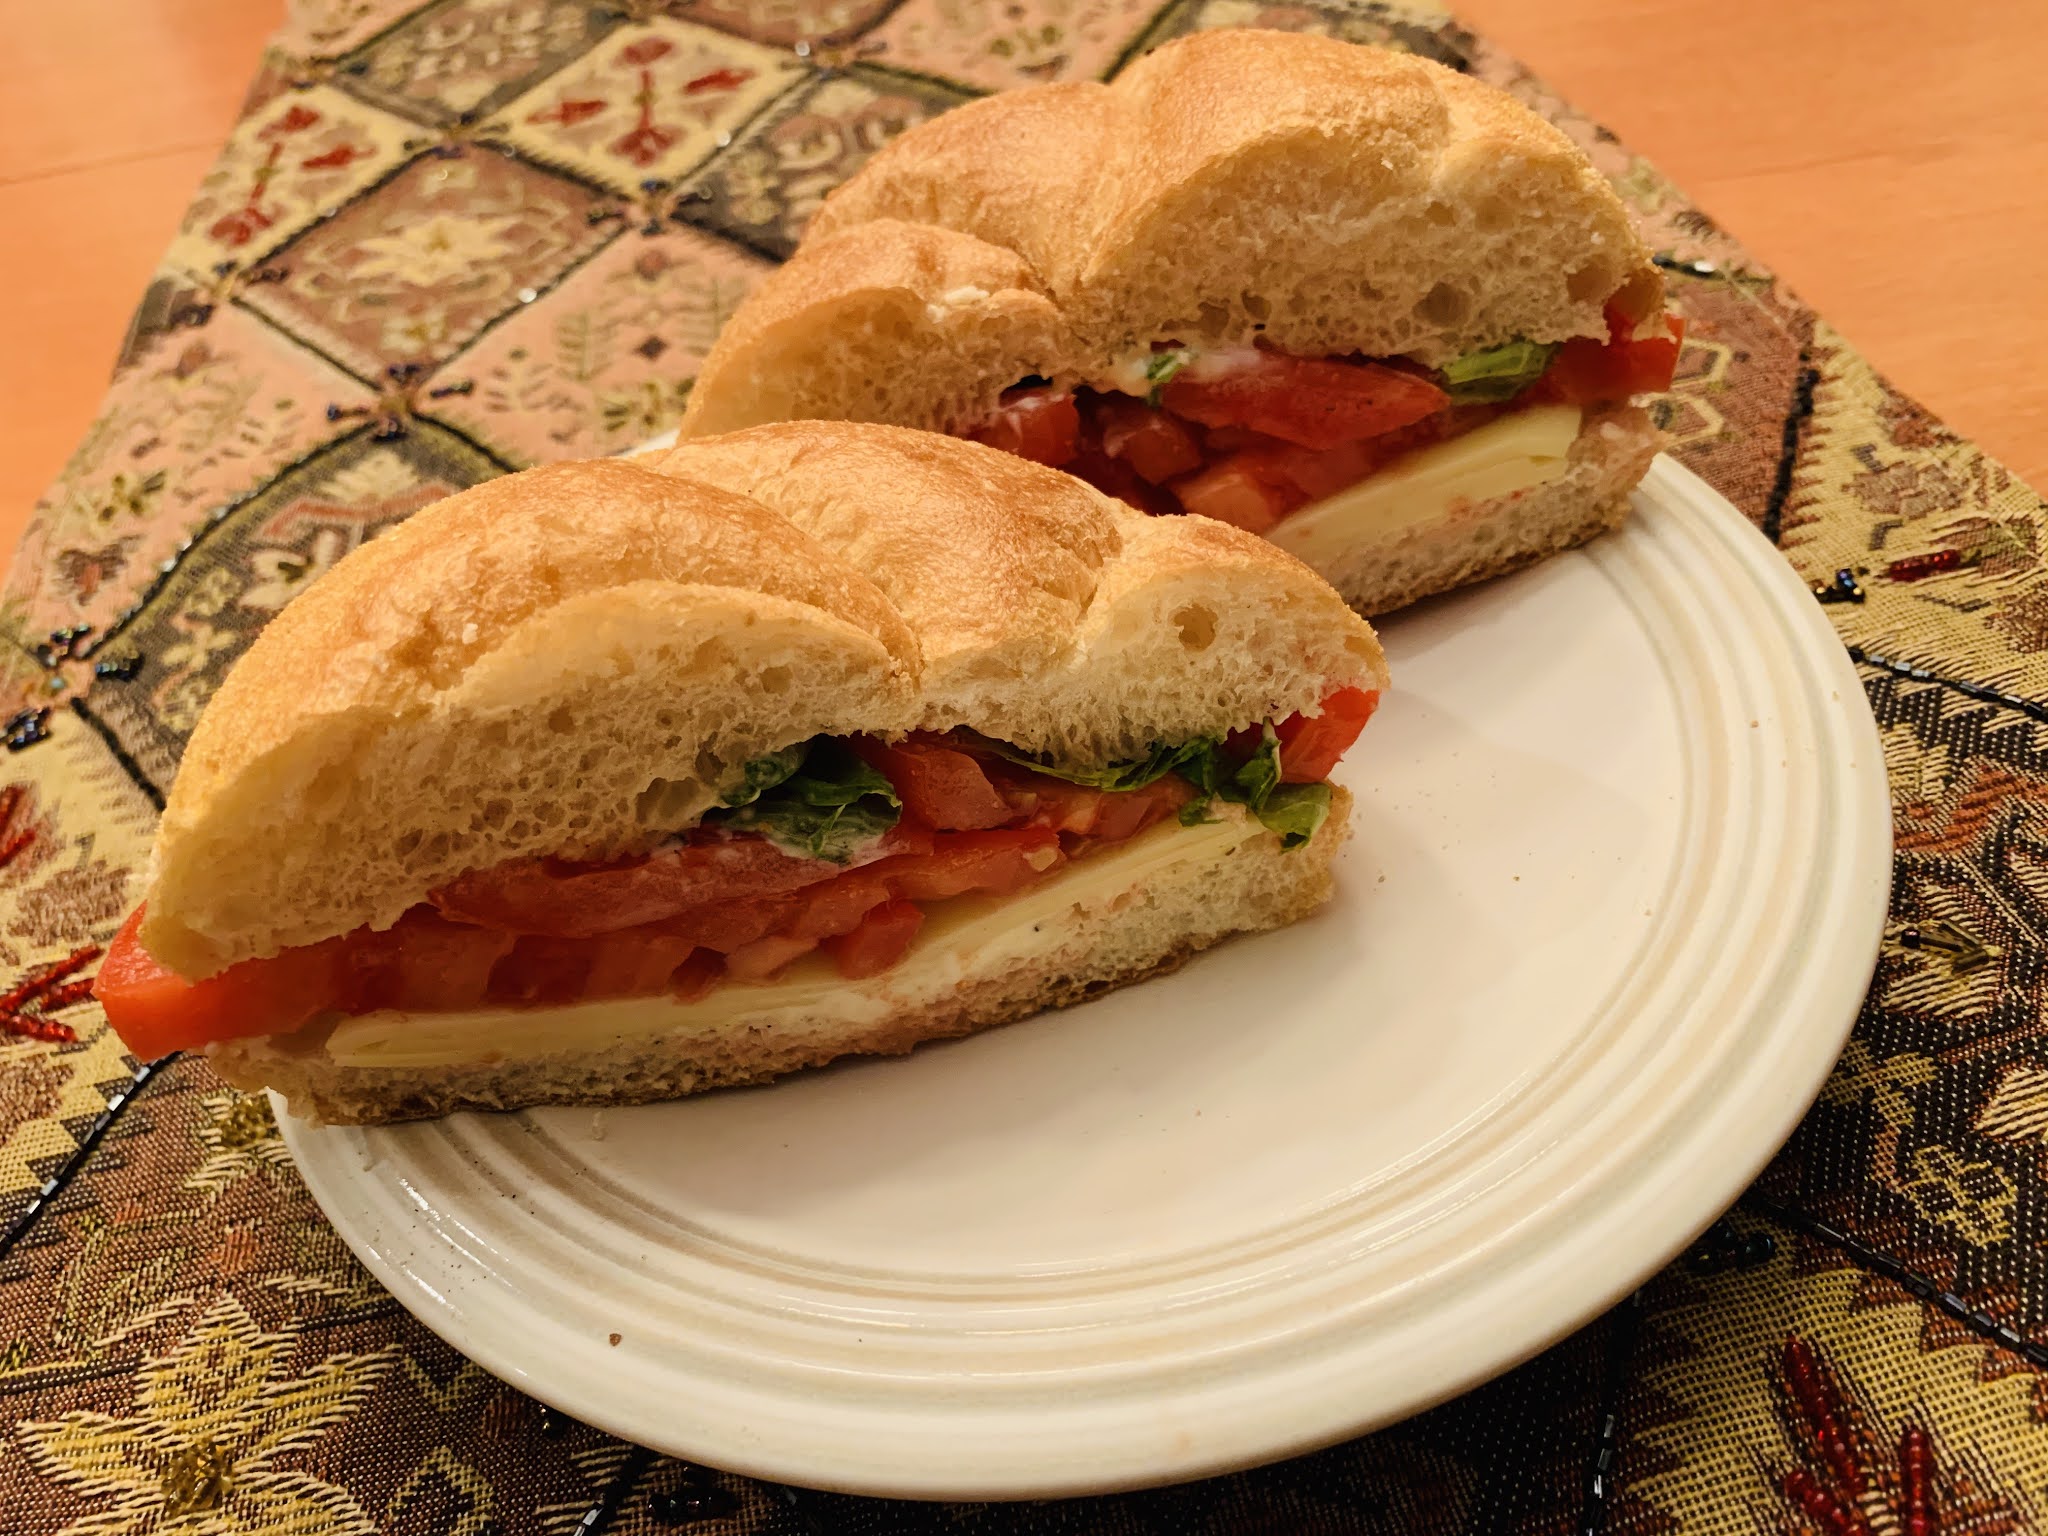
Tomato Sangwich 101

 I feel a bit ridiculous writing a recipe for the Tomato Sangwich. (Some people really truly call a sandwich a sangwich here in my parts. I can't tell you why. But it makes me laugh and I love it, so Sangwich stands.) But I realized that perhaps a classic Tomato Sangwich may be a total regional thing to my parts of South Jersey, and I should type this up as a public service to all of you who have not yet experienced the simple magic of a Tomato Sangwich. It truly is a standout of summer cuisine. 


Now my recipe below is literally just how I personally love it. 

I can recall my Poppop rocking a tomato sangwich out while whistling some tunes back in the day with just literally mayo, tomato, a pinch of salt on your totally standard sliced sandwich bread like Wonder or Stroehmann's. But see, the Jersey Girl is 100 percent a food snob, and sliced sandwich bread does not step foot into my cupboards. (Sorry, Poppop, and all y'all who love sliced sandwich bread.) You can of course make it on that, and the result is quite delish as the sandwich bread becomes all squishy and enveloped in the intoxicating juiciness of the Jersey tomato. But, yours truly prefers the amazing crustiness of a Kaiser roll. Why, you ask? The superior bread stands up to the simple contents of this sandwich. And it is the perfect vessel to hold the cheese, tomato, basil, mayo and seasoning. The bread softens, but not still too much. You still got the crust, you see? And because of that solid crust, it doesn't make a total mess. Although, don't expect to eat this all prim and proper unless you knife and fork it, which honestly I wouldn't. I would just chomp right in. 

For best results, let the sangwich hang out so that all the flavors mold together. Whatever you do, don't refrigerate the glorious tomato sangwich. I am known to chill my sangwich in a cooler until I am ready to unwrap into its glorious contents while poolside.

Happy summer!


Tomato Sangwich/Sandwich

Serves 1

1 crusty Kaiser roll, sliced in half

2 slices of favorite cheese such as provolone, pepper jack or American

1 medium fresh tomato, sliced 1/4-inch thick

5-6 fresh basil leaves

1 Tbsp. mayonnaise

Black pepper and salt to taste

Spread mayonnaise with a butter knife evenly onto the cut side of each roll half. Sprinkle evenly with black pepper.

Layer cheese slices onto one roll half. Evenly place tomato slices on top of cheese slices. Lightly season with salt. Evenly place basil leaves on top. Place other roll half onto the prepared roll half. Cut in half. For best results, let sandwich hang out for about 10 minutes before eating. 

Monday, July 20, 2020

Tomato Salad in the Style of Susan

The basic formula for a tomato salad is as follows: Sliced tomatoes, mozzarella, fresh basil, salt, pepper, olive oil.

But I make mine with a little bit extra. 

This salad is nice to make ahead. You just let it hang out at room temp and magic happens. The juice is so yummy for bread dipping.

I like how all the colors of the veggies complement each other. My recipe is for two people. But you can easily multiply the quantities for a bigger crowd. I like to place everything on a flat platter for presentation purposes.

Here you go.


Susan's Tomato Salad
Serves 2

1 large tomato, sliced into 1/4 inch-thick circles
4 slices of fresh mozzarella
1/4 small red onion, sliced thin
1/2 small green bell pepper, sliced thin
1 celery stalk, chopped
2 Tbsp. fresh basil, chiffonade, 
1/4 tsp. garlic powder
1/4 tsp. salt
Black pepper to taste
2-3 Tbsp. extra virgin olive oil

On a serving plate, place the tomatoes. On top of the tomatoes, place the mozzarella evenly. Top with red onion slices, bell pepper slices and celery slices. 

In a small bowl, mix garlic powder, salt and black pepper to combine. Sprinkle mixture evenly over the veggies. Drizzle with olive oil. Top with basil chiffonade. Garnish plate with more basil if desired. Let plate sit uncovered for at least an hour before serving. Be sure to serve with fresh bread!

Friday, July 10, 2020

Zucchini and Eggs

I am a gal who must eat breakfast, but it is usually small. So here is a bigger breakfast for me: Zucchini and eggs. This also makes a fab lunch. 

I love it when zucchini is in season, which is totally NOW. But, you know you can find zucchini pretty much all year so make this whenever your heart desires. 

Chop up your zucchini small so that it cooks quickly. I cook my eggs over a lower heat because that helps with the creaminess of scrambled eggs. Low and slow, baby. I add cheddar cheese at the end, but mozzarella would be fab, too. 


Zucchini and Eggs
Serves 1
1/2 zucchini, chopped small (about a cup)
2 Tbsp. minced onion
2 extra large eggs
Splash of milk
Salt and pepper to taste
1 Tbsp. butter
1/4 cup (or a handful) shredded cheddar or mozzarella cheese


In a medium pan over medium heat, melt butter. Add onion and zucchini. Season with salt and pepper. Saute over medium heat for about 5 minutes, stirring occasionally.

Meanwhile, in a separate bowl, lightly whisk together eggs, milk and salt and pepper to taste.


Once the zucchini and onion are lightly browned and soft, add the egg mixture to the pan. Lower heat to cook the eggs slowly. Stir frequently. Right before eggs are finished cooking, stir in cheese.

Serve with toast or chopped tomato or both!

Monday, July 6, 2020

Peas and Thank You: Risi e Bisi

This dish is so worth it. 

Risi e Bisi translates to rice and peas. Currently, fresh peas are in their gorgeous green glory in the farm markets in my parts. But the season is about to end here. If you can get your hands on the cute little pods of deliciousness, please please do so.


This dish was outstanding. My son really loved it, and I could see small children really loving it. Risotto is so comforting to eat.

Now this is not a quick in-and-out kind of cooking. You need to take your time and enjoy the process. By process, I mean stirring. Also, shelling the peas is not a speedy kind of task. Embrace it, baby. 

This recipe comes from a really cool cookbook I have called Polpo. It is written by a Brit, so the measurements are in grams and liters. I will provide the American translations to ease the situation for my fellow U.S. cooks.

This dish is so amazing simply because of its simplicity. Fresh peas were an eye-opener to my taste buds. They are so much crisper and sweeter than their frozen brethren. I hope you get to make this magic!

I went vegetarian and did not use pancetta. I use Arborio rice although the author of the recipe recommends carnaroli. I cut this recipe in half as I only have three peeps in my fam. The recipe makes enough for six. Here it is straight from the cookbook, which is totally amazing!


Risi e Bisi
For six
From "Polpo" by Russell Norman

2 kg (4.4 lbs) fresh peas in their pods
2 onions, 1 cut in half and 1 finely chopped
Flaky sea salt and black pepper
50 ml (3 Tbsp.) extra virgin olive oil
60g (4 Tbsp.) unsalted butter
150g (5 ounces) small pancetta lardons (optional)
400 g (14 ounces) risotto rice - carnaroli is best
1 handful of mint leaves, chopped
1 handful of flat parsley leaves, chopped
1 large handful of grated Parmesan


Shell the peas in advance because you are going to make a simple stock with empty pods. In a large pan, bring 2.5 litres of water to the boil. When all the peas are shelled, place the pods (but not the peas) in the pan with the halved onion. (Move the freshly podded peas to one side, out of temptation's way.) Bring the pods to the boil for only a minute or two and then take off the heat. Remove and discard the pods. Now you have your stock for making the risotto.


Sweat the finely chopped onion with a few pinches of salt in the olive oil and half the butter in a heavy-based pan. This should be a slow process on a low heat - you don't want it to turn brown at all. The onion should become clear, shiny and translucent. Add the pancetta lardons, if using, and continue to saute for a few minutes. Add a twist of black pepper.


Now add the rice and stir slowly for 2 minutes. You want to coat every grain in the oil and butter so that everything looks glossy and nothing is sticking. With a large ladle, put just enough stock in the pan to cover everything but not drown it. The contents will let off a satisfying hiss and a cloud of steam. This first ladleful will be absorbed and evaporate very quickly. Add another. If the pan continues to bubble, the heat is too high. Turn it down and stir slowly.


For the next 15 minutes or so you should continue to stir slowly and add a ladleful of stock every time the rice looks less than wet.  You are continually letting the rice absorb the liquid and allowing the grains to release the starch. Towards the end, add the peas, half the chopped mint and half the chopped parsley. Taste and add more salt if needed, but not too much. Remember that the Parmesan will add a little salt to the balance.


Don't be a slave to the clock; taste your grains to know when they are done. They should still have a little bite to them. When they are ready, make sure the mixture is nice and runny. Unlike a regular risotto, Risi e Bisi should be more liquid, rather like a thick soup. Take off the heat. Gently stir in the Parmesan, the remaining butter, mint and parsley. Cover the pan and let it rest for a few minutes, and then serve in wide shallow bowls. 

Wednesday, June 3, 2020

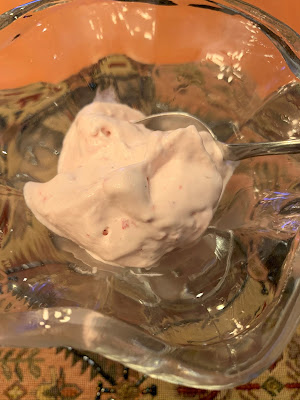
The Freshness: Strawberry Ice Cream

Nothing highlights the freshness of in-season fruit like a homemade frozen treat. This Fresh Strawberry Ice Cream recipe from Betty Crocker will rock your world. Totally.


If making ice cream trips you out, here are my tips, my friend. You got this!

1. Chill a glass bowl in the freezer well before you are even going to jump into the ice cream process. Like put it in the freezer the day before.

2. Let the cooked mixture cool in the fridge beyond the recommended 2-3 hours. I usually go at least 4. You need to allot a good amount of time to ice-cream making. Patience, peeps!

3. Be prepared to put the finished product into the freezer for many hours after you churn it in your ice cream device of choice. The ice cream is usually very soft when it is first made. (Although, this recipe so good you'll probably want to sneak some bites straight away.)

4. When adding the final ingredients into the cooled milk mixture, work fast.

5. Finally, I do strongly recommend to use ice cream recipes that require cooking and egg yolks. I made some imposter one-step strawberry ice cream recipe last summer and it was so blah. Like no texture or taste at all. No bueno.

But this sweet stuff below is super bueno!


Fresh Strawberry Ice Cream
From Betty Crocker Cookbook
Makes 1 quart

3 egg yolks, slightly beaten
1 cup sugar, divided into two 1/2 cups 
1 cup milk
1/4 tsp. salt
2 cups whipping cream
1 tsp. vanilla extract
1 pint (2 cups) strawberries


1. In a 2-quart saucepan, stir egg yolks, 1/2 cup of sugar, milk and salt until well mixed. Cook over medium heat just until mixture comes to a boil, stirring constantly (do not allow mixture to continue to boil or it will curdle.) Immediately remove from heat. 

2. Pour milk mixture into chilled bowl. Refrigerate uncovered 2 to 3 hours, stirring occasionally, until room temperature. At this point, mixture can be refrigerated up to 24 hours before completing recipe if desired.


3. Mash strawberries with the remaining 1/2 cup of sugar with a potato masher or process in food processor until slightly chunky (not pureed). 

4. Stir whipping cream and vanilla into milk mixture. Stir strawberries into milk mixture. Stir in a few drops of red food color if desired. Pour into 1-quart ice cream freezer and freeze according to manufacturer's directions.