Wednesday, June 26, 2019

Easy Peasy Blueberry Muffins


Muffins are one of the easiest of baking tasks, in my humble opinion. For one, you don't need a mixer. You just whisk things and use a wooden spoon.

You just need one mixing bowl.

There's no icing involved.

And they often utilize fresh ingredients of the season. Which is why, June and July are totally the months that you should be whipping up fabulous blueberry muffins.

I go tried and true with my recipe from that gal Betty Crocker. There's a reason why this cookbook has been reprinted again and again for almost 75 years. Because the recipes work! And they're super yummy.

This recipe offers a couple of options about things. I listed how I do at the bottom of the recipe.

These muffins come out light and fluffy. The blueberries really shine. The streusel topping is the perfect touch. It crumbles and melts in your mouth. These muffins are so delightful with your coffee first thing in the morn.


Streusel-Topped Blueberry Muffins
Makes 12
From the "Betty Crocker Cookbook"

For the muffins:
3/4 cup milk
1/4 cup vegetable oil or melted butter
1 egg
2 cups all-purpose flour
1/2 cup granulated sugar
2 tsp. baking powder
1/2 tsp. salt
1 cup fresh, canned (drained) or frozen blueberries

For the streusel topping:
1/4 cup all-purpose flour
1/4 cup packed brown sugar
1/4 tsp. ground cinnamon
2 Tbsp. firm butter

To make the streusel: In a medium bowl, combine flour, brown sugar and cinnamon. Cut in firm butter, using a pastry blender or fork, until crumbly.  Set aside.

To make the muffins: Heat oven to 400 degrees Fahrenheit. Grease bottoms only of 12 regular-size muffin cups with shortening or cooking spray, or line with paper baking cups.


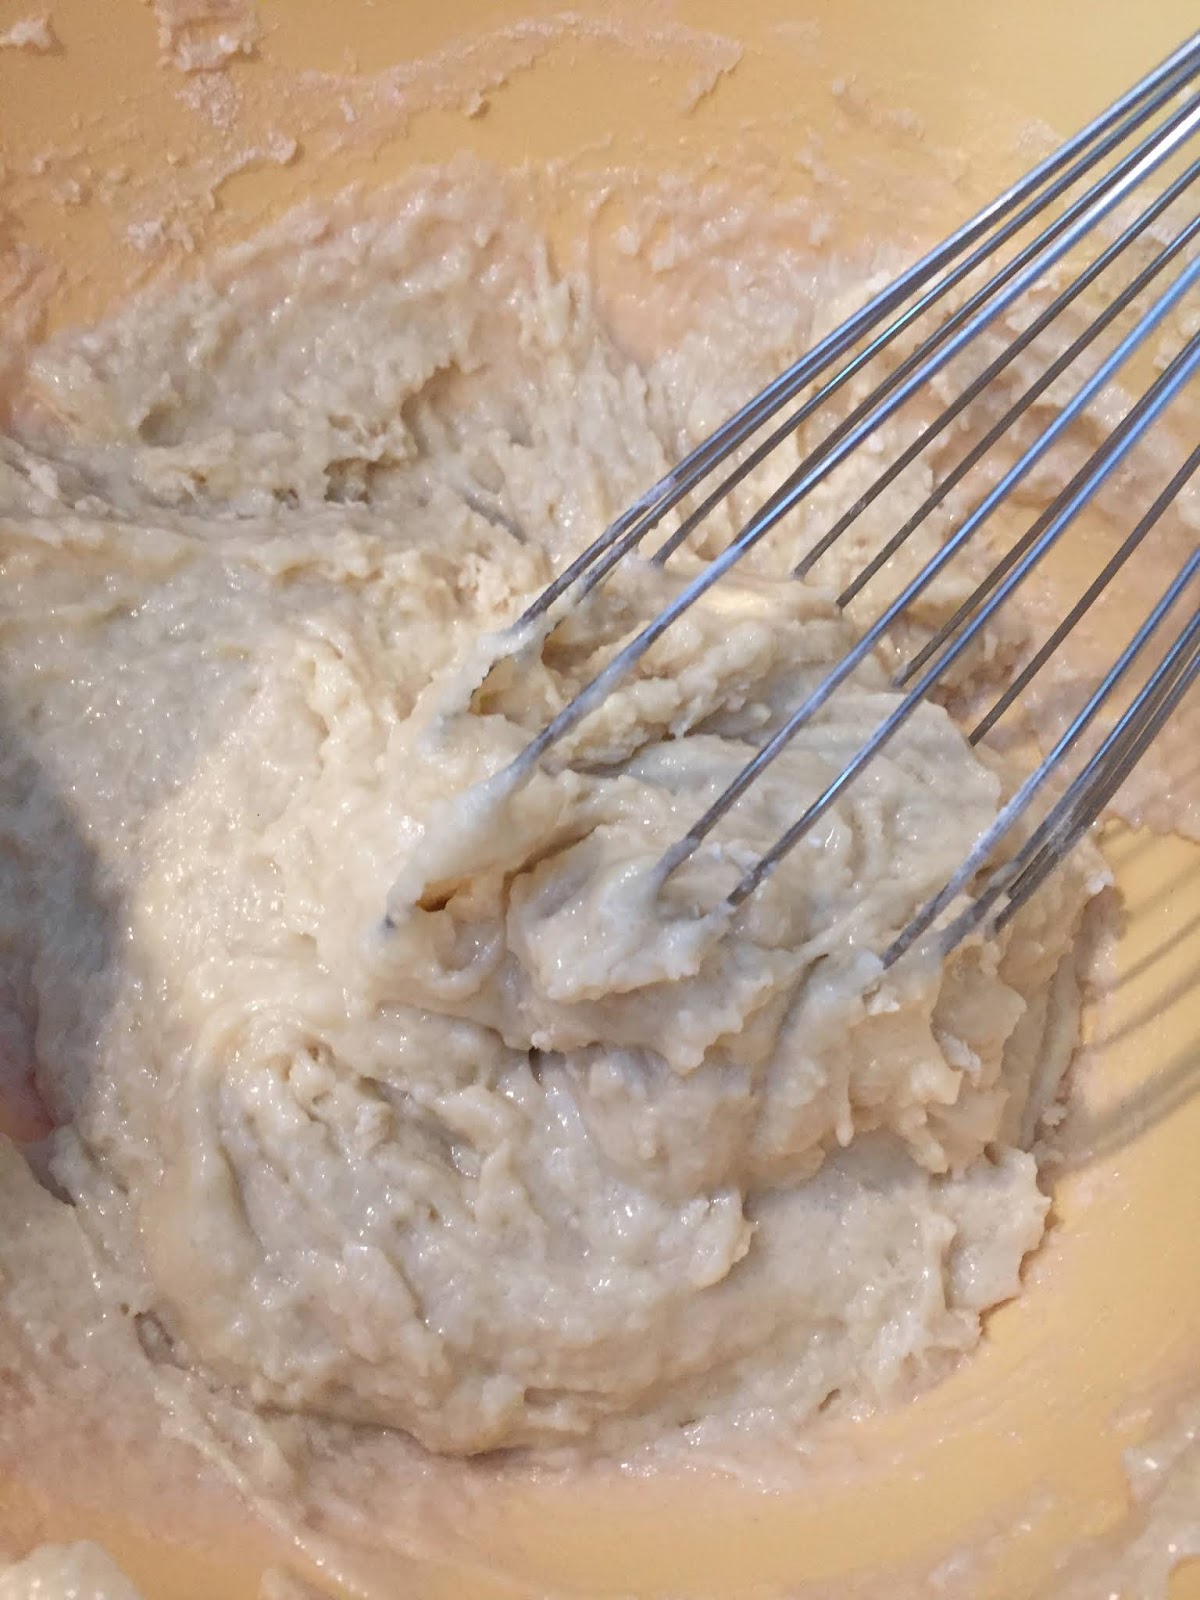
In a large bowl, beat milk, oil and egg with fork or wire whisk until well mixed. Stir in flour, granulated sugar, baking powder and salt all at once just until flour is moistened (batter will be lumpy).


Fold in blueberries.


Divide batter evenly among muffin cups.


Sprinkle each with about 1 tablespoon streusel topping.


Bake 20 to 25 minutes or until golden brown and toothpick inserted in center comes out clean. If baked in greased pan, let stand about 5 minutes in pan, then remove from pan to cooling rack; if baked in paper baking cups, immediately remove from pan to cooling rack. Serve warm if desired.

Please note: The Jersey Girl uses paper baking cups, oil and fresh blueberries. She also lets the muffins cool for about 20 minutes in the baking pan on a cooling rack before removing. 

Thursday, June 20, 2019

Chicken Paillard, Pizzette-Style

I love this recipe; I love this cookbook.


This dish is called Chicken Paillard, Pizzette-Style. It is from the awesome cookbook by Rachael Ray called "Everyone is Italian on Sunday." This cookbook has your traditional Italian-American recipes like chicken parm and fried calamari, but it also goes beyond with some awesome outside-the-box recipes. Like this one.

Paillard is a French term, that means pounded-out meat - usually chicken or veal. I take a shortcut and just buy thin-cut chicken cutlets at the store. To make cutlets out of chicken breast. Cut the chicken breast in half vertically and open up the sides as if your opening a book. Make two cutlets. Place between plastic wrap and pound the bejesus out of them with a meat pounder or a mallet. You can even use a rolling pin.

I hope this is a recipe you enjoy all summer long!

Chicken Paillard, Pizzette-Style

Serves 4
From "Everyone is Italian on Sunday"
By Rachael Ray

4 boneless, skinless chicken breasts (6 to 8 ounces each), butterflied and pounded into cutlets, or 8 skinless thin-cut chicken cutlets
1 Tbsp. olive oil, plus more for drizzling
Salt and black pepper
1 tsp. granulated garlic aka garlic powder
1 tsp. granulated onion aka onion powder
1 tsp. fennel seeds
1/2 tsp. crushed red pepper flakes
2 Tbsp. fresh thyme leaves
2 cloves garlic, thinly sliced
1 1/2 pints grape or cherry tomatoes, halved
A fat handful of basil leaves
1 pound fresh mozzarella cheese, very thinly sliced or shredded on the large holes of a box grater
Arugula or baby kale for garnish

Butterfly and pound the chicken cutlet breasts into cutlets. (You can skip this step by using store-made thin-cut chicken cutlets.

In a shallow dish, drizzle the chicken with the oil and season with salt, black pepper, granulated garlic, granulated onion, fennel seeds, red pepper flakes and thyme. Let marinate while you make the sauce.


In a large skillet with a lid, heat the oil (1 turn of the pan) over medium-high heat. Add the sliced garlic and stir for a minute. Add the tomatoes, season with salt, cover and cook to soften the tomatoes, shaking the pan occasionally, 8 to 10 minutes. Wilt in the basil.


Preheat the broiler. Heat a large griddle pan or grill pan over medium-high heat.

Cook the chicken on the griddle pan for a few minutes on each side, then transfer to baking sheets.


Treating the chicken like a small pizza crust, spread with sauce and top with mozzarella.


Broil to brown and melt the cheese.


Serve topped with arugula or baby kale.

Please note: The Jersey Girl uses thin-cut chicken cutlets rather than butterflying and pounding chicken breasts. She also places the prepared chicken on top of the arugula.

Monday, June 17, 2019

Peach Salsa

Peaches may not be your first choice when making salsa. Tomatoes usually hold that honor.

But, I must say this is a surprising win of a combination. My Peach Salsa recipe is bright and refreshing. When you find yourself with more peaches than you can handle, this is a nice little recipe to have up your sleeve.

I served mine with chips, but I do think it would pair nicely with grilled fish or a lime chicken.


Peach Salsa
(Makes 2 cups)

3 ripe peaches
1/4 red onion, minced
1/2 jalapeno, minced
Juice of 1 lime
1/4 cup cilantro, finely chopped
Salt and pepper to taste

Prepare an ice bath in a medium bowl. Fill it with water and ice. Set aside.

With a small paring knife, cut a tiny "X" into the top of the peach.

Bring a medium saucepan filled with water to boil.  Once the water boils, gently place the prepared peaches into the boiling water. Boil for 3-5 minutes so that skin loosens. Using a spider ladle, remove peaches from boiling water and place immediate in ice bath. Let sit for five minutes. Peel the peaches. Dice the peaches.

In a medium bowl, combine peaches, onion, jalapeno, lime juice, cilantro and salt and pepper. Gently stir.

Eat immediately if need be, but it's great to let the flavors blend together for about an hour. You can serve at room temperature or chilled with tortilla chips or with fish or chicken.


Wednesday, June 12, 2019

Always a Hit: Lemon Fusilli with Arugula

It's good to have recipes in your back pocket that are always a hit.

Such is the case with Lemon Fusilli with Arugula. The recipe is courtesy of Ina Garten - the one and only. It is from her cookbook "Barefoot Contessa at Home." I love this cookbook. It is filled with classic recipes that work again and again.

With this pasta dish, I like to use half and half instead of cream. It gives it a lighter touch, I find. I also add pasta water when I'm putting it all together. The recipe instructs you to drain the pasta into a colander, but I prefer to use a spider ladle and just transfer the pasta directly from the boiling water to the saucepan. I like the dish saucier than Ina does. I also do not add the slices of lemon for garnish at the end.

This dish works as a wonderful main, but it also accompanies chicken or salmon very nicely.

If baby arugula is dodgy in your market (I find that this happens a lot with arugula), you could substitute baby spinach or even baby kale, but those flavors are much stronger than arugula. I love my greens so it all works for me.

And of course if you don't have fusilli on hand, other short pastas work nicely like orrechiette or mezze rigatoni.

And please note: I use waaaaaaaaay more garlic than two cloves. That's the Italian in me. Ha.


Lemon Fusilli with Arugula
Serves 4 to 6
From "Barefoot Contessa at Home"
By Ina Garten

1 Tbsp. good olive oil
1 Tbsp. minced garlic (2 cloves)
2 cups heavy cream
3 lemons
Kosher salt and freshly ground black pepper
1 pound dried fusilli pasta
1/2 pound baby arugula (or 2 bunches or regular arugula, stems removed and leaves cut into thirds)
1/2 cup freshly grated Parmesan cheese
1 pint grape or cherry tomatoes, halved

Heat the olive oil in a medium saucepan over medium heat. Add the garlic, and cook for 60 seconds, then add the cream, the zest and juice of two of the lemons, 2 teaspoons salt and 1 teaspoon pepper. Bring to a boil, then lower the heat and simmer for 15 to 20 minutes, until it starts to thicken.

Bring a large pot of water to a boil. Add 1 tablespoon salt and the pasta, and cook al dente according to the directions on the package, about 12 minutes, stirring occasionally. Drain the pasta and return it to the pot. Immediately add the cream mixture and cook over medium-low heat for 3 minutes, until the pasta has absorbed most of the sauce. Pour the hot pasta into a large bowl and add the arugula, Parmesan and tomatoes. Cut the last lemon in half lengthwise, slice it 1/4-inch thick crosswise, and add a few slices to the pasta. Toss well, season to taste and serve hot.

Please note: The Jersey Girl uses half-and-half instead of cream to make the sauce. She also adds pasta water to make the dish saucier. 

Monday, June 10, 2019

Dessert Mashup: S'mores Brownies


Nothing says summer like S'mores. Synonymous with camping, the tasty treat featuring graham crackers, marshmallows and chocolate is traditionally cooked over a fire on a stick.


But this version  uses the oven, baby. And there is a layer of brownie in between the graham cracker and the marshmallow and chocolate chips. Amazing.

The best part is you don't have to actually sleep in a tent in a forest surrounded by creatures. Yay. But if that's how you roll, go for it, doll.

My pro-tips for this dish: Keep a watchful eye on your broiler. It can go to hell really fast when a broiler is involved. Let these cool for a long time before cutting into them. Be sure to check the bottoms of your treats for foil. And make sure you spray every inch of the foil with the cooking spray so that the brownies come off the foil nicely.


For another mind-blowing s'more-inspired recipe, check out my amazing S'mores Bars. These are the greatest dessert ever.

S'more Brownies
www.theverybestbaking.com

Makes 30 brownies

Nonstick cooking spray
9 broken in half (18 pieces) whole graham crackers, divided
1 package (18.3 oz.) traditional 13 x 9-inch chewy fudge brownie mix
1/4 cup water
2/3 cup vegetable oil
2 large eggs
2 cups (12-oz. pkg.) Nestle Toll House semi-sweet chocolate morsels, divided
2 cups miniature marshmallows

Preheat oven to 350 degrees Fahrenheit.

Line 13 by 9-inch metal baking pan with foil leaving an overhand on two sides. Spray foil with nonstick cooking spray.

Place 15 graham cracker halves onto bottom of pan overlapping slightly. Break remaining graham cracker halves into 1/2-inch pieces; set aside.

Combine brownie mix, water, oil and eggs in medium bowl until blended. Stir in 1 cup morsels. Spread over graham crackers in pan.

Bake for 25 to 30 minutes or until wooden pick inserted into center comes out still slightly sticky; remove from oven.

Preheat broiler.

Sprinkle remaining graham cracker pieces and marshmallows over warm brownies. Broil for 30 to 45 seconds or until marshmallows are light brown. Watch carefully as browning occurs very fast! A handheld kitchen butane torch can be used as well. Remove from oven to wire rack. Sprinkle immediately with remaining 1 cup morsels.


Cool for at least 1 hour at room temperature. Lift out by foil edges to cutting board. Carefully remove foil. Cut into bars with wet knife. Store in tightly covered container.

Friday, June 7, 2019

Summer Salad Starring Green Beans

Tis the season for BBQ's and potlucks. Quick and easy make-ahead salads are always a must for these types of get togethers.

Pecorino and Bean Salad combines green beans, cannellini and rosemary into a fantastic side that pairs nicely with just about everything: Meat, fish, chicken. Whatever floats your boat. It is light and refreshing, and the cheese adds a nice touch. 

Green beans are easy to find as the weather gets warmer. I hope this makes it to your summer get togethers. Your guests will love it!


Pecorino and Bean Salad
4 to 6 servings
From "Giada at Home"
By Giada DeLaurentiis

12 ounces green beans, trimmed and cut into 1-inch pieces (about 2 cups)
3 Tbsp. olive oil
3 garlic cloves minced
2 tsp. finely chopped rosemary leaves
1 (15 ounce) can cannellini beans, rinsed and drained
5 ounces Pecorino Romano cheese, cut into 1/4-inch chunks (1 cup)
1/4 cup chopped fresh flat-leaf parsley
1/4 tsp. salt
1/4 tsp freshly ground black pepper

Bring a medium saucepan of salted water to a boil over high heat. Add the green beans and cook for 3 minutes, or until a vibrant green but still crisp. Drain and place in a bowl of ice water for 1 minute. Drain and set aside.

In a small nonstick skillet, heat the oil over medium-low heat. Add the garlic and cook until fragrant, but not brown, about 30 seconds.  Remove the pan from the heat. Stir in rosemary and let cool slightly.

Combine the green beans, cannellini beans, Pecorino cheese, parsley and salt and pepper in a serving bowl. Add the garlic-rosemary oil and toss well, until all of the ingredients are coated.

Tuesday, June 4, 2019

Beef Stir Fry

Parents often say their kids won't eat anything. Fights. Hunger strikes. Terrorist negotiations. Oh yes, dinner can be a nightmare for many adults trying to just get through to bedtime with their beloved offspring.

Allow me to present a solution, dear desperate readers: Stir fry. Yes, stir fry them into a frenzy of eating and not complaining.

My son is now 8. While he is very open to trying new foods and in general digs dinner time, there certainly are nights where he doesn't even want to eat dinner. But honestly, doesn't that happen to all of us, no matter what our age? There are times I do not want to eat. There are times my husband doesn't want to eat. So if my little guy just doesn't have an appetite, I get it. There's no need to argue. Some nights,he may just want a snack and there are a few nights that he is not grooving on what the main dish is. Even in these instances there is usually something that he will gnaw on at my table: Salad, bread, rice. He'll live. That's the point.

One of the many hits in my house with kiddo is stir-fry. Yes, I bust out my wok, and he is totally like, "Mom, let's DO THIS!" He even houses the hot and sour soup I occasionally make to go with stir fry dins. Yay!


Here is a steak and mixed veggie stir fry I make when my husband travels. My husband would love it, too, but he tries to avoid red meat, so I whip it up when he's on the road. My son has yet to taste the broccoli but one day, people. One day....

I served this with white rice, but of course you could do brown rice. And I think it would be really nice with ramen noodles, too. You can mix and match whatever veg your heart desires. My mix has bell peppers, broccoli, carrots and onions. I top it all with scallions as part of a grand finale sitch.

The five spice Chinese seasoning is easily found in any grocery store in your spice aisle. McCormick makes one.


Beef and Mixed Veggie Stir Fry
Makes 4-5 gigantic portions

1 1/2 pounds sirloin steak, trimmed of fat and cut into strips
1 small red bell pepper, sliced into strips
1 small green bell pepper, sliced into strips
1 carrot, peeled and slicked into matchsticks
1 small onion, sliced
12-14 broccoli florets
2 cups beef broth, warmed in a microwave safe measuring cup or in a small pot on the stove
2 Tbsp. cornstarch
2 Tbsp. Chinese 5-spice seasoning
3-4 Tbsp. soy sauce
Fresh ground pepper
1 Tbsp. clear vegetable oil
For serving: Chopped scallions, soy sauce to taste, sirachi if desired

In a wok or large rimmed frying pan over medium-high heat, add vegetable oil. Once hot, add steak. Stir frequently so that all the meat browns. Cook for about 4-5 minutes. Using tongs, remove cooked steak to a dish.


Add all of the vegetables to the wok. Stir frequently so that all of the vegetables fry quickly. Add the meat back to the wok. Season with Chinese 5-spice seasoning, soy sauce, and black pepper. Stir again.


Whisk the cornstarch into the warmed broth. Slowly add broth mixture to wok.


Bring to a gentle simmer over medium heat. Cover with lid for a few minutes to cook through.


Top with chopped scallions and more soy sauce, to taste. For spiciness, drizzle with sirachi

Serve with three cups cooked rice. I like basmati.


Sunday, June 2, 2019

Classic Calzone

So you're itching for a calzone. I mean, who isn't?

Put the phone down. Forget about the menu. Do you really need all of that extra grease and salt?

But listen to me, and listen closely: You can make the calzones yourself. I swear to Baby Jesus.


Just buy the pizza dough. I mean, honestly, you should always have some balls of pizza dough rolling around your freezer for moments like this.

And for the love of god make the pizza sauce. It's easy. See the recipe below. It tastes way way way better than that jarred mess in your cupboard and it has none of the chemicals or salt. You can just throw in a pinch of salt, and it tastes fab. Trust me!

 Below is my classic calzone, but you can always put your own spin on this with additional fillings. For the meats: Prosciutto, pepperoni, well drained and already cooked sausage. For veggies, you could do some baby spinach or fresh chopped tomatoes or some sautéed bell peppers. Just remember, a little goes a long way in a calzone because the star of the show is the cheese. I don't mess with the traditional trifecta of ricotta, mozzarella and parmigiano, but you do you, Boo.

Here's a link to my wild and crazy calzone: Spinach and Tomato Three Cheese Calzones.

And here's my classic way below:

Classic Calzones
Makes 4

1 ball pizza dough
15 ounces ricotta cheese, room temperature
1 cup fresh mozzarella, diced
1/2 cup grated parmigiano cheese
4-6 cloves of garlic, minced
1 Tbsp. chopped fresh parsley or fresh basil or both
Salt and pepper to taste
Pizza sauce, warmed (Recipe below)

Preheat the oven to 400 degrees Fahrenheit.

Lightly grease one or two baking sheets. (I prefer two.) Cooking time will be longer, if you use two sheets.

In a medium sized bowl, combine the ricotta, mozzarella, parmigiano, minced garlic, parsley, basil, salt and pepper. Combine gently with a spoon. Set aside

On a lightly floured surface, divide dough into four equal portions. Roll into balls. Roll out balls into four even circles with a rolling pin. Flip the dough and add a sprinkle of flour as needed so that it doesn't stick.

Dividing the filling evenly among four portions, spread the filling onto half of each dough circle and leave a 1/4-inch border of dough around the filling.


Gently fold over the remaining half of the dough to cover the filling. Fold the edge to seal in the filling, pinching with your fingers or a fork.

Place calzones on baking sheets. Gently prick the dough with the tines of a fork.  Brush the calzones with a little olive oil.


Bake the calzones for 18-25 minutes or until golden brown. If using two baking sheets, flip the sheets halfway while baking.


Serve with warmed pizza sauce. Recipe below:

Pizza sauce
2 Tbsp. olive oil
1 28 ounce can of crushed tomatoes (I like Cento)
6 cloves of garlic minced
1/4 tsp. crushed red pepper flakes
1/2 tsp. oregano
Handful of shredded fresh basil
Salt and pepper to taste

For the sauce:

In a medium saucepan over medium heat, add olive oil. Add garlic, red pepper and oregano. Cook for 2-3 minutes until fragrant. Add crushed tomatoes, salt and pepper and basil. Bring to a simmer. Cover partially and cook over low heat for 30-40 minutes, stirring occasionally.

Recipe may be doubled, and remaining portions may be frozen for later use.

Caesar salad is a great side with the calzones!