Thursday, July 30, 2020

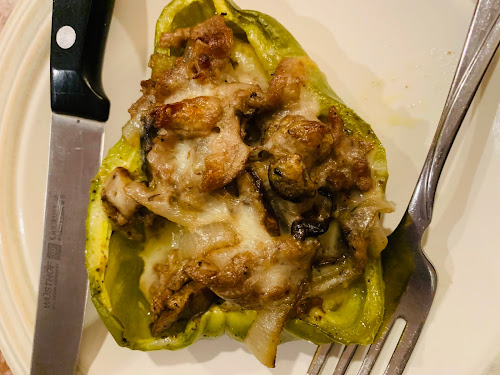
Cheesesteak Stuffed Peppers

I don't order takeout frequently, but when I do it's often a cheesesteak. Yummy!

Here is a stuffed pepper recipe inspired by the delicious sandwich that is a mainstay in South Jersey and Philadelphia. 

Old Neighborhood shaved beef is the product I use for this dish. You can use any steak sandwich style meat or even ground beef.

Be sure to have your oven mitts on hand because you go in and out of the oven a bit to prepare this. 

This is a good one for people cutting out carbs. But the peppers are quite filling, in my petite girl opinion. 


Cheesesteak Stuffed Peppers
Makes 8 halves

4 bell peppers, cut in half from top to bottom, seeded
1 lb. package shaved beef, (I like Old Neighborhood)
1 medium onion, sliced
2 cups white mushrooms, chopped
1 tsp. garlic powder, divided
Salt and pepper
2 cups shredded mozzarella
3 Tbsp. extra olive oil, divided 
Cooking spray

Preheat oven to 400 degrees Fahrenheit.  

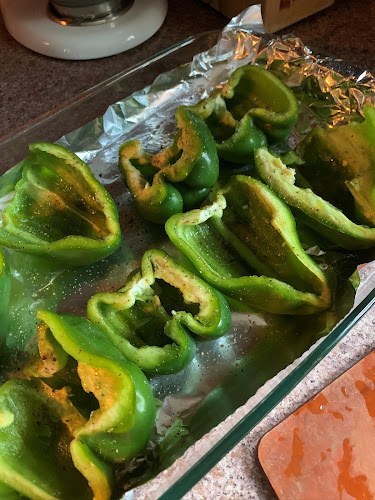
Line a 13-by-9 inch baking dish with aluminum foil. Spray evenly with cooking spray. Place pepper halves cut side up onto baking sheet. Brush with olive oil, about a tablespoon's worth for all eight halves, give or take. Sprinkle with salt and pepper. Bake uncovered for 20 minutes.


While the peppers cook, heat a large skillet over medium high heat. Add a drizzle of olive oil. Add meat. Season with 1/2 tsp. garlic powder, salt and pepper. Brown the meat. Once browned, remove to a large mixing bowl.


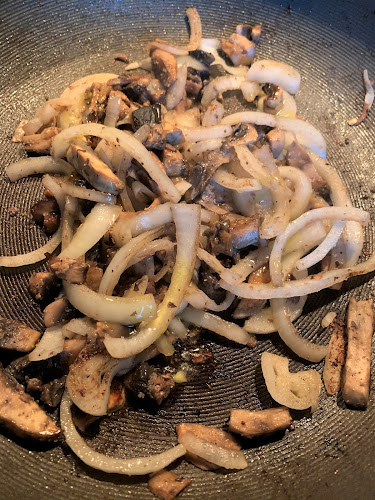
In the same pan, add the mushrooms. Cook for about five minutes. Add onions. Season with remaining garlic powder, salt and pepper. Cook until onions are soft, about 8 minutes. Once veggies are cooked, add to bowl with meat. Toss gently with tongs or a spoon.


Remove peppers from oven. Lower oven temperature to 375 degrees.


Carefully (the pan and peppers are hot!) fill the peppers with the meat and veggie mixture. Tongs work nicely for this task. Top filled peppers with shredded mozzarella, about 1/4 cup each. Drizzle with a little olive oil.


Cover pan with aluminum (use oven mitts!). Return pan to 375 degree oven and cook for 30 minutes. Remove aluminum foil and cook for 10 more minutes uncovered.


Dig in!

Tuesday, July 28, 2020

Celebration Cake: Yellow with Chocolate Icing


"A party without cake is just a meeting."

So says Julia Childs, which means this statement is 100 percent fact.

The fave cake in these parts is yellow with a fab chocolate frosting. It holds beauty and comfort. Here she is:


 I always rock out some rainbow sprinkles on this. My son used to call the bundt-style cake a doughnut cake when he was a toddler. So cute.

And here's my secret about this cake: It originates from a box of cake mix. Listen up, all y'all who think making cakes is hard work: The recipes that follow are from the Cake Mix Doctor aka Anne Byrne. This amazing lady teaches us home cooks how to gussy up a box of cake mix that will wow a crowd. And her frostings are always a homerun. 


Next time you have a celebration that needs something sweet and special, be sure to make this Basic Sour Cream Yellow Cake. There is nothing basic about it! I love how homemade and imperfect it looks, which makes it perfectly perfect in my book.


Basic Sour Cream Yellow Cake
From "The Cake Mix Doctor"
By Anne Byrn
Serves 16

Vegetable oil spray for misting the pan
Flour for dusting the pan
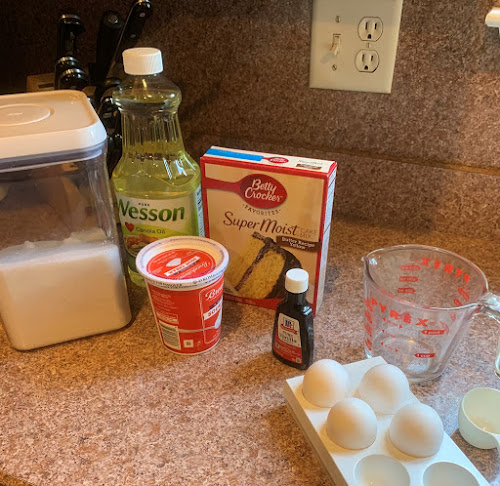
1 package (18.25 ounces) plain yellow cake mix
1 cup sour cream
1/3 cup vegetable oil, such as canola, corn, safflower, soybean or sunflower
1/4 cup water
1/4 cup sugar
4 large eggs
1 tsp. pure vanilla extract

Place a rack in the center of the oven and preheat the oven to 350 degrees Fahrenheit. Lightly mista 10-inch tube pan with vegetable oil spray, then dust with flour. Shake out the excess flour. Set the pan aside. 


Place the cake mix, sour cream, oil, water, sugar, eggs and vanilla in a large mixing bowl. Blend with an electric mixer on low speed for 1 minute. Stop the machine and scrape down the sides of the bowl with a rubber spatula. Increase the mixer speed to medium and beat 2 minutes more, scraping the sides down again if needed. The batter should look thick and smooth. Pour the batter into the prepared pan, smoothing it out with the rubber spatula. Place the pan in the oven.


Bake the cake until it is golden brown and springs back when lightly pressed with your finger, 50 to 55 minutes. Remove the pan from the oven and place it on a wire rack to cool for 20 minutes. Run a long, sharp knife around the edge of the cake and invert it onto a wire rack, then invert it again onto another rack so that the cake is right side up. Allow the cake to cool completely, 30 minutes more. Frost as desired.


Store the cake, unfrosted, covered in aluminum foil, at room temperature for up to 4 days or in the refrigerator for up to 1 week. 

Martha's Chocolate Icing
From "Chocolate from the Cake Mix Doctor"
By Anne Byrn
Makes 1 and 1/2 cups, enough to frost a bundt or tube cake, 24 cupcakes or a 13-by-9-inch cake

1 cup granulated sugar
5 Tbsp. butter
1/3 cup whole milk
1 cup semisweet chocolate chips


Place the sugar, butter and milk in a medium-size saucepan over medium-high heat. Stir until the mixture comes to a boil, 3-4 minutes. Still stirring, let the mixture boil until the sugar dissolves, 1 minute. Remove the pan from the heat.


Stir in the chocolate chips and continue to stir until the mixture is smooth and the chocolate has melted.

Spread the icing over the cooled cake or cupcakes of your choice.


Monday, July 20, 2020

Tomato Salad in the Style of Susan

The basic formula for a tomato salad is as follows: Sliced tomatoes, mozzarella, fresh basil, salt, pepper, olive oil.

But I make mine with a little bit extra. 

This salad is nice to make ahead. You just let it hang out at room temp and magic happens. The juice is so yummy for bread dipping.

I like how all the colors of the veggies complement each other. My recipe is for two people. But you can easily multiply the quantities for a bigger crowd. I like to place everything on a flat platter for presentation purposes.

Here you go.


Susan's Tomato Salad
Serves 2

1 large tomato, sliced into 1/4 inch-thick circles
4 slices of fresh mozzarella
1/4 small red onion, sliced thin
1/2 small green bell pepper, sliced thin
1 celery stalk, chopped
2 Tbsp. fresh basil, chiffonade, 
1/4 tsp. garlic powder
1/4 tsp. salt
Black pepper to taste
2-3 Tbsp. extra virgin olive oil

On a serving plate, place the tomatoes. On top of the tomatoes, place the mozzarella evenly. Top with red onion slices, bell pepper slices and celery slices. 

In a small bowl, mix garlic powder, salt and black pepper to combine. Sprinkle mixture evenly over the veggies. Drizzle with olive oil. Top with basil chiffonade. Garnish plate with more basil if desired. Let plate sit uncovered for at least an hour before serving. Be sure to serve with fresh bread!

Friday, July 10, 2020

Zucchini and Eggs

I am a gal who must eat breakfast, but it is usually small. So here is a bigger breakfast for me: Zucchini and eggs. This also makes a fab lunch. 

I love it when zucchini is in season, which is totally NOW. But, you know you can find zucchini pretty much all year so make this whenever your heart desires. 

Chop up your zucchini small so that it cooks quickly. I cook my eggs over a lower heat because that helps with the creaminess of scrambled eggs. Low and slow, baby. I add cheddar cheese at the end, but mozzarella would be fab, too. 


Zucchini and Eggs
Serves 1
1/2 zucchini, chopped small (about a cup)
2 Tbsp. minced onion
2 extra large eggs
Splash of milk
Salt and pepper to taste
1 Tbsp. butter
1/4 cup (or a handful) shredded cheddar or mozzarella cheese


In a medium pan over medium heat, melt butter. Add onion and zucchini. Season with salt and pepper. Saute over medium heat for about 5 minutes, stirring occasionally.

Meanwhile, in a separate bowl, lightly whisk together eggs, milk and salt and pepper to taste.


Once the zucchini and onion are lightly browned and soft, add the egg mixture to the pan. Lower heat to cook the eggs slowly. Stir frequently. Right before eggs are finished cooking, stir in cheese.

Serve with toast or chopped tomato or both!

Tuesday, July 7, 2020

Fancy Lunch: Smoked Salmon Wraps

Now this is a perfect lunch.


My smoked salmon wraps are just what a girl needs for mid-day grazing by the pool, preferably with a champagne or spritzer in hand. But usually for moi it's just a good ole bottle of H2O.

I gave up lunch meats for Lent this year, and I have been really holding to it well past the 40 days of my vow to give up a lil somethin' somethin. It forces me to get more creative in the kitchen, and it is ridding my life of excess salt which in turn gives me positive energy and fantastic body feelings, so I'm staying with the no lunch meat thang.

If you are a meal prepper, you could totally make a stash of these wraps for the week. Letting them sit in the fridge lets them hold up better.

The smoked salmon works beautifully with the chives and cucumber and arugula. And I love the color!

I used whipped cream cheese for its ideal spreading capabilities. If you are using regular old cream cheese, just make sure you let it sit out to get to room temp.


Smoked Salmon Wrap
Serves 1 fabulous person

1 large tortilla (plain, spinach, whole wheat) (49 grams)
2-3 Tbsp. whipped cream cheese
1 tsp. chopped chives
4 slices (2 oz.) thinly sliced smoked salmon
6-8 thin cucumber slices
1/2 cup baby arugula

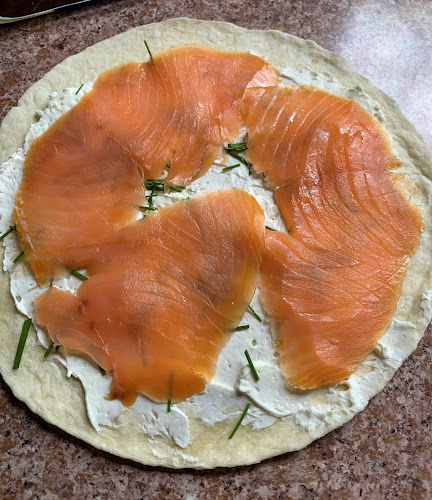
On one side of the tortilla, spread whipped cream cheese with a spreader or butter knife. Sprinkle evenly with chives. Place smoked salmon slices atop the cream cheese and chives.


Arrange cucumber slices on top of the smoked salmon, spacing out evenly. Place arugula on top of the cucumber slices.


Roll up into a log. Cut in half. Chill for thirty minutes and enjoy!


Cover

Monday, July 6, 2020

Peas and Thank You: Risi e Bisi

This dish is so worth it. 

Risi e Bisi translates to rice and peas. Currently, fresh peas are in their gorgeous green glory in the farm markets in my parts. But the season is about to end here. If you can get your hands on the cute little pods of deliciousness, please please do so.


This dish was outstanding. My son really loved it, and I could see small children really loving it. Risotto is so comforting to eat.

Now this is not a quick in-and-out kind of cooking. You need to take your time and enjoy the process. By process, I mean stirring. Also, shelling the peas is not a speedy kind of task. Embrace it, baby. 

This recipe comes from a really cool cookbook I have called Polpo. It is written by a Brit, so the measurements are in grams and liters. I will provide the American translations to ease the situation for my fellow U.S. cooks.

This dish is so amazing simply because of its simplicity. Fresh peas were an eye-opener to my taste buds. They are so much crisper and sweeter than their frozen brethren. I hope you get to make this magic!

I went vegetarian and did not use pancetta. I use Arborio rice although the author of the recipe recommends carnaroli. I cut this recipe in half as I only have three peeps in my fam. The recipe makes enough for six. Here it is straight from the cookbook, which is totally amazing!


Risi e Bisi
For six
From "Polpo" by Russell Norman

2 kg (4.4 lbs) fresh peas in their pods
2 onions, 1 cut in half and 1 finely chopped
Flaky sea salt and black pepper
50 ml (3 Tbsp.) extra virgin olive oil
60g (4 Tbsp.) unsalted butter
150g (5 ounces) small pancetta lardons (optional)
400 g (14 ounces) risotto rice - carnaroli is best
1 handful of mint leaves, chopped
1 handful of flat parsley leaves, chopped
1 large handful of grated Parmesan


Shell the peas in advance because you are going to make a simple stock with empty pods. In a large pan, bring 2.5 litres of water to the boil. When all the peas are shelled, place the pods (but not the peas) in the pan with the halved onion. (Move the freshly podded peas to one side, out of temptation's way.) Bring the pods to the boil for only a minute or two and then take off the heat. Remove and discard the pods. Now you have your stock for making the risotto.


Sweat the finely chopped onion with a few pinches of salt in the olive oil and half the butter in a heavy-based pan. This should be a slow process on a low heat - you don't want it to turn brown at all. The onion should become clear, shiny and translucent. Add the pancetta lardons, if using, and continue to saute for a few minutes. Add a twist of black pepper.


Now add the rice and stir slowly for 2 minutes. You want to coat every grain in the oil and butter so that everything looks glossy and nothing is sticking. With a large ladle, put just enough stock in the pan to cover everything but not drown it. The contents will let off a satisfying hiss and a cloud of steam. This first ladleful will be absorbed and evaporate very quickly. Add another. If the pan continues to bubble, the heat is too high. Turn it down and stir slowly.


For the next 15 minutes or so you should continue to stir slowly and add a ladleful of stock every time the rice looks less than wet.  You are continually letting the rice absorb the liquid and allowing the grains to release the starch. Towards the end, add the peas, half the chopped mint and half the chopped parsley. Taste and add more salt if needed, but not too much. Remember that the Parmesan will add a little salt to the balance.


Don't be a slave to the clock; taste your grains to know when they are done. They should still have a little bite to them. When they are ready, make sure the mixture is nice and runny. Unlike a regular risotto, Risi e Bisi should be more liquid, rather like a thick soup. Take off the heat. Gently stir in the Parmesan, the remaining butter, mint and parsley. Cover the pan and let it rest for a few minutes, and then serve in wide shallow bowls.