Thursday, October 29, 2009

Game Day Eats


Turkey burgers are ready to be served.

World Series Game 1.

Phillies beat down Yankies, natch.

To help my main man Mark stay calm, I feed him my magical Spicy Turkey Burgers and Broccoli Soup.

Broccoli is known to help those with high blood pressure. My calm-on-the-outside but bursting-with-emotion-on-the-inside husband totally has the high blood pressure.

And, my medical guess is it goes sky high during these World Series games. For a person who LOVES baseball with all of his being, I don’t comprehend the anxiety he feels at every waking moment during the post season. But, I guess his jaw clenching, pursed brow and nervous energy are all part of his passion.

I of course, with glass of wine in hand, declare to the husband the Phillies are totally going to kick New York’s ass minutes before the first pitch is thrown. This boastful moment, I assure you, was most likely interspersed with various words not suitable for publication because I am part-trucker. But at least, I got the husband to crack a smile. Even Utley’s two homeruns and Lee's behind-the-back catch didn’t soothe Mark’s nerves.

Now, for those of you who are haters of broccoli and would rather eat the beef burger as opposed to a leaner turkey burger: All I’m saying is give the menu a chance.

My husband is no fan of broccoli. No sir.

But he totally loves the broccoli soup. He houses it. Which is awesome because it’s pretty much just a big bowl of pureed vegetables. There is some butter and a teeny bit of half-half in the mix, but whatevs. The soup is uber yummy.

In case you haven't noticed, I'm not exactly a health nut who's all anti-this and against that. If you want butter, eat some damn butter.

My turkey burgers are way spicy. That’s how we roll here. Fresh jalapeno and hot sauce are a big part of my burger. And, I top it with pepper jack cheese. But you certainly can cut back on the hot factor if you can’t handle it. The burger is loaded up with fresh red bell pepper, garlic, parsley and thyme so that it has lots of taste. You don’t need ketchup to jazz up this burger.

It’s definitely not boring.

Just like the World Series.

Go Phils!


Broccoli Soup is on the table.


Broccoli Soup
Broccoli florets from 4 to 5 big stalks, chopped
Two carrots, peeled and sliced
1 medium onion, chopped
3 Tbsp. butter
2 Tbsp. flour
4 cups chicken broth, I like Swanson
1 cup water
¼ half-and-half
Salt and pepper
Grated cheddar cheese, to serve


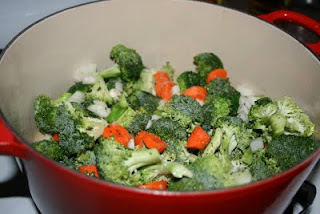
The vegetables cook up.

In a large soup pot, melt the butter over medium heat. Add broccoli, carrots and onion. Season with salt and pepper. Saute for about 10 minutes. Once the vegetables are tender, add flour. Stir and cook for a minute.

Add chicken broth and water. Bring to a simmer. Simmer uncovered, stirring occasionally for 15 to 20 minutes. Add half and half. Stir.


Pureeing soup is easy with
an immersion blender. You can
use a standard blender if that's what you have.

To puree: Place an immersion blender into the pot until the mixture is smooth. If you don’t have an immersion blender, you can ladle the mixture into a standard blender and pulse until smooth.

To serve, top with fresh black pepper and your favorite grated cheddar cheese.

Spicy Turkey Burgers
(Makes four)

1 pound ground turkey
1 jalapeno, finely chopped
3 cloves garlic, finely chopped
¼ red onion, finely chopped
½ small red pepper, finely chopped
2 Tbsp. parsley, finely chopped
2 to 3 tsp. hot sauce
1 tsp. dried thyme
1 Tbsp. Montreal steak seasoning
4 slices pepper jack cheese
4 crusty Kaiser rolls
Olive oil

Mix the first nine ingredients in a bowl. Let stand for at least 30 minutes. You can do this several hours ahead and cover with plastic wrap.

Form four burgers by dividing the meat mixture and shaping into round patties. Brush each burger with olive oil.

Preheat a grill pan over medium-high heat. Place burgers on hot pan and cook for 6 to 7 minutes on each side. Once both sides are cooked, place a piece of cheese on each burger for the last minute of cooking.

Serve on rolls.

Tuesday, October 27, 2009

Bearing Baked Ziti


A dish of baked ziti before being baked. This is a great dish
to make ahead of time.

It’s been a big week for my fam.

My sister Michele had a baby. Lucia joins sisters Chiara, Mia and Sophia.

Yes, dear readers, four girls.

My family is full of GIRL POWER.

So, the event totally calls for the cooking prowess of me and the fellow familia cooking goddesses – Mom and Aunt Lorraine – since my sister is kind of busy welcoming her beautiful bundle of joy into her bustling home and being Super Mom to all the girls.

So, baked ziti it is.

“That is SO Carmella Soprano of you.”

Of course those are the words of my sister Monica. I hadn’t yet had my coffee when she exclaimed this on Monday morning before our weekly panel discussion of “Mad Men.”

“Really?!? I don’t remember Carmella always whipping up ziti,” I say, fumbling for the Krups.

Heavy gold jewelry, striking bitch face (Tony deserved it, OK), gossiping with the wimmins, and the ability to drop a bundle of coin on a fabulously gaudy New Jersey home. These facets of Carmella I CLEARLY remember.

I could try to confirm Monica’s ziti claims by rewatching past epis on Comcast On Demand, or as my mom says, In Demand, but chances are I won’t.

Love “The Sopranos,” but that show gave me major anxiety. Especially when Little Steven put a million bullets through the heart of Adriana in the woods off the Turnpike. May she rest in peace. I’m still bitter about her death. And it’s been how many years?

Anyway, they say that new moms welcome home-cooked food with open arms.

And my niece Chiara totally digs on baked ziti.

Baked ziti totally stands the test of time. Plus it travels well. Plus it can feed a whole bunch of people, especially a house full of Little Women and my brother-in-law Bob.

What’s not to love?!

The recipe is from the side of a box. Aren’t those the best recipes? I have to admit though, it’s from San Giorgio, and for this batch I used Barilla. But make it with your fav brand. Also, I prefer penne to ziti. Penne has the lines. You could also use rigatoni or shells.

Baked Ziti
Recipe from the side of a box of San Giorgio brand ziti

Ingredients:
3 tablespoons grated Parmesan cheese
6 cups (16 oz.) ziti or your favorite short-cut pasta, uncooked
3 cups marinara sauce, divided
1-3/4 cups (15 oz.) ricotta cheese
2 cups (8 oz.) shredded mozzarella cheese
1/4 cup chopped fresh parsley or 1 tablespoon dried parsley flakes
1 egg
1 teaspoon dried oregano leaves
1/2 teaspoon garlic powder
1/2 teaspoon salt
1/4 teaspoon ground black pepper

Heat oven to 375°F.

Cook pasta according to package directions for 9 minutes; drain.

In large bowl, stir together hot pasta, 1-1/2 cups spaghetti sauce, ricotta cheese, mozzarella cheese, parsley, egg, oregano, garlic powder, salt and pepper.

In 13 x 9 x 2-inch baking dish, spoon pasta mixture; top with remaining 1-1/2 cups sauce. Sprinkle with Parmesan cheese; cover with foil. Bake 30 minutes or until hot and bubbly. 10 servings (1 cup each).

MAKE-AHEAD DIRECTIONS: Prepare recipe as directed, but do not bake. Cover with plastic wrap, then foil. Refrigerate up to 24 hours or freeze up to 2 months. Thaw frozen version in refrigerator overnight. Remove plastic wrap; replace foil. Bake as directed, adding about 10 minutes to baking time.

Sunday, October 25, 2009

Gourmet, You Will Be Missed


I’m in mourning, dear readers.

Actually, I’m kind of ticked off.

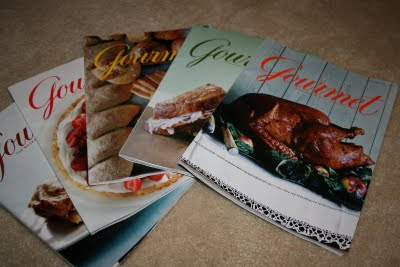
I’ve recently learned that this will be the first Christmas since being hitched that I will not receive a copy of Gourmet magazine’s amazing cookie edition.

In case you haven’t heard, the suits at Conde Nast have kicked Gourmet to the curb.

Curses!!!!!!!!

Being the news junkie that I am, I learned of the demise of Gourmet as soon as it was announced earlier this month.

But I thought to myself, “At least there’s the holiday issue. They can’t take the holiday issue from me.”

But, they did.

Bastards.

This also means that I received my last Gourmet magazine just last week. The Thanksgiving turkey mocked me from the cover.

I know what you’re thinking: “Who reads magazines anymore?”

I do, dear readers. I DO!!

Books, too. Lots and lots and lots of books and the newspaper. And I use…..a dictionary when I need to know the meaning of a word. I use the ones that are bound and have a hard cover and have that awesome old-book smell that I breathe in when I visit the library.

I’m also very anti-text, and I rarely answer my cell when I remember to turn it on.

GASP!

I know, right? It’s not like I look and/or act like I’m 100 years old. Hello, I just got carded last week. Honest. Ask the husband.

I guess there’s a bit of old-fashioned inside of me.

Or I’m just fabulous and stuck in the wrong time period. Although, watching the women do their thang on “Mad Men” makes me appreciate all gals of a certain age.

Anyway, Gourmet’s been around for 70 years.

Not too shabby.

But my delusional self always thought I’d be reading Gourmet for 70 years. Whenever I make something from the mag I feel so accomplished. And I so enjoyed reading the articles about food trends, politics, techniques, ingredients while blocking out Comcast SportsNet and enjoying a bottle of wine. The photography was gorgeous. The tips were fantastic.

Le sigh. Fortunately, many recipes will live on at Epicurious.com.

One of my favorite recipes, Pumpkin Spice Bundt Cake with Buttermilk Icing , has a fond place in my Jersey Girl heart. I made this for my inlaws for Thanksgiving 2005. It was AWESOME. I hope you are able to give it a try.

And fortunately, I saved the Christmas editions of Gourmet from years past. So, I guess I’ll be digging into my archives for this year’s baking.

My Current Wishlist

I often imagine what my Dream Kitchen would look like. Six-burner stove in an amazing shade of red. A walk-in pantry. Two ovens. Two refrigerators. Copper pots. Le Creuset everything. Many wooden implements.

Le sigh.

A girl can dream, can't she?

So, feeding my dreams is this month's Williams-Sonoma catalogue.

On my wishlist:


Le Creuset Heritage Oval Cocotte, 4-Qt. This had me at hello when I opened my mailbox. Love it! I don't own any Le Creuset in Flame, so I think I'm about due.  This item is so fabulous, I think it's about all I want.

Thursday, October 22, 2009

Product Review: Le Creuset Silicone Spatulas


Why I love them: These colorful cooking tools are made of awesome. They come in a variety of colors: red, green, yellow, white, sparkly (my fav) and sizes. They are very durable and clean up beautifully.

The back story: After ditching my el cheapo spatulas that I received from my bridal shower and/or purchased as a newlywed, I started doling out bigger bucks for a fabulous Le Creuset spatula. My original spatulas were fraying and bending. Ick Nast! As an avid baker, I knew it was high time to up the ante on this important tool for awesome treats. Unfortunately, the cheap spatulas lasted about a year or so. My Le Creuset spatulas are five years strong and still going.

Uses: Depending on your size and shape, the spatulas are great for folding and stirring ingredients, removing batter from bowls, getting condiments out of jars and bottles, smoothing batter out in a pan.

Pros: Durable, heat resistant, colorful, many different shapes and sizes for different needs, versatile, pretty.

Cons: Pricey.

Cost: $9-$14

Where to buy: Sur la Table

Wednesday, October 21, 2009

Monica: Queen of the Roaster


Mark, Suzie, Monica and Jason doing what we do best: Drinking and
eating on a cruise during a hurricane. Good times.

My little sister is not happy with me.

“Why haven’t you written about ME on your blog, Suzie?”

(Silence)

(Mumbling)

I got nothin.’

The pressure, Monica, the pressure!

So, yeah. I totally shoulda, coulda, woulda written about my little sis and her majorly delish roasted chicken when I finally, FINALLY made one this summer after watching “Julie and Julia” with Aunt Lorraine.

I told Mark the roasted chicken was so in honor of Monica and Julia and all things chickeny and roasted, but I did not write about it, dear readers. Nor, did I or Husband shoot any photos. Truth is I was anticipating a major fail.

But……

The chicken rocked.

As Monica says, “Roast chicken is a no-brainer.”

So true, Mon. So true.

Monica thinks it's funny how so many people fear roasting. She will tell you straight up that roasting your dinner makes life a lot easier and the world a better place. Well, maybe I exaggerate. But if you have kiddies in your realm, Monica encourages you to totally roast away.

Last spring, after her baby Jackson was birthed and joined the fam, Mark and I made our annual spring visit to see Monica, husband Jason and baby Jackson, aka Team Kemp, who live outside D.C. After Mark headed back to work, I mean home, I stayed on for some sisterly bonding.

My mission for the week was to cook and clean and fold laundry and be a goddess aunt and sister. (I may have also played a lot of Guitar Hero, sunbathed at the pool, read a novel or two and watched vintage footage of “General Hospital” on YouTube while drinking red wine with my brother-in-law. Isn’t that what Mary Poppins would do?)

One night, Monica rocked out her roasted chicken and gave me a fabulous tutorial. She’s a good teach! She’s also your go-to-gal if you need to organize your closet, your shoes, your life, or if you need input on a fabulous ensemble, or if you must know how to analyze data relating to politics and television. Monica has previously worked as a mac daddy political survey guru. Now, she works for Nielson Media, which is fitting because girlfriend lurves to watch her TV.

We are known to talk on a daily basis about riveting topics such as: celebrity gossip, really good sales, what we’re wearing, work, going out, cooking, and much more.

So, check out Monica’s Amazing Roast Chicken. And just so you know, Monica is a fellow goddess in the kitchen. I will be sharing many more of her recipes and tidbits!

And seriously, Monica, we need some good current pics of us.

Monica’s Roast Chicken
1 whole chicken (3.5 to 4 lbs.)
2 lemons
3-4 sprigs of rosemary
Salt and pepper
1 white onion
Olive oil

Preheat oven to 400 degrees.

Rinse chicken and pat dry inside and out.

Place chicken in pan breast side up.

Season inside cavity with salt and pepper.

Dice up a white onion and scatter it throughout the pan.

Drizzle olive oil and juice from two lemons on the chicken and onions.

Place squeezed lemon halves and rosemary sprigs inside the chicken cavity.

Cover and place in oven.

Remove cover after 30-45 minutes.

Roast for a total of 90 minutes.

Let rest for 5 minutes or so before slicing and serving. Serve with your favorite potatoes, stuffing and vegetables. And don't forget a salad!

Monday, October 19, 2009

Product Review: Harney and Sons Fine Tea


Why I love it: This delish tea by Harney and Sons is amazing. It comes in gorgeous silk bags in a variety of flavas. It truly puts other teas to shame. The Paris flavor is my fav.

The back story: I first came across Harney and Sons Tea as a gift from my mother-in-law, natch. She bought me the Le Creuset tea pot in Sonoma green from Williams-Sonoma. So, with it she included some fabulous tea that smelled intoxicating and came wrapped in silk. No joke. The flavor was Hot Cinnamon Spice. We both came across Harney and Sons Tea while out at dinner in Stone Harbor a few years ago. It was there, at Jays on Third, when Harney’s Paris flavor was bestowed upon me. It’s been love ever since. It had me at first sip. Mark/Santa filled my stocking with a tin of the Harney and Sons Paris variety in 2008. It is my absolute favorite, and I’m hoping for a repeat in 2009. Fortunately, I found the Paris flavor at the Marlton, N.J., Williams-Sonoma store this past spring a few weeks before our trip to Paris. I bought three containers. It tastes heavenly. It’s a black tea that is as mesmerizing as the city.


Pros: Tasty, cute tins, great flavors, aromatic, silk satchels.

Cons: Expensive, hard-to-find.

Where to Buy: Harney and Sons

Prices: $8 for 20 tea satchels. Harney also sells loose teas and tea in teabags, so prices vary. They often offer free shipping when your purchase is more than a certain dollar amount.

Dinner in 10 Minutes


No joke.

It took 10 minutes to prepare dinner tonight.

On the menu: Smoked Salmon Salad.

Yes, I am blessed with a husband who does not require mass quantities of steak and potatoes for dinner to be dinner.

Normally, on Monday nights, I’m dining alone – at about 9:30 p.m. or so. My last student leaves at 9:15.

But tonight is no ordinary Monday, my friends. Tonight is Game 4 of the National League Baseball Playoffs, so Husband somehow got all his work done and was in his manly leather chair by first pitch.

I know my salad is not very baseball-esque in style and stature, but Mark is going to the game on Wednesday so I’m sure he’ll get his fill of hotdogs and beer courtesy of Citizens Bank Park.

Tonight, he was served something a bit more high brow.

Smoked salmon seems so fancy pants, right?

I actually pick it up right at the SuperFresh five minutes from mi casa.

Oh, the glamour.

Goat Cheese Toasts accompanied the Smoked Salmon Salad. The salmon tastes so delish on top of the toasts. Highly recommend.

So, with that I leave you: Bon appetite and kick L.A.’s ass, Phillies!!!!!

Smoked Salmon Salad with Goat Cheese Toasts

Note: Let smoked salmon and goat cheese sit out at room temperature for about 30 minutes.

Toasts:
Half a baguette, sliced
Your favorite goat cheese

Lightly toast baguette in a toaster oven or under your oven’s broiler until golden brown. Spread with goat cheese. (Tough recipe, I know.)

Salad:
1 6. oz package of smoked salmon
3 cups of mesclun mix, aka salad greens
¼ red onion, chopped
1 Tbsp. capers
½ cup celery, chopped
Juice of ½ lemon
2 Tbsp. extra virgin olive oil
Salt and pepper, to taste

In a salad bowl, combine mesclun, onion, capers, celery, lemon juice, olive oil, salt and pepper. Toss lightly. Place on serving plates and arrange salmon and goat cheese toasts alongside.

Sunday, October 18, 2009

A Very Girly Dinner


Let’s talk quiche.
I made one the other night. I thought Husband would not be down with this, but he housed it, actually - and declared it super delish.

Well, maybe I’m paraphrasing, but he really loved it.

So, I totally cheated with the crust. Yes, I’m hanging my head in shame.

Actually, I’m not.

I make a killer pie crust, but I made said quiche in the middle of the workweek and I was kind of strapped for time.

So, Pillsbury it is.

I will give you my tips on piecrust making the next time I whip one up. It’s about time for a pumpkin pie, isn’t it? Key lime is my specialty, truth be told.

Anywho, quiche always makes me think of the French peoples. Although, when Mark and I visited Paris over the spring, I never once ordered quiche. I always envisioned that I would, but there were so many better things to eat in Paris that I’ve never made such as amazing lobster salad and flaky chocolate croissants.

OMG, take me back now, Husband.

Quiche also makes me think of very girly things: Showers, sorority rush events, demonstrations at your neighbor’s house – also known as events attended by chatty women where hopefully alcohol is served, but odds are quiche is on the menu.

Quiche is great to make when you have odds and ends of various ingredients that you want to use up. You know, those items in your fridge that you used one time and you know you’re gonna have to toss them if you don’t act fast. My items that needed to be cooked on this day were: scallions, pancetta and gruyere cheese. The trifecta worked perfectly for my rockin’ quiche. I served a salad with it.

Pancetta and Gruyere and Scallion Quiche

1 unbaked pie crust pastry
4-6 slices of pancetta, diced
½ small white onion, diced
½ Tbsp. olive oil
3 Tbsp. chopped scallion
2 Tbsp. chopped fresh parsley
¾ cup whole milk
¾ cup cream
4 eggs, beaten
1 cup Gruyere cheese, grated
¼ cup Parmesan cheese, grated
A pinch of salt (pancetta is salty. You don’t need a lot) and lots of black pepper


In a pan, heat up olive oil over medium heat. Saute pancetta and onion until pancetta is crispy. Remove pancetta and onion from pan and drain on paper towels. Set aside

Preheat oven to 450 degrees.

Line a 9-inch pie plate with pastry. Crimp the edge. Do not prick the pastry. Line with two sheets of foil. Bake for 8 minutes. Remove pie plate from oven and remove the foil. Bake for 4 to 5 more minutes. Pastry should appear set and dry.

Lower oven to 325 degrees immediately.

In a large bowl, whisk together, milk, cream, eggs. Stir into egg mixture: scallion, parsley, cheeses, reserved pancetta and onion, salt and pepper.

Once the pie crust comes out of the oven, pour egg mixture carefully into the pie crust. The crust should be warm. Bake for 40 to 45 minutes. If you insert a knife into the middle of the quiche, it should come out clean. That’s how you know it is cooked.

Let the quiche set for 10 minutes before serving.

If you make this dish ahead, you can reheat the quiche uncovered for 10 to 15 minutes in a 325 degree oven.

We enjoyed our quiche with a delish salad and refreshing wine.

Thursday, October 15, 2009

Risotto: Have No Fear


Let me guess. You’re scared to make risotto.

Come on. Get over it.

It’s really not that complicated, and yet this tiny grain can invoke major worry in so many.

Not to worry. I am here to help.

I met a dozen South Jersey peeps perplexed by risotto’s ways about a year ago at a risotto class at Sur la Table.

You must know that the Sur la Table store in Marlton offers awesome classes, and when you take one you get an amazing coupon – 15 percent off anything your heart desires.

Hell yeah.

For info on Sur la Table classes, click here .

I was totally, incredibly excited to take the class. Granted, I’ve made risotto like a million times prior to the class, but seafood risotto was on the program, and I wanted to learn to make it like a rock star for Christmas Eve for my fam’s Feast of the Seven Fishes.

My fellow classmates seemed to be perplexed by risotto. In fact, most had tried and claimed to have failing results when cooking it. The teacher went around the room and asked about our risotto experience.

So, here’s the deal: Risotto is made by heating up many cups of broth in one pot, while cooking the rice in another pan. You cook the rice by sautéing some aromatics – garlic, onion, shallots, leeks (to name just a few) in olive oil or butter. Then, you add the rice and mix it around for a minute or two. Then, you add some wine. Let the wine reduce. Then, you start adding a ladle of the simmering broth into the pan with the rice. You stir. And you stir a little more. When the broth has pretty much been absorbed, you add more broth. You repeat this little process for about 20 minutes. Season it up with salt and pepper and some cheese and call it a day.

The slow cooking and stirring process helps the rice release its starchiness and creates a creamy, dreamy dish. It’s so good.

I guess this could trip out beginner cooks, but here are my tips:

1. Make sure your pan is over medium heat. The broth should simmer as you add it.

2. Just add a soup ladle-full at a time.

3. Taste as you cook. If the rice not cooked through, keep adding the broth and stirring.

4. Have patience and fun.

There’s a first time for everything. Of course, the more you make risotto, the better you’ll get.

Below is my recipe for Roasted Butternut Squash Risotto. Holy mackerel, it’s so amazing. It really has the flavors of fall. Butternut squash is the star of the show. I wish I had pics to show you how to take the skin off a butternut squash. The next time I cook it, I will make sure Mark is around to shoot that.

Butternut squash risotto can be served as a main dish. But, I made it as a side. With it, I served an amazing veal dish by Lidia as well as an arugula salad.

Butternut Squash Risotto

How to roast the butternut squash:

1 butternut squash, peeled and seeded. Cut squash into ½ inch cubes
Olive oil
Salt and pepper

Preheat oven to 400 degrees. Line a baking sheet with parchment. Toss butternut squash with a tablespoon of olive oil, salt and pepper. Place squash on the baking sheet in a single layer. Roast for 25 to 28 minutes.

Note: This step can be done ahead of time.

How to make the risotto:

1 ½ cups risotto (I use arborio)
4 slices of pancetta, finely chopped
1 shallot, finely chopped
2 Tbsp. butter, plus 1 Tbsp. butter
¾ cup white wine
6 cups low-sodium chicken broth
½ cup Parmesan cheese
Salt and pepper
Roasted butternut squash

In a saucepan, heat chicken broth to a simmer. Keep covered.

Over medium heat, melt 2 Tbsp. butter in a wide risotto pan or sauce pan. Add pancetta and shallots. Cook for about 4 to 5 minutes. Add the rice and stir so that the grains are coated with the butter, shallot and pancetta yumminess.

Add wine. Once the wine has reduced (this should take a couple of minutes), slowly add a ladle of hot chicken broth. Slowly stir until almost all of the stock is absorbed. Continue to add the broth, one ladle at a time and stir, for about 15 to 20 minutes. If rice is not cooked through after 15 minutes, keep adding broth.

Once the rice is cooked through, season with salt and pepper. Add 1 Tbsp. butter and stir. Add butternut squash and stir. Add parmesan and stir.

Serve immediately. You may want extra parmesan when you serve.

Tuesday, October 13, 2009

Best Soup Ever


I love the fall.

Simply because when the weather turns chilly it’s time to make soup.

You thought my adoration of autumn was based on football starting, didn’t you?

Ha ha.

Truth be told I would rather watch hours of static on the TV than subject myself to football. But, go Eagles! Or, I guess I should say, “Go Redskins,” since that’s the team Mark digs, which I still don’t understand considering he is a lifelong South Jersey resident.

Anyhoo, one chilly night this week, when the husband was working crazy late (It’s the life of a newspaper man), I whipped up my famous Tortellini and Escarole Soup.

It is fabulous. I highly recommend it, which is why I’m sharing it with you.

Since Mark was doing his daily grind at the office, I took the photo this go-around.

Mark said it was a keeper. Yay!

As a side note, my dad has run a photo lab for like my entire life and yet, I take the worst pictures ever. But I keep trying. As I tell my piano students when they miss a note, “You gotta keep trying.”

Fortunately, my husband is a mac daddy photog. Unfortunately, he works approximately 70 hours a week, so sometimes a blogging gal has to take the pics herself.

If you've never tasted escarole or pancetta (key ingredients of said soup), you really should give them a whirl. Keep an open mind when cooking. That’s my rule of thumb.

Pancetta is similar to bacon, but it isn't smoked. You could substitute bacon, but I think the pancetta has a more subtle flavor. If pancetta isn't carried in your local grocery and you have to resort to buying it at a fancy pants market or online, you can freeze what you don't use. Again, just like bacon. In my parts of the world, Bagliani's on 12th Street in Hammonton carries awesome pancetta.

Make sure you wash your escarole really well. When you get a head of escarole, peel off the outer layer, chop off the core and separate the leaves into a big bowl or clean sink filled with water. Swish the water around and let the leaves chill out. Dump the water and repeat. I know – it’s a process. But seriously, do you want dirt in your food? I don’t think so.

I cut the escarole into strips for the soup. When you put the leaves in the pot, it appears that you have enough escarole for a small army, but it wilts down. Give it time.

Tortellini and Escarole Soup

2 Tbsp. olive oil
¼ cup pancetta, chopped
1 small yellow onion, chopped
3 garlic cloves, chopped
2 carrots, peeled and chopped
1 (15-ounce) can of cannelloni beans, rinsed and drained (I like Goya)
1 head of escarole, washed well and shredded.
4 cups low-sodium chicken broth (I like Swanson)
3 cups water
½ lb. cheese tortellini
Salt and pepper to taste

In a dutch oven or soup pot, heat olive oil over medium heat. Add the pancetta and brown for a few minutes. Add onion carrots and garlic. Cook for a few more minutes until fragrant. Add beans, escarole, broth and water. Season with salt and pepper. Increase heat so that mixture comes to a boil. Then, reduce to a simmer for about 15 minutes. Add tortellini and cook until heated through.

Serve with parmesan cheese and Italian bread.

Monday, October 12, 2009

Making Pasta with Nana


Nana sits down with the family
for a big bowl of pasta

Meet Nana.

Isn’t she fierce?

Yes, women young and old wish they were as fabulous as my 94 (you read that number correctly) 94-year-old paternal grandmother.

Listen, I’ve worked hard at being a cooking and style goddess. But let’s be real, it’s in my genes.

Nana worked up until a few years ago at J.C. Penney. She was the company’s oldest employee. She worked in the children’s department, which is so appropriate because Nana has always been young at heart. She’s got amazing jewels and shoes (natch) and can outcook and outclean just about all of us. She’s also one of the most kind and giving people who I’ve ever known. Seriously.

This past weekend Nana agreed to teach yours truly and my cousin Blair the ins and outs of pasta making. When we were kids, Nana would make homemade pasta pretty frequently. She took the dough and rolled it out and wrapped it around wires made from the spokes of an umbrella. This wire contraption was designed by my Poppop John. He was quite handy in his day. He also was fantastic at growing a garden (a trait I definitely did not pick up.) Nana’s pasta is similar to cavatelli, but it’s longer and doesn’t have ricotta in it. The dough is pretty basic: Flour, salt, eggs, water.

That’s it.

My cuz and I are among the few who love to cook in mia familia. I mean we really LOVE to cook. Like, we’d probably rather cook on the weekend than anything else. ….. OK. Blair driving around in the latest BMW and me buying shoes would probably come in at a close second, but you get the picture.

So, on the day of our Pasta Making Extravaganza, the weather was way humid. I think it rained. For those of you new to the world of pasta-making, rain and humidity are not welcome here.


The Nana School of Pasta Making is under way.
From left: Blair, Nana, Susan (the author) and Jason.

Our team made three batches of pasta. The second batch worked the best. The dough was a bit drier. Also, you can only roll out small portions of the dough at one time, so we realized keeping the dough in the refrigerator made it easier to roll out. Nana said keeping a bowl of water nearby to wet your fingertips also helps the process.


You can make a pasta roller wire by cutting the spokes of an umbrella with a wire cutter. (The pasta wire is shown at left with a pasta cutter). This pasta dough can also be used to make your basic spaghetti or linguini with a pasta maker, which is way less time-consuming. Our pasta is made one noodle at a time. It is for the patient. But is so delish. That’s why I really really wanted to learn how to make it.

Blair’s mom, Aunt Karen, and Blair’s husband, Jason, joined in on the pasta-making party. My husband stopped by to shoot some pics. And my cousin Chris was on hand for moral support. Later that night, my parents and Aunt Karen’s husband, Ron, joined us for an amazing dinner.

Champagne was popped (Nana loves the bubbly), delish wine was shared and good food was served.

Blair made an awesome Caesar salad; Aunt Karen rocked out her famous apple pie; and I whipped up my old-timey cream puffs.

Below is the recipe for the pasta and some step-by-step pictures. You may notice a recipe for meatballs and sauce is MIA. Listen, I love all y’all, but the meatball recipes stay in the family. You could possibly marry in. You are also more than welcome to come to Hammonton and bribe me with shoes, jewelry, J. Crew gift cards, really good wine and sushi, but the chances of that happening are pretty slim, I’m sure. So, you have my apologies.

Super thanks to Nana for showing us how it’s done.


Nana oversees Blair's  handiwork.


Pasta – Nana Style
4 cups flour
½ tsp. salt
4 extra large eggs
6 Tbsp. water (more or less may be needed)


Combine flour and salt. Dump mixture onto your work surface. Make a well in the flour mixture.


Place four eggs into the center of the well of flour.


Mix mixture with a fork or your fingers.


Add a few Tbsp. water and continue to work dough with your hands. The mixture will be sticky.


Once the dough comes together into a ball, knead until smooth.


You knead dough, by pushing the low end of your palm into the dough away from your body. Then, rotate the dough and repeat. The ball of dough should be smooth when it is ready.

Cut off a portion of the dough. The piece should be about the size of a deck of cards.


Roll the dough with your fingers into a cord about one-quarter of an inch wide.


With a knife or pasta cutter, cut the cord of dough into pieces about an inch or inch and one-half long.
Take one portion of cut dough and press the wire into the middle of the dough. Using your fingers, roll the dough back and forth so that it coils around the wire.


Shimmy the dough off the wire. There should be a hole in the center of the pasta.

If the dough is sticking to the wire, place reserved dough in the refrigerator so that it cools down. In addition, wet fingertips help control the dough as you are working it around the coil.


Once your pasta noodle is made, lay on kitchen towels or a sheet pan. You may keep the finished pasta out until you are ready to cook them.

Or, you can place the sheet pan in the freezer for a few hours. Once frozen, store in a plastic bag.

We made three batches of pasta for nine people. There were plenty of leftovers.

To cook the pasta: Bring a pot of salted water to a boil. The pasta takes 20 minutes to cook.  Serve with your fav sauce. I think they work best with a red sauce or a bolognese.


My mom, Nana and Aunt Karen at dinner.


Yumminess!

Tuesday, October 6, 2009

BLT....With a Twist


So one night in September, when the Jersey tomatoes were still around here in all their sweet, delish glory, I decided to make us some BLTs.

I know, I know. We’re now in October when pumpkins should be on the brain. But I had mixed emotions about posting this recipe. I mean, it’s just a BLT.

But, I did make it with a special Suzie touch: Lemon Scallion Mayonnaise. So, I thought dear readers, you would want to know about this sandwich. Or as the people in my hometown say, sangwich.

Anyway, Mark does not groove on mayo, but he totally digs scallions and lemony things, so I thought I would try to spice up the condiment. Because in my humble opinion, it ain’t no BLT without the mayo.

When I assembled the BLTs, my fellow Aries husband and I had a great debate regarding the way in which to stack the sandwich. (Aries people are VERY opinionated, in case you didn’t know.) Does the B come before the T followed by the L? Should ingredients follow the order of the name: the B, the L, the T.

You get the picture.

Of course, a bottle of wine and being really hungry makes you realize: Does this debate really matter?

So…..we went with Mark’s suggestion: Tomato, Lettuce, Bacon. This kind of baffled me, but I went with it. It totally tasted amazing and that’s all that counts. Mark thought the bacon should be on top so that my devoted readers could see it in his pic. Isn’t he thoughtful?

Mark also thought we should make the sandwiches in an open face style. He said that’s how his Moms did it back in the day. Plus, less bread is better for you I suppose. The open-faceness prompted us to dine with utensils which made me feel like I was totally in the “Seinfeld” episode where everybody’s eating candy bars and cookies with a fork and knife and Elaine is like, WTF?

I guess in this scenario, I’m Elaine.

To go with the BLTs, I served the Barefoot Contessa’s Cheddar Corn Chowder. I was making bacon for the BLT’s and I had a ton of fresh corn that I had boiled a week earlier and frozen, so the stars aligned for my menu.

The corn chowder recipe is on the FN Web site and in "The Barefoot Contessa" Cookbook. I cut the recipe way in half. Ina Garten’s recipes are always big enough to feed an army – or your fabulous group of gays and ladies who lunch from East Hampton.

Sigh, I wish I was Ina Garten. An estate in the Hamptons, a flat in Paris, an amazing collection of le Creuset, a group of fellas who can help you buy shoes and decorate your house.

Well, a girl can dream.

Here’s the BLT recipe. Enjoy! Feel free to make it closed-face if you desire. Ha ha!

BLT with Lemon Scallion Mayo
Makes 4 open-face sandwiches

12 strips of bacon, cooked. Lay on paper towels to drain oil
4 romaine leaves, washed and dried
2 tomatoes, sliced
Salt and pepper, to taste
Lemon Scallion Mayo (recipe follows)
4 slices of fav bread, toasted

Spread toast with thin layer of mayo. Layer tomatoes. Season with salt and pepper. Layer romaine on top of tomatoes, then two or three strips of bacon per sandwich.

Lemon Scallion Mayo
3 Tbsp. Hellmann’s mayonnaise
Zest of one medium lemon
1 small scallion, minced
Pinch of salt
¼ tsp. black pepper.

Mix all ingredients in a small bowl. Spread on your fav sandwich.

Monday, October 5, 2009

A Very Giada Din


Recently, our dinner was all about Giada DeLaurentiis.

Or, you could just say I used her recipes. I did not over-annunciate the names of the recipes or ingredients, however. Sorry.

On the menu were Creamy Red Pepper Soup and Venetian Panino. Both recipes are available on the Food Network Web site.

Giada calls for a dab of mascarpone cheese in the middle of the soup. I ixnayed that since there’s cheese in the panini. I love me some cheese, but I don’t need to have it in everything. Furthermore, the soup is so amazingly delish, I feel like the mascarpone would mask its flavor. This is one of my husband’s fav soups, so I make it all the time. It’s a really gorgeous color and it becomes creamy not from cream but from one regular old potato.

I do make the homemade croutons. They are perfect. They make your house smell really toasty, too. Just heat up some olive oil in a big pan and toss in cubed day-old bread. I used Italian bread, because in H'town that's about the only type of bread you can find. I also season with a little salt and pepper.

I love the Venetian Panino. For some reason, Giada uses turkey instead of prosciutto.  The horror.

According to her cookbook, prosciutto is what is used in Venice, so I go with the prosciutto.

Since I’m back to my fulltime piano teaching schedule, I have to get creative with the timing of my cookery. Earlier in the day, I made the soup, croutons and spread for the panini. Then, when it was time to eat I reheated the soup and assembled and cooked the panini. So, if you’re having a busy day you could totally do a lot of this menu ahead so that it takes no time at all when it’s time to eat.

As a side note: My husband photographer Mark AKA “my very own Paul Child” wasn’t thrilled with the pics this go-around. I told him you would all be OK with that.