Sunday, August 29, 2021

Pasta and Peas

Sometimes the simplicity of a dish it what makes it so special. I feel that way about Pasta and Peas. This is the perfect food for the little kiddos in your life, but honestly it works in amazing ways for all ages, especially as a side to a chicken or a fish or a steak. Whatever, you please. Sometimes I just eat a bowl of it when I want a little pasta and nothing else. 

Peas are always on hand in my freezer, and small pasta is always in my cupboard. You could easily use orzo or elbows if you do not have ditalini hanging around.

I also think a sprinkle of fresh parsley or basil would be a nice finishing touch, if you want to elevate the pasta to a more a high-falutin level of cuisine. 


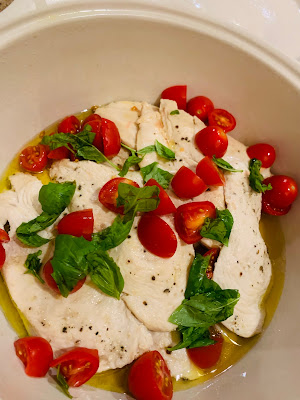
I served the Pasta and Peas with a delicious Chicken Caprese dish that is fabulous when the temps are sweltering. It features grape tomatoes, fresh basil, fresh mozzarella and balsamic. For that easy and tasty recipe, please click here.


Pasta and Peas

Makes about 6 side dish servings

1 small onion, chopped

1 Tbsp. butter

1 Tbsp. extra virgin olive oil

8 ounces ditalini

1 cup frozen peas

Grated parmesan

Pasta water

In a medium saucepan with sides, melt butter into olive oil over medium heat. Add onion. Cook for 5-8 minutes until glistening.


Meanwhile, bring a pot of water to a boil. Salt the water. Cook the ditalini until 2 minutes before total cooking time as listed on the box of pasta, (about 8 minutes). Reserve a cup of pasta water.

When there are 2 minutes remaining, add frozen peas to the pot of cooking pasta. Drain pasta and peas in a colander.

Add drained pasta and peas to the pan with the onions. Add about 1/2 cup pasta water. Season with salt and pepper. Stir in a handful of grated parmesan. Add more pasta water, if desired.

Serve immediately. Add more grated parmesan, if desired. 


Wednesday, August 25, 2021

Caponata

Caponata is summer simmering in a pot. This appetizer of Sicilian origin features eggplant and many other fave summer veg such as zucchini and peppers. This dish is meant to be served at room temp, and it tastes better the longer the flavors have to blend together. So, it's a great one to make ahead.

I enjoy caponata with fresh bread and some Italian cheese, but it is a perfect accompaniment meat, chicken and fish. It also would rock over a bed of creamy polenta.

Many versions call for raisins and capers. Feel free to add some to my version if you like!

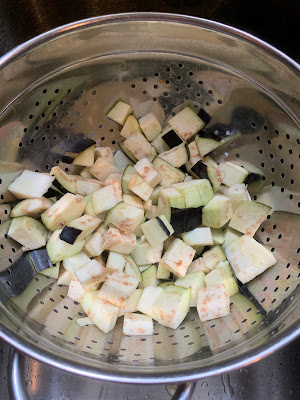
I like to salt the eggplant and set aside while chopping all the other veg.

The final step is adding a simple syrup, which brings a little sweetness to the savory. You can also up the amount of hot pepper flakes you use if you want it spicier. Please note, I don't add much salt to this dish as the olives are salty. Feel free to add some after tasting if you would like. 

I hope you get to try this while summer's bounty of eggplant, zucchini and peppers is still in full force.

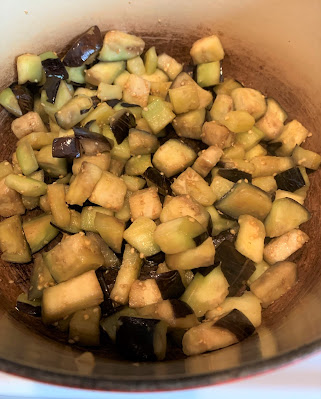
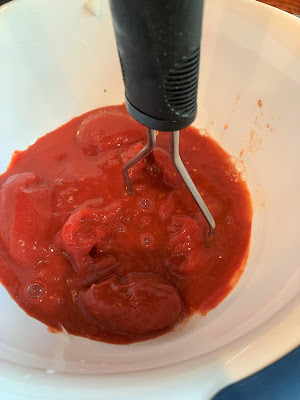
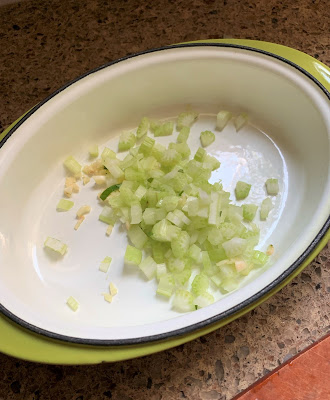
Here's a glimpse of some of the prep work:


And next up, is the recipe. Enjoy!


Caponata

Makes 10-12 servings

1 medium eggplant, skin peeled in 1/2 inch strips so that it is not fully peeled, chopped into 1/2-inch dice

1/2 tsp. salt

1 zucchini, chopped in 1/2-inch dice

1 red bell pepper, diced

2 cubanelle peppers or 2 green bell peppers, diced

1 onion, diced

2 celery stalks, diced

5 cloves garlic, sliced

1 can (28 oz) San Marzano tomatoes

1/4 cup olive oil, plus 3 Tbsp. olive oil

1 cup green Calstelvetrano olives, pitted and sliced

1/2 tsp. red pepper flakes

1/4 cup white wine vinegar

1 Tbsp. sugar

Ground pepper

1/2 cup fresh basil, torn

Place eggplant in a colander. Toss with 1/2 tsp. salt. Set aside for 20-25 minutes.

In a large Dutch oven, add 1/4 cup olive oil over medium high heat. Saute eggplant for 8-10 minutes until lightly browned. Remove to a plate using a slotted spoon.

Add remaining 3 Tbsp. olive oil to the same Dutch oven over medium high heat. Add red pepper flakes, zucchini, celery, onion, red peppers, cubanelle peppers and olives. Saute for about 10 minutes, stirring occasionally. Add garlic. Saute another 2 minutes. Return eggplant to pot.

Place San Marzano tomatoes in a medium sized bowl and crush with your hands or a potato masher. Add to the pot. Stir.


Season with pepper. Bring to a simmer. Partially cover and cook for 20-25 minutes.


In a small sauce pan, bring white wine vinegar to a boil. Add sugar. Stir over high heat until mixture thickens slightly. About five minutes. Add vinegar mixture to the pot of vegetables. Stir in basil. Simmer for 5 minutes.

You may season with salt to taste if desired. Due to the saltiness of the olives, I don't add extra salt to the caponata.

To serve: Bring to room temperature. Serve with bread or cheese. You may also use the caponata to accompany meat or fish or to top a sandwich.

Extra servings may be frozen for later use.

Sunday, August 22, 2021

Crispy Mustard Chicken

Crispy Mustard Chicken by Ina Garten is so easy, and soooooo good.

Her recipe calls for serving this over frisee, but I can never ever ever find that in my grocery store, so I served it over arugula dressed with lemon juice, olive oil and salt and pepper.

But about the chicken....

This dish uses thighs, which are so juicy and delish. I know the chicken breast gets all the glory but thighs really are the unsung hero of the chicken. Plus, they are super cheap.

I always have panko, lemon zest, Dijon and white wine on hand. If you don't have fresh thyme, dried would work just as well. Just cut it to 1/2 tsp.

Be sure to dry the chicken for that extra crisp factor. 

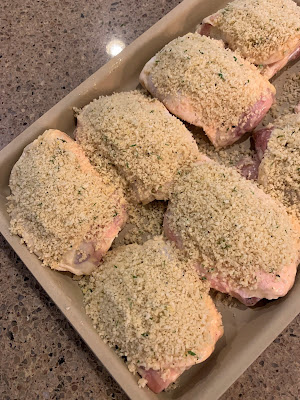
Here's my assembly line set up for getting the chickens dipped and coated: 

My husband and son both loved this dish. I will definitely add it to our regular recipe arsenal.

Here you go:

Crispy Mustard Chicken

Serves 4

From "Cook Like a Pro" by Ina Garten

 2 garlic cloves

1 1/2 tsp. fresh thyme leaves

Kosher salt and freshly ground black pepper

1 cup panko (Japanese bread flakes)

1 1/2 tsp. grated lemon zest

Good olive oil

1 Tbsp. unsalted butter, melted

1/4 good Dijon mustard

1/4 cup dry white wine

1 1/2 lbs. bone-in, skin-on chicken thighs (4 large)

Preheat the oven to 375 degrees Fahrenheit.

Place the garlic, thyme, 1 tsp. salt and 1/2 tsp. pepper in a food processor fitted wtih a steel blade and process until garlic is finely minced. Add the panko, lemon zest, 1 Tbsp. olive oil and the butter and pulse a few times to moisten the panko. Pour the mixture into a shallow bowl. In another shallow bowl, whisk together mustard and wine.


Pat the chicken thighs dry with paper towels and sprinkle generously with salt and pepper. Dip each piece first in the mustard mixture to coat the top and bottom and then coat the skin side only in the crumb mixture, pressing gently to make the crumbs adhere. Place the chicken on the sheet pan, crumb side up and press any remaining crumbs ontho the chicken. 

Roast for 40 to 50 minutes, until the chicken reaches an internal temperature of 160 degrees.


Serve immediately.

Please note: The Jersey Girl serves this chicken over a bed of arugula dressed with lemon juice, olive oil and salt and pepper. 


Sunday, August 1, 2021

Cherry Pepper Salad

For all my hot pepper lovers out there, this one is for you.

Fresh Cherry Pepper Salad is full of color, crunch and SPICE. 

Cherry peppers are super cute and super HOT. If heat isn't your thing, you may want to skip this dish. This salad uses fresh peppers, so the spice is really in your face. My husband absolutely loved it.

This salad goes great with whatever you are grilling. I also think the peppers would be a great topping on a sandwich. 

You could make this with those cute baby bell peppers that are sold in the grocery store. Those guys are sweet!


But if fiery is your flavor, go for the cherry peppers. Here you go:

Fresh Cherry Pepper Salad

Makes 6-8 servings as a garnish

12-14 red and green cherry peppers, quartered and seeded

1 rib celery, finely diced

1 garlic clove, minced

Juice of half a lemon

1/4 cup extra virgin olive oil

2 tsp fresh oregano, minced

2 tsp fresh basil, minced

Salt and pepper to taste

Combine all ingredients in a bowl, mix and set aside for at least an hour.


Serve with fresh Italian bread.

Please note: You may want to wear plastic gloves while cutting and seeding the peppers. Be careful as to not touch your eyes.