Thursday, June 1, 2017

Don't Call it a Comeback

I read somewhere - most likely on the internets - which is why I can't quite recall, that sun-dried tomatoes are back, baby. (They say we don't remember what we read on screens. I read that fact from somewhere, too. Again, don't know where. But it does sound like something that I would have found on the Drudge. And I 100 percent believe it. But I digress.)

I do know for absolutely certain - because my good old fashioned cookbooks - like the ones printed and bound - have said this: sun-dried tomahtoes were all the rage, dahling, back in the 1980s and 1990s until they were overused so much they were shunned by anyone who is anyone in the world of cooking. Leading up to their demise, they were like the avocado of that time. Or the kale. Or the truffle oil. Or the quinoa.You get me? Off topic: How quinoa became a thang I will never know. When will quinoa's day come and go? That really is the question.

OK. Focus, Susan.

But just like bodysuits (gag) and flannels (this one I am behind as long as they are from J. Crew or Lucky or something), the cool stuff from the 90s is all the rage here now in 2017 and that includes sun dried tomatoes.

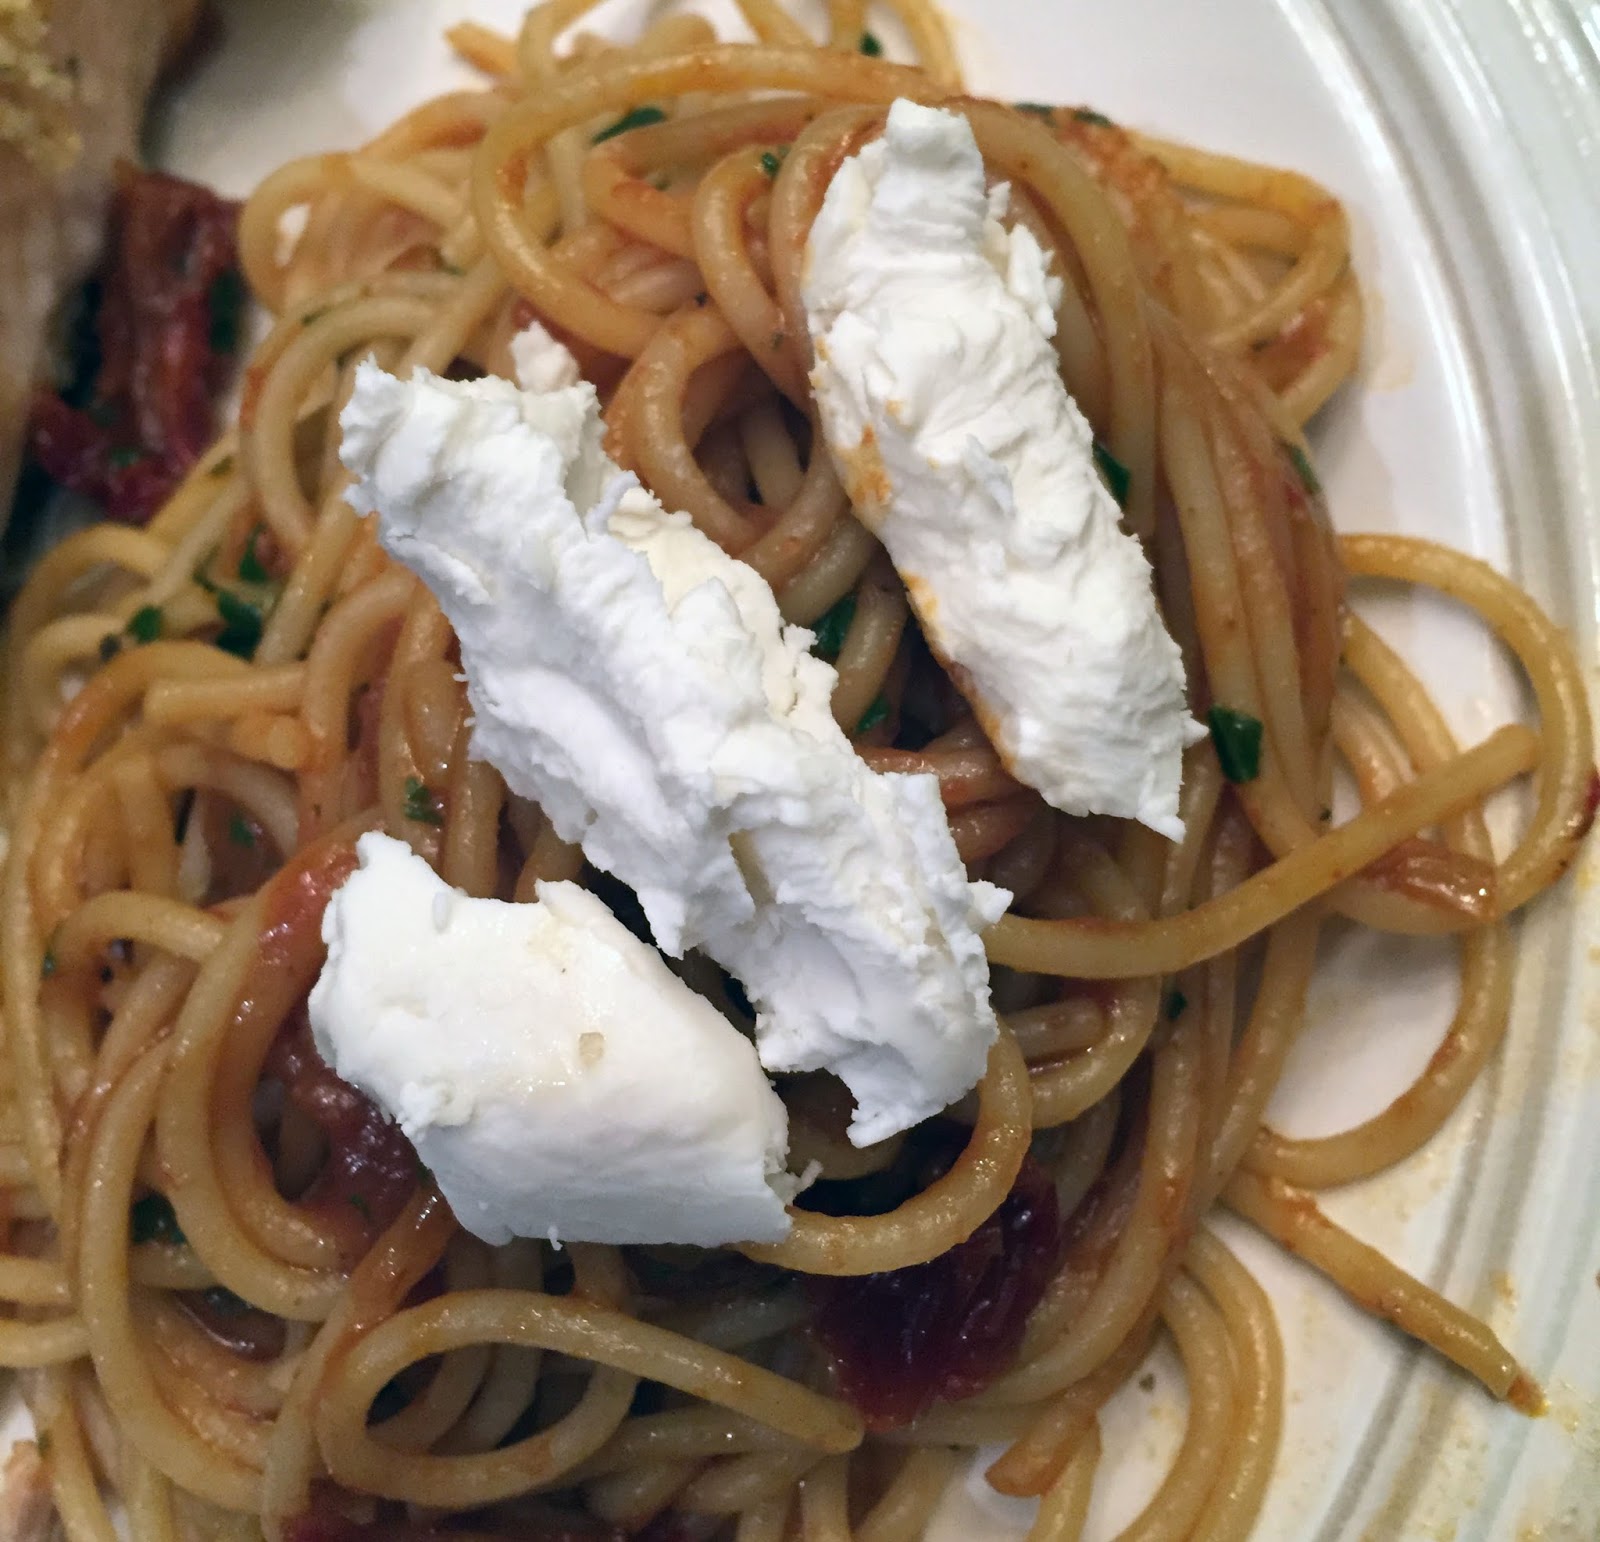
So, yay me for being right on trend with this fabulous Angel Hair Pasta with Sun-Dried Tomatoes and Goat Cheese by Giada.


Truth is I have been making this dish since 2007 when I saw Giada whip it together in a very chic kitchen on the Food Network (remember when they actually showed interesting cooking shows of people actually cooking on the tellie?  Memories....). And soon thereafter, I got my paws on the cookbook Everyday Pasta. In 2007, sun-dried tomatoes still weren't exactly the hotness on ingredient lists. At that time it was more like fancy salts (eyeroll) and slabs of bacon.

But I treat my food just like fashion, bandwagons be damned. You won't ever catch my in a bodysuit or willingly eating quinoa whether it  is 1997 or 2017. And if I want a sun-dried tomato in a dish, I'm going for it. Because they taste good. And that's that.

The pasta is very bold in flavor, and the goat cheese adds a phenom touch. I love it tons.

And so did my son. Which floored me. A 6-year-old asking for seconds of sun-dried tomatoes and goat cheese. I'll take it.

I served this with a wonderful panko crusted salmon dish by Barefoot Contessa. Recipe is here: Panko-Crusted Salmon


Doesn't the salmon look fab?

As for the sun dried tomato pasta, I use tomatoes not packed in oil like the recipe says. I use regular olive oil in place of the sun-dried tomato oil. Also, I used spaghettini instead of angel hair aka cappellini. I find cappellini gets too dry for my liking.

And just a little tip so that you don't find tomato paste rotting in your fridge a week later: You can store leftover tomato paste in little baggies or in ice cube trays in your freezer. Yay!

Here is the salmon plated with the pasta. I love the colors and the textures:


As for the sun-dried tomato pasta, I use tomatoes not packed in oil like the recipe says. I use regular olive oil in place of the sun-dried tomato oil. Also, I used spaghettini instead of angel hair aka cappellini. I find cappellini gets too dry for my liking.

And just a little tip so that you don't find tomato paste rotting in your fridge a week later: You can store leftover tomato paste in little baggies or in ice cube trays in your freezer. Yay!

Angel Hair Pasta with Sun-Dried Tomatoes and Goat Cheese

4 to 6 servings
From "Everyday Pasta"
By Giada De Laurentiis

1 (10 ounce) jar sun-dried tomatoes packed in oil, chopped (oil reserved)
1 small onion, chopped
4 garlic cloves, minced
1/4 cup tomato paste
1 cup dry white wine
1 pound angel hair pasta
3 Tbsp. chopped fresh flat-leaf parsley
1 tsp. salt
1/2 tsp. freshly ground black pepper
3-4 ounces fresh goat cheese, coarsely crumbled

Heat 3 tablespoons of the oil from the sun-dried in a large, heavy skillet over medium heat. Add the onion and saute until tender, about 3 minutes. Stir in the garlic and saute until fragrant, about 1 minute. Add the tomato paste and cook for 2 minutes, stirring constantly. Add the wine and chopped sun-dried tomatoes and simmer until the liquid reduces by half, about 2 minutes.


Meanwhile, bring a large pot of salted water to a boil. Add the pasta and cook until al dente, stirring occasionally, about 4 minutes. Drain, reserving 1 cup of the cooking liquid. Add the pasta and parsley to the tomato mixture and toss to coat, adding some of the reserved pasta water to moisten. Season the pasta with salt and pepper. Mound the pasta in bowls, sprinkle with the goat cheese and serve.


Tuesday, May 23, 2017

Classic for a Reason: Chicken Piccata


I was going to post the recipe last night - the actual day of making it. But it didn't seem right. A gal safe and sound in her house in Jersey sharing a classic, uncomplicated recipe for Chicken Piccata while all this turmoil was going on across the pond in Manchester.

I don't know.  I guess I take my news hard. After scouring the news channels and internets for hours, I just headed to bed where I tossed and turned and didn't sleep much - for about the thirtieth night in a row.

Cooking settles my soul.  I'm surrounded by chaos it seems day in, day out - regardless of what is happening in the current news cycle. I'm sure everyone feels at times that the hustle and bustle of work and child-rearing, bill paying and housekeeping can wear you down. That's when I turn to making something wonderful in my kitchen.

Chicken Piccata is a classic. It doesn't require fancy ingredients, and it often is a crowd pleaser. I find it very comforting as well. Two years ago, I suffered a miscarriage. My family insisted I eat something upon returning home from the hospital trying to conclude the most unsettling day I have ever had in my life. Head pounding, heart breaking, delirious from trying to understand the unfathomable. I ordered some Chicken Piccata from a local restaurant. I ate about five bites before collapsing into a bed filled with loss and tears. But in some way that simple Chicken Piccata made me feel like maybe everything will be ok. I like to make this dish when we need our spirits lifted. When we need a fabulous dinner without a lot of thought. I hope you do the same. 


Chicken piccata
Makes 4-6 servings

2 lbs. thinly cut chicken cutlets
½ cup flour, plus 2 Tbsp.
Zest and juice of 2 lemons
1 cup of white wine
1 cup chicken broth
2 Tbsp. capers
4-6 garlic cloves, finely chopped
1 shallot, finely chopped
¼ finely chopped fresh flat-leaf parsley
Extra virgin olive oil
1 Tbsp. unsalted butter
Salt and pepper to taste

On a baking sheet, line up your chicken. Season lightly on both sides with salt and pepper.

In a shallow dish – like a pie dish – whisk together flour with salt and pepper to taste. Dredge the seasoned chicken cutlets in the flour.

Meanwhile, in a large pan heat up a Tbsp. olive oil. Lightly brown chicken on each side – about three to four minutes per side. Remove to a covered dish. Repeat until all chicken is cooked and removed from pan.

Melt butter and a little more olive oil in the pan over medium high heat. Add garlic, shallots and lemon zest. Saute until fragrant. Add 2 Tbsp. flour. Whisk until blended.

Add white wine. Bring to a boil and allow wine to reduce to about half. Mixture should slightly thicken. Add chicken broth. Bring to a simmer. Add lemon juice and capers. Season with salt and pepper. Simmer for about five minutes.

Return chicken to pan. Cover. Cook over medium-low heat until everything is cooked through.

Top with chopped parsley and serve.


Monday, April 17, 2017

Turkey Cutlets

Like most peeps trying to get din on the table day to day, I often rely on chicken making frequent appearances on the menu. Roasted, grilled, baked, breaded, sauced, stir-fried, slow-cookered. You follow me, I'm sure.

Of course noshing on the the same thing again and again no matter how you shake it up is the B-word: Boring. Oh, how I loath boring. Boring is a bore! Who wants to be boring? Nobody! That's who.

So I decided to get wild and crazy with chicken's unboring cousin: Turkey.

Right. Turkey is totally boring, too. It's not like I'm talking about quail or duck or pheasant. Just a turkey. But this recipe uses turkey cutlets. Ooooooh. Cutlets.

And turkey tastes way different than chicken. And it has it's own texture. And it's not chicken. So.....there.

Ta da:


No you aren't missing anything. This dish isn't exactly setting the culinary world on fiyah. Glamorous. Sexy. Food pornish. No. Not really at all. That's not what we're going for here, are we?

I can tell you it's good. And your kid will eat it. And it's fast. What more do you want from me?

If you do not have fresh rosemary or thyme just use some dried. As I often do, I cook din at 9 a.m. in the morning and the husband and kiddo heat up the grub at din din time while I work my weirdo-person hours. The turkey reheats just beautifully. It goes great with noodles, rice and of course potatoes in all forms. The last time I made it I put some buttered corn on the side because my kindergartner has a thang for corn. Yes it was frozen. But I made homemade bread that day, too, so we have that going for us.

I got this recipe on Pinterest. I love it. I made it twice and honest to goodness it works. 

This is like a very organized recipe. I love lining up the cutlets on a sheet pan to season them all orderly like so:


 Yeah. I said I love doing that. 

And everything cooks in one pan. First the turkey:


Then the sauce:


Easy peasy. This is a great recipe for all y'all who don't like to cook. Very low stress.

Rosemary and Thyme Turkey Breast Cutlets


Ingredients
  • 1 lb. thinly sliced turkey breast cutlets
  • Salt & Pepper
  • 1 tbsp olive oil
  • 1/4 cup white wine
  • 4 tbsp butter, cut into 4 pieces
  • 1/3 cup chicken broth
  • 2 sprigs fresh rosemary
  • 3 sprigs fresh thyme

Instructions
  1. Heat a large cast iron skillet over medium heat, add the olive oil and swirl to coat the pan.
  2. Season the turkey breast cutlets* with salt and pepper on both sides. Once the pan is nice and hot, add the turkey cutlets and sear for about 1 minute on each side, then remove from skillet to a plate to keep warm. You might have to do this in batches if your skillet is not large enough to fit them all in at once.
  3. Once all the turkey is cooked, pour in the white cooking wine** and use a spatula to scrap the bottom of the pan to loosen all the browned bits. Once the liquid has reduced, lower the temperature to medium-low and add in the butter, stirring till the butter melts. Add in the chicken broth, rosemary and thyme and simmer for a couple minutes.
  4. Add the turkey breast cutlets back to the pan, including any juices that may have collected at the bottom of the plate. Coat the turkey with the sauce and let simmer a couple more minutes, until the turkey is heated through again. Enjoy!

Sunday, March 5, 2017

Escargot Go Go

So, right. I've been told by some peeps here or there that I know my way around the kitchen. But even the most confidant of chefy type wannabes can be presented with a dish and be like, "Oh, please sweet baby Jesus, don't let me eff this up."

Take, escargot. No, really. You can make it at home. Here's the dilly-o:

First of all, the Jersey Girl does not store escargot shells up in here. No, sir. A kitchen gadgety hoarder I most definitely am, but in my old age I have decided that kitchen gadgets that serve one purpose to be purposefully used once every five years have no purpose in my kitchen. Good riddance.

But up my sleeve I do have a gorg set of white ramekins that rock my world.

After doing some research I learned that these vessels are super perfect in which to cook the escargot. Who needs shells that make your fork meeting delicious garlicky snails even more of a challenge?

So, where do I get escargot in my parts? Igourmet.com, dahling. Click here to see what I bought.

I can't even find fresh mint in my town. And if you wait to hit the markets by 5 p.m. on some days in H'town, the fresh bread is GONE. So the chances of me finding escargot here are pretty slim. Reality is a bitch but we food snobs persevere. I knew the internets needed to be involved if escargot was getting cooked up by moi.

Finally, how do we get them all delicious? Really all you need is a boatload of butter, shallots, garlic, parsley and wine. Pop them in the oven and in minutes, voila! Make sure you have some amazing bread on the side!

These were a hit when I made them the first time last summer down the shore. I wasn't even in my kitchen and I was a total nervous nelly. But all escargot tasters gave rave reviews! I made this round for The Husband for Valentine's Day. He loved them, natch. Honestly, they taste better than those I've had in restaurants.


Hope you give this fanciness a whirl.

Escargot a la Bourguignonne
Makes six ramekins of 8-12 escargot

Container of 48 petite escargot
1 cup butter, softened
1/4 cup fresh flat leaf parsley
1 shallot
4 big garlic cloves
2 Tbsp. white wine
Salt to taste

Special equipment: Six 5-inch wide ramekins

In a food processor, place parsley, peeled and quartered shallot and 4 peeled garlic cloves. Pulse until finely minced.

In a glass bowl, place softened butter. Place mixture from the food processor in bowl with butter. Add white wine and a pinch of salt. Blend with a fork. (You can make this ahead and set aside.

In a strainer, drain escargot but do not rinse.

Pre-heat oven to 350 degrees Fahrenheit.

Place six ramekins on a baking sheet.

Place 8-12 escargot in each ramekin. Top evenly with butter mixture.


Place in hot oven and bake for 12 minutes.

Serve hot with delicious bread!


Monday, February 20, 2017

Olive Tapenade

Olive tapenade is a fab dish to make when you are having guests or need to make something to schlep to a gig offsite. Of course the fact that not everyone grooves on olives could jack up this plan. So make this if you really know your audience.

Since the Jersey Girl comes from a bunch of Italianos, you can bet your bottom dollar that my fam digs the olive tapenade and will hunt you down for the recipe and ask about it over and over and over again. The recipe comes from Debi Mazar and her Tuscan farmer chef husband Gabriele Corcos. I love it because I get to use my mortar and pestle. And the fresh parsley and lemon juice really brighten it all up. I serve it with sliced tomatoes, goat cheese and toasted bread or crackers. 

Pitting olives isn't exactly the most glammest of job. In fact, it's the pits. Ba dum dum. In case you don't know how to do it: Gently push down firmly on a back of a knife placed over a whole olive. The pit will push out of the olive. Consequently, it will probably roll onto the floor or all over the counter making an oily mess and prompting a stream of profanity. So have wine and your swear jar on hand. And maybe just buy pitted olives.

I love the mix of green and black olives in this. The colors and deep flavors are gorgeous up against lovely tomatoes and soft goat cheese.


Olive Tapenade
From "Extra Virgin"
By Gabriele Corcos and Debi Mazar

2 anchovy filets
1 garlic clove, smashed
1 cup black Nostraline olives, pitted and roughly chopped
1 cup green Sicilian olives, pitted and roughly chopped
1/2 cup extra virgin olive oil, plus more for serving
1 Tbsp. fresh lemon juice
2 Tbsp. chopped fresh Italian parsley
1/2 Tbsp. capers, rinsed and chopped
Toasted country bread slices, rubbed with raw garlic, for serving
1 heirloom tomato, sliced, for serving

Mash the anchovies with the garlic in  a mortar and pestle, then mix well with the chopped olives. Combine with the 1/2 cup olive oil, the lemon juice, parsley and capers.

Spread the tapenade on the garlic rubbed toasts. Drizzle with olive oil and top with a slice of beautiful heirloom tomato.

Please note: The Jersey Girl serves this with goat cheese as well.

Thursday, February 16, 2017

Crackalicious Onion Dip

I'm just gonna tell you straight away: Get  your extra crunches in. Exercise at least an hour every day. Drink a vat of detox water. And eat as much as your heart desires of this insane in the membrane Pan-Fried Onion Dip.


Seriously. OMG. Seriously.

I don't even like chips.

Or onion dip.

I mean skeeve.

But the next time you have a party. Make this.

I'm sure you're like: Bitch, please. Where was this two weeks ago for the freakin' Super Bowl?

Yeah. I know I suck. Maybe you can get it in for those riveting World Cup qualifier games. Or March Madness. That's big, right? Right?!

So the ratio of real onions to the trifecta of  totally fattening clog-your-artery ingredients - mayo, cream cheese, sour cream  - is like 3 to 1. I believe. I told myself. I really don't know. But whatever. That's what it looked like. And, oh right: You cook the onions in vegetable oil AND four tablespoons of butter. But, I mean who's counting?


This is a Barefoot Contessa recipe. So you know it's good. And she does not give a flying fig if this dip is healthy. And well, it's not!

This is more time consuming than opening a packet of tan chemicals labeled Onion Dip Mix and dumping it into a container of sour cream. But it so worth it. Your guests will love. Trust.

Pan-Fried Onion Dip

From the Barefoot Contessa Cookbook
By Ina Garten

2 large yellow onions.
4 tablespoons unsalted butter.
1/4 cup vegetable oil.
1/4 teaspoon ground cayenne pepper.
1 teaspoon kosher salt.
1/2 teaspoon freshly ground black pepper.
4 ounces cream cheese, at room temperature.
1/2 cup sour cream.
1/2 cup good mayonaisse


Cut the onions in half and then slice them into 1/8-inch thick half-rounds. (You will have about 3 cups of onions.) Heat the butter and oil in a large saute pan over medium heat. Add the onions, cayenne, salt, and pepper and saute for 10 minutes. Reduce the heat to medium-low and cook, stirring occasionally, for 20 more minutes until the onions are browned and caramelized. Allow the onions to cool.
Place the cream cheese, sour cream and mayonnaise in the bowl of an electric mixer fitted with the paddle attachment and beat until smooth. Add the onions and mix well. Taste for seasonings. Serve at room temperature.

Sunday, February 12, 2017

Marinated Eggplant

It seems many peeps like to get in and get out of the kitchen as fast as they can when conjuring up some eats for the day.  The Jersey Girl, on the other hand, looks forward longingly to those days that I can master a dish that took quite a bit of time, much preparation and above all patience. This is how I set my sights on creating some lovely Marinated Eggplant. It most definitely is not to be rushed.

As is often the case when I make something that is multi-stepped and requires some waiting around, timing things just right and a cooling off period, I so wanted to ring up my Mommom and tell her all about my culinary adventure, hoping to pop by and give her a taste. But that experience in my cooking accomplishments has come and gone. Mommom passed away about a year ago.

She made an amazing marinated eggplant. And I guess that's why it's on my mind. Approaching the anniversary of her death, I can't help but think about the unforgettable dishes she has made throughout the many years of her cooking for all of us.

I don't have a copy of my grandmother's marinated eggplant. I don't really know if she had one. She often stored culinary blueprints in the corners of her brilliant mind with no tangible documentation save for the finished delicious product.

But I tried to replicate it as best I could with this Poached Eggplant with Vinegar, Garlic and Mint recipe by Lidia Bastianich. I used basil instead of mint. I couldn't get my hands on nice mint at the time. I know this isn't peak eggplant season, but I wanted to give it a try before summer hits so I know what I'm doing when I find myself with boatloads of eggplant. (My students, family and friends often bestow me with vast quantities of produce. A fact of life if you live in South Jersey.)

This if magnifico on just really fresh Italian bread. I'm sure it would rock with some grilled meats or swordfish. And of course a wonderful glass or bottle of vino. I know I did my Mommom proud with this one.

Poached Eggplant with Vinegar, Garlic and Mint


Serves 6 or more as a side dish; 12 or more as an antipasto
By Lidia Bastianich
From Lidia's Family Table

For Poaching
2 1/4 pounds small, firm eggplants (preferably 6 to 8 ounces each)
2 cups red wine vinegar, white wine vinegar or cider vinegar

For Marinating
1/2 teaspoon salt
15 to 20 small fresh mint leaves, shredded
3 garlic cloves, thinly sliced
3 Tbsp. extra virgin olive oil

Recommended Equipment
An 8-quart pot or saucepan for poaching
A flat baking sheet or platter for cooling the eggplant

Prepping and Poaching the Eggplant
Trim the stem and bottom (blossom) ends of the eggplants. Slice the eggplant in half lengthwise, then slice each half into wedges, about 1 1/2 inches wide on the outside (peel side). You should have thirty or more wedges.

Pour the vinegar and 20 cups water into the pot, cover and heat quickly until boiling. Drop in all the eggplant slices, cover and return the liquid to the boil rapidly, then set the cover ajar and adjust the heat so it's a moderate boil.


Push the eggplant under the surface frequently, shifting the pieces around a bit so they all poach evenly. After about 10 minutes, reduce the heat so the liquid is perking gently and won't break up the softening wedges. Cook for a total of 15 to 20 minutes, until the flesh of the eggplant appears completely translucent - any opaque streaks means it is not cooked through. Don't cook any longer than necessary; as soon as they are done, turn off the heat and carefully lift the wedges out of the liquid with a wide, perforated spatula or strainer - let the liquid drain off briefly - and lay them on the baking sheet. Spread the slices apart from each other in one layer and let them cool for a few minutes.


Marinating the Eggplant

 Using a paring knife, cut out the stuck-together mass of seeds on each slice and discard, taking care not to tear the flesh; don't worry if a few seeds are left.

As you seed them, lay a third of the wedges in the small gratin dish in one layer, and top them with the seasonings; sprinkle on a third of the salt and a third of the mint-leaf shreds, scatter a third of the garlic slices, and drizzle a third of the oil all over. Arrange and season two more layers of eggplant in the same way.

Marinate the eggplant for about an hour at room temperature before serving or using in a dish (though they will be tasty in 30 minutes if you need them sooner).

If you are making this ahead for serving the next day, seal the dish with plastic wrap and refrigerate; remove at least an hour before using so it comes to room temperature. To keep after the second day, remove the garlic slices from the dish, wrap and refrigerate; use within a week.

Please note: The Jersey Girl used basil instead of mint.