Sunday, March 27, 2022
Mushroom Ragu
Friday, March 25, 2022
Beans and Greens Chicken Chili
I love a one-pot situation that is full of flavor and health, so I came up with this awesome chicken chili recipe recently. I call it Beans and Greens Chicken Chili. I used black beans, cannellini beans and baby kale to up the healthy factor. Frozen corn adds a pop of color.
You could easily swap out the chicken for ground turkey. Spinach could replace the kale if you aren't a fan.
This is easy to freeze as well, so double the batch if you would like!
Please note the recipe does not call for any salt. This is due to the Goya Adobo seasoning, which already contains salt. If you wish to swap out the Adobo seasoning for salt and black pepper, feel free! You may also add more salt during your cooking process. I tend to use a lot less salt than most recipes call for. Just a personal taste.
Beans and Greens Chicken Chili
Makes 4 big servings
Ingredients:
1 onion
1 jalapeno
4 cloves garlic
2 Tbsp. olive oil
1 lb. ground chicken
1 tsp. Adobo seasoning
1 tsp. cumin
1 Tbsp chili powder
1/2 tsp. coriander
flour
2 cups chicken broth
1 19-ounce can cannellini beans, drained and rinsed
1 15-ounce can black beans, drained and rinsed
5 ounces baby kale
1/2 cup frozen corn
1/2 cup- 1 1/2 cups of water, if desired
Lime juice, chopped scallions, shredded cheese, sour cream, tortilla chips to serve
Instructions:
In a dutch oven, add olive oil over medium heat. Add onion and jalapeno, saute for 5 minutes, stirring occasionally. Add garlic, saute for a minute. Add ground chicken. Stir until well browned.
Add Adobo, cumin, chili powder, coriander. Stir and cook for 2-3 minutes. Add flour. Stir until well blended.
Add broth, 1/2 cup water, cannellini beans, black beans, corn and kale. Simmer over low heat partially covered for 15 minutes. Stir. Add another 1/2 cup of water if desired, simmer for another 15 minutes. For the third and final time, stir and add another 1/2 cup of water if desired.
Let chili rest. Serve with a squeeze of lime juice, scallions, shredded cheese and/or sour cream, if desired.
Thursday, March 17, 2022
Molten Chocolate Cakes
If you are looking for a dessert to celebrate a special day - anniversary, bday, promotion, awesome report card - these Molten Chocolate Cakes are just for you. But if you want them on any ordinary day, they totally work for that, too!!!
You do need baking ramekins for this dish. I only have 4, but the recipe calls for six. I was able to bake the remaining batter a day later in my clean ramekins, and they turned out just as awesome as on day one. The batter did firm up quite a bit, but that was the only change. Side note: I must order more ramekins!
These little cakes would go perfectly with ice cream or whipped cream. We just sprinkled some powdered sugar on top. My son absolutely loved them.
Handle with care when flipping them from the ramekin to the plate. I used a spatula to get under the ramekins and used kitchen mitts as the ramekins are hot when plating.
Check out my son Evan digging in! What a treat!
Molten Chocolate Cakes
From Betty Crocker's Cookbook
Serves 6
Unsweetened baking cocoa
6 oz. semisweet baking chocolate, chopped
1/2 cup plus 2 Tbsp. butter
3 whole eggs
3 egg yolks
1 1/2 cups powdered sugar
1/2 cup all-purpose flour
1. Heat oven to 450 degrees F. Grease bottoms and sides of 6 (6-ounce) custard cups with shortening; dust with cocoa.
2. In a 2-quart saucepan, melt chocolate and butter over low heat, stirring frequently. Cool slightly.
3. In large bowl, beat whole eggs and egg yolks with wire whisk or hand beater until well blended. Beat in 1 1/2 cups powdered sugar. Beat in melted chocolate mixture and flour. Divide batter evenly among custard cups. Place cups on cookie sheet with sides.
4. Bake 12 to 14 minutes or until sides are set and centers are still soft (tops will be puffed and cracked.) Let stand about 3 minutes. Run small knife or metal spatula around side of each cake to loosen. Immediately place heatproof serving plates upside down onto each cup, turn plate and cup over and remove cup. Sprinkle with additional powdered sugar. Serve warm.
Make ahead directions: Batter can be made up to 24 hours ahead. After pouring batter into custard cups, cover with plastic wrap and refrigerate up to 24 hours. You may need to bake the cakes 1 to 2 minutes longer.
Tuesday, March 8, 2022
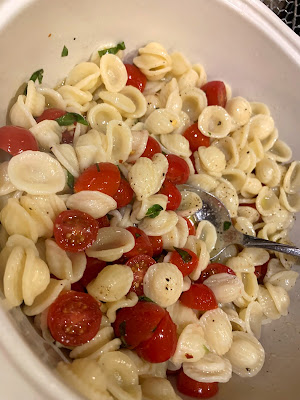
Pasta with Marinated Grape Tomatoes
Pasta with Marinated Grape Tomatoes is a total necessity. I make this all year, but it's really a blessing for the summer when you don't feel like cooking a big thing but need your pasta fix.
The beauty of the dish is it requires zero cooking time or energy for the sauce. Just toss all the ingredients together in a serving bowl and set aside for at least 30 min. Cook the pasta, add it the sauce with some pasta water and voila! Perfection.
Top with mozzarella or goat cheese if you like.
Pasta with Marinated Grape Tomatoes
Makes 4 side dish servings
1/2 pound orecchiette or other short pasta
1 cup grape tomatoes, halved
1 clove garlic, minced
1/4 tsp. crushed red pepper
1/8 tsp. black pepper
1/4 tsp. salt
3 Tbsp. fresh basil, minced, plus more for garnish
1/4 cup olive oil, plus more for garnish
Fresh mozzarella, diced, or crumbled goat cheese
In a medium serving bowl, combine grape tomatoes, garlic, red pepper, black pepper, salt, basil and olive oil. Stir gently. Set aside for at least 30 minutes.
Bring a pot of salted water to a boil and cook orecchiette as directed by the package. Once cooked, transfer cooked pasta with a spider ladle to the bowl of marinated tomatoes. Add a ladle or two of pasta water. Drizzle with olive oil, check for seasonings and garnish with more basil, if desired.
Serve hot or at room temperature with mozzarella or goat cheese, if desired.
Saturday, March 5, 2022
Herb-Roasted Onions
A cook can never have too many side dish options, and this Herb Roasted Onions recipe from the Barefoot Contessa is a total hit.
The hardest part of preparation is not crying while peeling and quartering onions. (I run water in the faucet and look up and take breaks and pray).
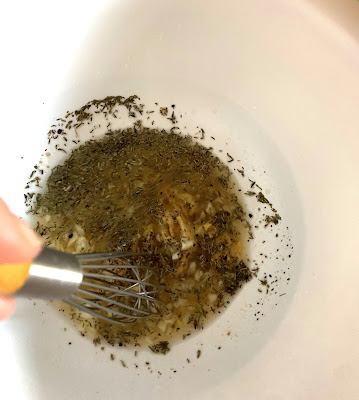
I actually whisked together the vinaigrette in the big bowl first, then just placed the onions on top. Ina says to cut the onions first and place in a big bowl, and then whisk the vinaigrette in a small bowl and then pour the vinaigrette over them. But honey, that means more things to wash up. So, I'll keep my way. LOL.
This dish can be made ahead and would go wonderfully with any kind of roast: turkey, chicken, ham, lamb or beef.
Here you go:
Herb-Roasted Onions
From "Barefoot At Home"
By Ina Garten
Serves 6
4 red onions
3 yellow onions
1/4 cup freshly squeezed lemon juice (2 lemons)
2 tsp. Dijon mustard
2 tsp. minced garlic (2 cloves)
1 Tbsp. minced fresh thyme leaves
1 1/2 tsp. kosher salt
1/2 tsp. freshly ground black pepper
1/2 cup good olive oil
1 Tbsp. minced fresh flat leaf parsley
Preheat the oven to 400 degrees Fahrenheit.
Remove the stem end of each onion and carefully slice off the brown part of the root end, leaving the root intact. Peel the onions. Stand each onion root end up on a cutting board and cut the onions in wedges through the root. Place the wedges in a large bowl.
Combine the lemon juice, mustard, garlic, thyme, salt and pepper in a small bowl. Slowly whisk in the olive oil. Pour the dressing over the onions and toss well.
With a slotted spoon, transfer the onions to a sheet pan, reserving the vinaigrette that remains in the bowl. Bake the onions for 30 to 45 minutes, until tender and browned. Toss the onions once during cooking. Remove from the oven and drizzle with the reserved dressing. Sprinkle with parsley, season to taste, and serve warm or at room temperature.


