Thursday, December 19, 2019

Nigella Christmas Chocolate Cookies

I've been wanting to make Nigella Christmas Chocolate Cookies for years. But this time of year is always so hectic, and each December would come and go and I just cranked out my cookie standbys: pizzelles, biscotti, ricotta, chocolate chips.

So this week, I changed all that and made a point to get to it already. Afterall, procrastination and putting tasks off is not how I roll.

These are like a chocolate shortbread drizzled with a chocolate glaze and sprinkled with your favorite Christmas sparkles or confetti.

I'm glad I made them. They are a nice surprise.

My batch made closer to 30 than the 24 listed in the recipe.

The recipe is featured in the Nigella Christmas cookbook. Nigella Lawson is one of my fave celebrity chefs and I collect all of her books. If you are not an avid reader of Nigella Lawson recipes, you may be surprised by her style as it is quite colorful and she adds a bit of her own commentary. I have listed her recipe exactly as it is written in the book.

My tips for the cookies that may have differed from her recipe are as follows:
1. I did not wear rubber gloves to roll out the dough. And it was totally just fine.
2. I did not remove my cookie sheet from the oven to place on a cold a surface. I don't even know what that means. Ha. Maybe her fancy kitchen has ice cold marble surfaces on which hot cookie sheets can be placed? I used a standard cooling rack on my common man formica.
3. My yield was greater than 24, so you may want to have 3 cookie sheets prepared.
4. Just in case it's not clear for you in her recipe, please bake each sheet one at a time.


Christmas Chocolate Cookies
From "Nigella Christmas"
By Nigella Lawson
Makes approximately 24

2 1/4 sticks (18 Tbsp.) soft unsalted butter
3/4 cup sugar
1/3 cup unsweetened cocoa powder
2 cups all-purpose flour
1/2 tsp. baking soda
1 tsp. baking powder

For the Festive Topping:
2 Tbsp. unsweetened cocoa powder
1 1/2 cups confectioners' sugar
1/4 cup boiling water, from a kettle
1 tsp. vanilla extract
Christmas sprinkles

Preheat the oven to 325 degrees Fahrenheit and line  2  cookie sheets with parchment paper.

Cream the butter and sugar in a bowl and when you have a light, soft, whipped mixture, beat in the 1/3 cup cocoa powder (sifting if it is lumpy) and, when that's mixed in, beat in the flour with the baking soda and baking powder. Or just put everything in the processor and blitz, if you prefer.

This mixture is very soft and sticky and I find it easiest to form the cookies wearing my disposable vinyl gloves, so pinch off pieces about 1 Tbsp. in size, roll them into balls, then slightly flatten into fat discs as you place them well spaced on your cookie sheet. You should get about 12 on at a time.

Bake each batch for 15 minutes; even though the cookies won't feel as if they've had enough time, they will continue to cook as they cool. They will look slightly cracked on top, and it's this cozy, homespun look that I love.


Remove the cookie sheet to a cold surface and let it sit for 15 minutes before transferring the cookies to a wire rack, with a sheet of newspaper under it to catch drips while topping them.

To make the topping, put the cocoa powder, confectioners' sugar, water and vanilla extract into a small saucepan and whisk over a low heat until everything's smoothly combined. Take off the heat for 10 minutes.


When the cookies are cool, drizzle each with a tablespoonful of chocolate glaze - to glue the sprinkles on in a minute - using the back of the spoon to help spread the mixture, though an uneven dribbly look is part of their charm. After you've iced 6 cookies, scatter with some of the Christmas sprinkles, and continue thus until all the cookies are topped. If you ice them all before sprinkling, you will find the cocoa "glue" has dried and the sprinkles won't stick on.


Sunday, December 15, 2019

Buttermilk Cheddar Biscuits

Fresh baked goods are one of the greatest things ever, in my humble opinion. So, whenever I have a moment to whip up a fresh batch of anything, I go for it.


These Buttermilk Cheddar Biscuits are totally amazing. The recipe is a Barefoot Contessa from her cookbook called "Back to Basics."

Now, buttermilk is not an ingredient I have on the ready like ever. But, you can make up your own buttermilk substitute on the fly with regular old milk and a lemon. Simply measure out a scant 1 cup of milk and add 1 Tbsp. fresh lemon juice. Stir and let it hang out for 5 minutes. Voila. Buttermilk. For this recipe, you just need a half cup of buttermilk.

I made these biscuits the last time I made a buffalo chicken salad. Here's a pic:


 Link to that awesome recipe is here: Buffalo Chicken Salad

These biscuits would obviously rock with a brunch situation. I also feel like they would be amazing with a chowder or a stew or if you're whipping up a baked ham din.

You can totally use pre-shredded cheese. That's what I did (sorry, Ina.). Totally top each biscuit with a pinch of flaky sea salt. It's the ultimate finishing touch. They are so super amaze. You will definitely eat a whole bunch. I love this recipe because each biscuit looks unique. I love the whole misshapen quadrangle situation that is going on. Yay!

Here's a pro tip with the butter. Cut it into cubes and just leave it on the butter wrapper to easily dump it into the mixing bowl. I like to chop the butter first and put it back in the refrigerator to keep it super cold for biscuits and pie crusts. Then I measure out all my other ingredients. When it's time to make the dough, just pop out your cubed butter from the fridge. Gotta be prepared! And you totally do not want soft butter for flaky perfect biscuits.


Here's the recipe for the biscuits:

Buttermilk Cheddar Biscuits
Makes 8 biscuits
From "Barefoot Contessa: Back to Basics"
By Ina Garten

2 cups all-purpose flour, plus a handful
1 Tbsp. baking powder
1 1/2 tsp. kosher salt
12 Tbsp. (1 1/2 sticks) cold unsalted butter, diced
1/2 cup cold buttermilk, shaken
1 cold extra large egg
1 cup grated extra sharp Cheddar
1 egg beaten with 1 Tbsp. water or milk
A sprinkle of sea salt

Preheat the oven to 425 degrees Fahrenheit.

Place 2 cups flour, the baking powder and kosher salt in the bowl of an electric mixer fitted with the paddle attachment. With the mixer on low, add the butter and mix until the butter is the size of peas.

Combine the buttermilk and egg in a small glass measuring cup and beat lightly with a fork. With the mixer still on low, quickly add the buttermilk mixture to the flour mixture and mix only until moistened. In a small bowl, mix the cheddar cheese with a small handful of flour and, with the mixer on low, add the cheese to the dough. Mix only until roughly combined.


Dump out onto a well-floured board and knead lightly about six times. Roll the dough out to a rectangle 5 by 10 inches.


With a sharp, floured knife cut the dough lengthwise in half and then across in quarters, making 8 rough rectangles. Transfer to a baking sheet lined with parchment paper.


Brush the tops with egg wash, sprinkle with sea salt and bake for 20 to 25 minutes, until the tops are browned and the biscuits are cooked through. Serve hot or warm.


Sunday, November 24, 2019

Eggs in Purgatory

Oh, if only I had known the savior that is Eggs in Purgatory as a young collegiate party animal. I suppose it is named as such because of the spicy nature of the sauce, but I like to think of its nurturing qualities when one feels like he or she is ready to enter the depths of hell due to one too many. And, you know. We've all been here. 

 I mean this is seriously the most perfect food to nurse a hangover. Or, more importantly to feed your drunken-stupor soul when you stumble home in the wee hours of the night/morning and must stave off ravenous hunger that follows a night of hitting that bottle a little too hard. This dish is so necessary before making it to bed with two liters of water, a chaser of Gatorade and a bottle of Tylenol PM on your nightstand. 

Of course, you can also make this when the husband is traveling and there's nothing much to eat. Or, because you just really freaking want a pan of the tomato/egg gloriousness because it is THAT AMAZING. This works for all courses: Breakfast, lunch, dinner, snack time. It's the perfect meal.

You can make Eggs in Purgatory with a can of chopped tomatoes or pureed tomatoes or leftover marinara sauce. Hot pepper flakes, garlic, olive oil, basil and parmigiano cheese and you are good to go. Just make sure you have some major slices of Italian bread toast as a go-along because I don't care what any of these diety people preach: Drunks and really hungry peeps need carbs.


Eggs in Purgatory
Serves 1

1 Tbsp. extra virgin olive oil
2 garlic cloves, minced
1/4 tsp. (or more) crushed red hot pepper flakes
114 ounce can of diced tomatoes or tomato puree
Salt and pepper to taste
2 eggs
Grated parmigiano cheese 
1 Tbsp. shredded basil
Serve with Italian bread, toasted

In a small pan, heat the olive oil over medium heat. Add garlic and red pepper flakes. Cook for a minute or two. Add tomatoes. Season with salt and pepper. Bring to a simmer. Cook for five minutes. Stir.

Meanwhile, gently crack open two eggs in a bowl. Set aside.

While the sauce is still simmering over medium high heat, gently add the eggs directly to the tomatoes. Season with a little salt, pepper and about a Tbsp. of parmigiano cheese. Cover with lid, partially. Cook for about five minutes or until the whites are opaque and set. I like to rotate the pan halfway through the cooking process. The yolk should be runny.

Garnish with basil and a drizzle of olive oil and more cheese if desired. Serve with toast. 

Monday, November 18, 2019

Crowd-Pleasing Baked Artichoke-Spinach Dip

Here's an oldie but goodie: Baked Artichoke-Spinach Dip straight from the pages of the red-and-white-checkered Better Homes and Gardens Cookbook.

Every year I do a cookbook purge. But the BHG always makes the cut. Sometimes those classic recipes from yesteryear are just what we need.

This is a great dip for holiday parties, birthday parties, family get togethers and sports gathering. My crowd always loves it!

Be sure to drain your artichoke in the colander pressing into them gently with a spoon. This makes the dip less watery.

You can totally make this the day before and bake the day of your event. Just be sure to go with the longer baking time of 25 minutes.

Serve this dip with pita chips, crackers, crusty bread or tortilla chips.


Baked Artichoke-Spinach Dip
Makes about 3 cups dip
From "The Better Homes and Garden Cookbook"

1/2 cup shredded mozzarella cheese
1/2 cup dairy sour cream
1/2 cup mayonnaise
1/2 cup grated Parmesan cheese, divided
1 to 2 tsp. Dijon-style mustard
Dash white pepper (The Jersey Girl uses regular black pepper)
1 14-ounce can artichoke hearts, drained and coarsely chopped
1 cup loosely packed, coarsely chopped baby spinach leaves
1/2 cup finely chopped red onion (1 medium)

1. In a large bowl, combine mozzarella cheese, sour cream, mayonnaise, 1/4 cup of the Parmesan cheese, mustard and pepper. Stir in artichoke hearts, spinach and onion. Spread mixture evenly into a 9-inch pie plate. Sprinkle with remaining 1/4 cup Parmesan cheese.

2. Bake uncovered in a 350 degree oven for 15 minutes or until heated through. Serve with pita wedges, French bread, and/or crackers.

Make-ahead directions: Prepare as above through step 1. Cover and chill for up to 24 hours. Uncover and bake about 25 minutes or until heated through.


Sunday, November 10, 2019

Thankful for the Memories

Thanksgiving is all about tradition. Especially with the food.

That's why my Mommom Sacco's amazing string beans are always on my Thanksgiving table. This dish requires very few ingredients. Beans, a small potato, garlic and oil and voila - magic happens.

That's really how it was with everything my Mommom cooked and baked. And that's one of the reasons I love her recipes so much.

Hope you love this one, too. It's wayyyyy better than the whole string bean casserole nonsense.

I'm so thankful for all the amazing recipes my grandmother taught me. They bring her back to life each time I make them. We love you, Mommom!


Mommom Sacco and me at her last Thanksgiving in 2015. 

Mommom Sacco's String Beans
Makes 10-14 servings

1 1/2 to 2 lbs. string beans, washed, trimmed and cut in half
1 small baking potato, peeled and quartered
5 cloves of garlic, minced
1/4 cup olive oil
Salt and pepper.


In a large pot filled with cold water, add prepared string beans and quartered potato. Place on stove top. Bring to a boil. Partially cover pot with lid, and boil for 20 minutes or until the potato is tender and falling apart.

Carefully drain the beans and potato in a colander over the sink.


Return pot to stovetop. Add oil and garlic. Cook garlic over low heat. Do not burn!

Add drained string beans and potato to the pot. Season with salt and pepper. Toss the beans and potato in the garlic oil. Using a fork carefully mash up the potato. Toss again. Taste for seasonings.

Dish may be made the day before and reheated before serving.

Friday, November 8, 2019

Refresh Your Palate

Thanksgiving din is decadent.  And heavy.

So, it's nice to have bright and refreshing cranberry relish to lighten things up.

Back in the day, my mom rocked out a cranberry Jell-O mold totally reminiscent of the days of Betty Draper. It remained largely untouched. Sorry, Mom.

I recently read that cranberry sauce is the least fav side of Thanksgiving. To which I say, "Obviously!" Who want to eat a congealed jiggly concoction from a can?

No one, that's who.

So grab a bag of fresh cranberries and a clementine and get to business. The color and fragrance is total fall. And your guests will love this little kick of cranberry, trust.


Refreshing Cranberry Relish
Makes 2 cups

1 12-ounce bag of cranberries, rinsed and picked through
1 clementine, unpeeled, cut in quarters.
1/2 cup granulated sugar.


In a food processor, add cranberries and clementine segments. Pulse about 10 times to finely chop the fruit. You may need to scrape the sides once during this process. Be sure to not over-pulse. You want the mixture to have texture.


Spoon cranberry clementine mixture into bowl.  Gently stir in sugar. Cover and refrigerate for at least a day.


Sunday, November 3, 2019

Trisha Yearwood Pork Tenderloin

Who doesn't need a good crockpot recipe up her sleeve?

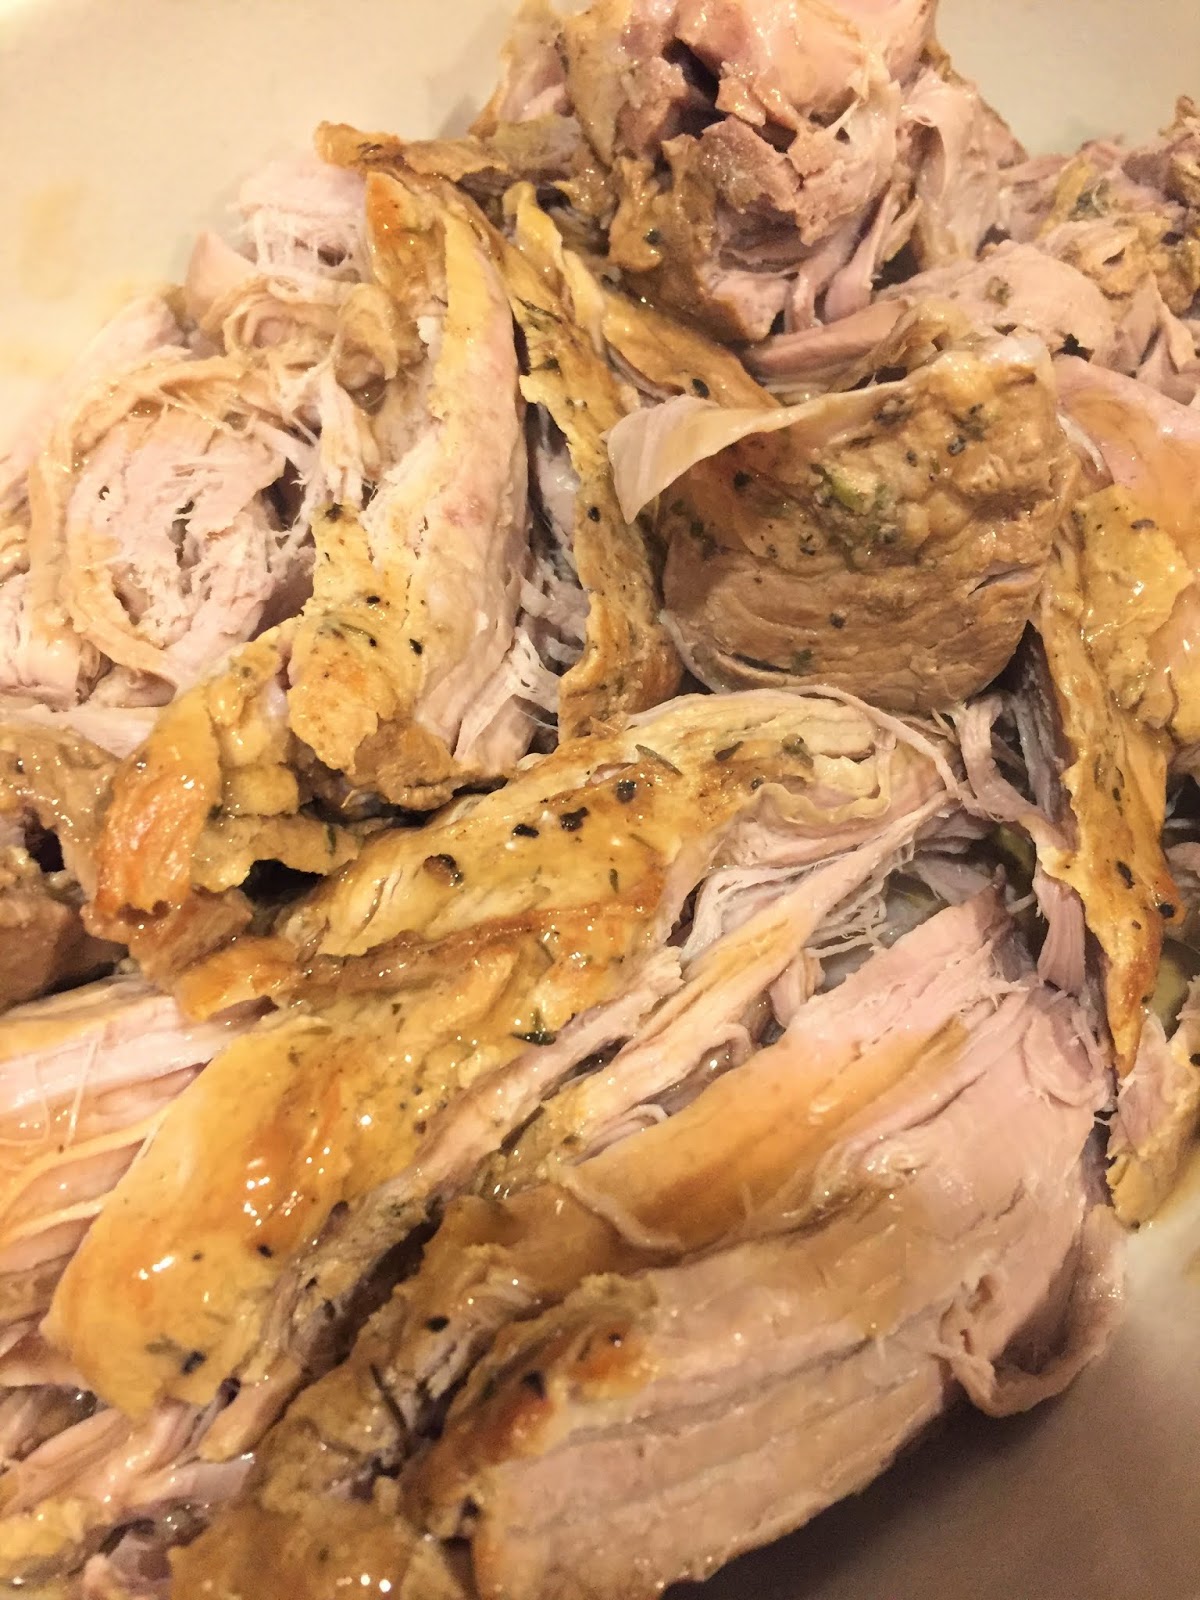
This Slow Cooker Pork Tenderloin comes from Trisha Yearwood. While I don't avidly watch her show on the Food Network, I've heard of her cooking skills and thought this dish looked interesting. 

This is a crockpot recipe, but it starts on the stove with searing the meat and ends on the stove with making the gravy.

I served it with mashed potatoes and broccoli rabe.

I followed her recipe closely, but I do use low sodium soy sauce and low sodium chicken broth. I also skipped the very first step of seasoning the pork tenderloin with salt. I try to cook with minimal salt always, and I thought the soy sauce provided ample salt. I seared the meat in olive oil rather than vegetable oil. The seasonings seem sparse in the recipe list, but it all worked well together. 

My pork tenderloin was just under 3 pounds and it came in two pieces. You may use a pork loin or a pork tenderloin for this recipe. 


Slow Cooker Pork Loin
By Trisha Yearwood
Makes 8 to 10 servings

2 1/2 to 3 lb. pork loin, trimmed of all visible fat
1/2 tsp garlic powder
1/4 tsp ground ginger
1/8 tsp dried thyme
1/4 tsp black pepper
1 Tbsp. vegetable oil (The Jersey Girl used olive oil)
2 cups chicken broth
2 Tbsp. lemon juice
1 Tbsp. soy sauce
3 Tbsp. cornstarch
salt and pepper, to taste

Season the pork loin lightly with salt. In a small bowl combine the garlic powder, ginger, dried thyme, and black pepper. Rub the seasoning over the surface of the pork loin.


In a skillet heat the oil and brown the pork loin on all sides. Transfer the pork to the crock pot. Combine the chicken broth, lemon juice, and soy sauce; pour over the pork loin.


Cover and cook on low heat for 8 to 10 hours, or on high for 4 to 5.


After cooking, transfer the roast to a platter and keep warm.

To make the gravy, pour the liquid from the crock pot into a measuring cup. Skim off the fat. Measure two cups of the liquid, adding water if needed. Transfer to a sauce pan reserving 1/2 cup of the liquid.


Stir the cornstarch into the reserved liquid, then stir into the liquid in the sauce pan. Heat, stirring frequently, until the gravy is thick. Taste and season with salt and pepper, if needed. Serve the roast with the gravy.