Wednesday, January 22, 2020

A Little Prep Ahead

I'm all about getting her done the night before. My lists. My prep. My dinner. People are always asking me when do I do it all? When do I cook?

A nightowl by nature, I cook and meal prep off the clock for din on wackadoo hours - like 10 p.m. or 10 a.m. Then The Husband just reheats it so he and the kiddo can eat a nice plate while I'm working.

These Lemon and Herb Roasted Tenderloins are a dish I put together the night before. The marinade can be made right in the pan that is used for roasting the tenderloins. I use my good ole' Pyrex, but any type will do. I then bake it first thing in the morning so that its ready for my fam.

The marinade is great with both pork and turkey tenderloins. Pork tenderloin is easier to find in the store as turkey tenderloin is a newer item on the market. You can find them in the poultry case hanging out with the chickens if your store has them, which mine sometimes does and sometimes doesn't. A package of turkey tenderloin is usually two pieces so I buy two packs for these measurements. One package of pork tenderloin usually equals about 2.5 to 3 pounds. It is usually two pieces. So, I buy one package of pork tenderloin for these measurements.

These are great with rice or your basic baked potato. And of course some veggies! My pics today show the turkey tenderloins:
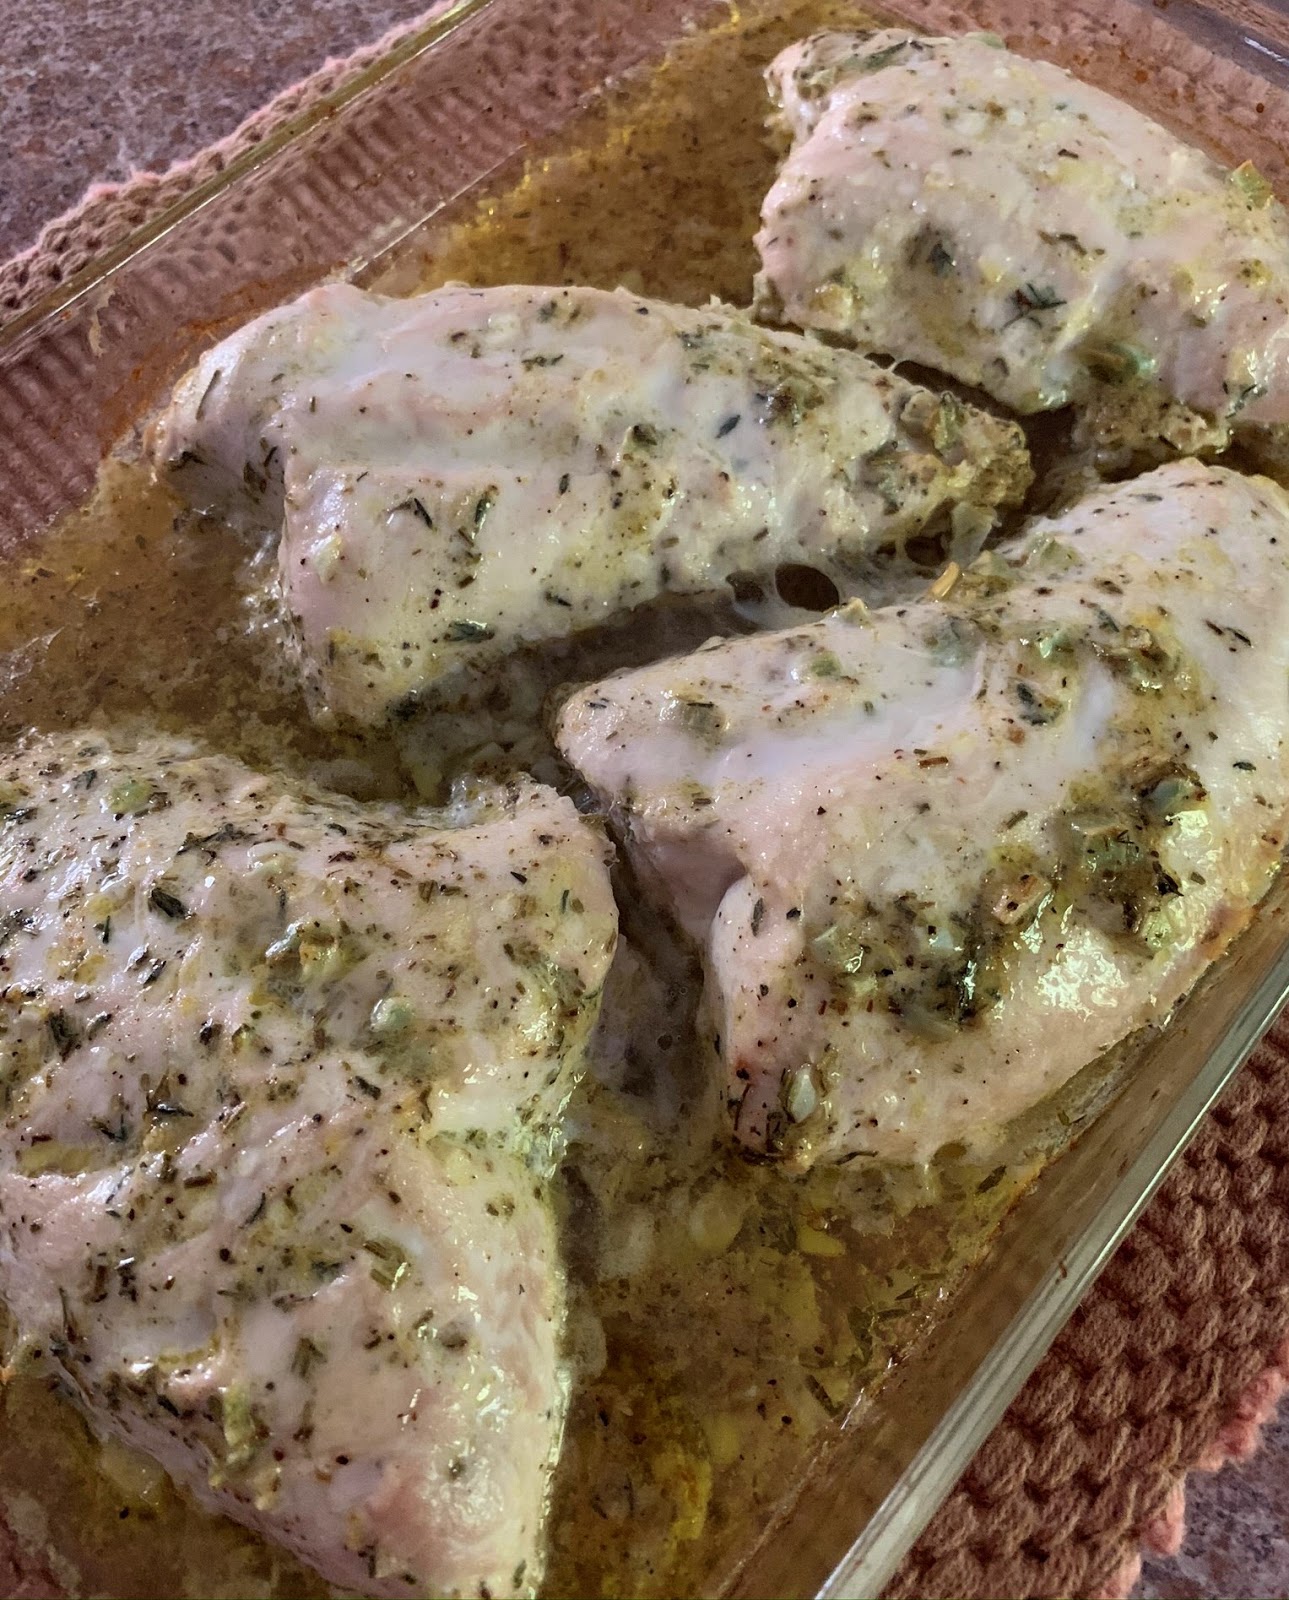


Lemon and Herb Roasted Tenderloins
(Makes four to six servings)

2.5 - 3 pounds of turkey or pork tenderloins

Marinade ingredients:
Juice and zest of 1 lemon
3 cloves garlic, minced
1 tsp. dried rosemary
1 tsp. dried thyme
2 tsp. Dijon mustard
3 Tbsp. olive oil
Salt and pepper to taste

In a baking dish large enough for your tenderloins, add all of the marinade ingredients. Whisk together. Place the tenderloins in the pan and coat with the marinade. Cover dish with aluminum foil. Place prepared dish in your refrigerator. Marinate for at least 8 hours or over night.


When you are ready to cook the tenderloins, preheat oven to 375 degrees Fahrenheit. For turkey: cook uncovered in oven for 45-55 minutes. For pork: Cook covered for 40 minutes. Uncover and cook for 10 minutes more.

Remove from oven and cover with foil. Let rest for 10 minutes. Serve with potatoes or rice and your favorite veggies!

Sunday, January 19, 2020

Ravioli in Vodka Sauce

When The Husband and Son go out on the town for their sports and whatnot, the Jersey Girl still throws it down in the kitchen for Me, Myself and I.

These are the moments I cook something a little special but doesn't require too much cleanup. Because homegirl needs to enjoy her food while watching a trashy show or a chick flick or reading a good book. AmIright, Darling? Of course I am. No stress, please and thank you.

So here we go: Vodka Sauce but not just with any old penne. Aw, hell no. Homegirl went in big with the ravioli.


Now my package of ravioli had a quantity of 12, so the amount of the sauce made in the recipe below was a bit extra. No problemo: Into the freezer it awaits for my next night alone. Although, I do think my homeboys would groove on this. So, maybe I'll share when it defrosts.

I served my magnifico ravioli with some roasted asparagus. But it would also be fab with a little salad, maybe some baby spinach or spring greens.

I used my girl Rachael Ray's recipe from her classic book "30 Minute Meals 2." This book came out when she was first blowing up on Food Network. I think it is a very useful book, especially for beginner cooks. It is one of the first cookbooks I bought before even getting hitched. I use it all the time, 16 years later.

Rachael has a thing against measuring, but I did literally measure the vodka. I feel like the wrong quantity of that could totally jack this recipe up. Plus, who wants to waste their precious pricey vodka? Not this girl.

You-Won't-Be-Single-For-Long Vodka Cream Pasta
From "30 Minute Meals 2"
By Rachael Ray

Makes 4 servings (Make it for 2 with seconds in mind)

1 Tbsp. extra virgin olive oil (once around the pan)
1 Tbsp. butter
2 garlic cloves, minced
2 shallots, minced
1 cup vodka
1 cup chicken stock
1 can (28 ounces) crushed tomatoes
Salt and freshly ground pepper
1/2 cup heavy cream
20 leaves fresh basil, shredded or torn
Crusty bread

Put large pot of salted water on to boil.

Heat a large skillet over moderate heat. Add oil, butter, garlic and shallots. Gently saute garlic and shallots, 3 to 5 minutes to develop their sweetness. Add vodka, 3 turns around the pan in a steady stream will equal about a cup. Reduce vodka by half, 2 or 3 minutes. Add chicken stock and tomatoes. Bring sauce to a bubble, then reduce heat to simmer. Season with salt and pepper.


While sauce simmers, cook pasta in salted boiling water until al dente, a bit firm to the bite (cooking time should be listed on your box of pasta).


Stir cream into the vodka sauce. When sauce returns to a bubble, remove from heat. Drain pasta. Toss hot pasta with sauce and basil leaves. Serve immediately along with crusty bread.

Friday, January 17, 2020

Rosemary Focaccia

A day at home with no plans is blissful for me.

Now I can get up and go with the best of them, but seriously you can put me on house arrest for a good two weeks and I will be just fine. As long as I can cook, bake, read, play the piano, organize some things and watch trashy TV it's all good in the hood for the Jersey Girl.

Our culture of never-ending plans, appointments, commitments and outings kills my spirit.

So I have encountered great insane joy when I have had the time to delve into this awesome book that has found its way into my collection: "Polpo: A Venetian Cookbook (Of Sorts)." There are so many interesting recipes, and as soon as my glistening eyes caught sight of this focaccia recipe I read it from top to bottom and then once more. I declared this focaccia must be mine.


Isn't it totally gorgeous? I've made the focaccia twice. It's a very easy bread to conquer. It just takes time to rest and get its groove on. My son  - who is obsessed with rosemary (yay) - likes to assist with putting the dimples in the dough and placing the rosemary leaves and sprinkling with a little sea salt. 


I love making this with him! The bread lasts for several days if stored in an airtight container. It's so good with pasta e fagioli and also with chicken cacciatore. 


The next time you have some spare time on your hands and you want to get into in your kitchen, I hope you give this amazing recipe a try!


Focaccia
From "Polpo: A Venetian Cookbook (Of Sorts)"
By Russell Norman

For one loaf:
25 g fresh yeast (or 2 x 7g fast-action yeast)
650 ml warm water
1 kg strong white bread flour (4 cups)
25 g fine salt (5 tsp.)
Extra virgin olive oil
Flaky sea salt
1 good handful of small rosemary sprigs

In a large bowl, mix the fresh or dried yeast into the water and whisk until the yeast is dissolved. Add half of the strong white bread flour and use a hand whisk to beat till smooth. At this stage, your mixture will still be very wet, like a pancake batter. Leave, covered with clingfilm, until it has risen but keep a close eye on the 'tide line.' When the mixture starts to fall again (about 1 hour in a warm kitchen, longer in a cooler one), knead in the other 500 g of strong white bread flour and the fine salt. Work everything together until there are no lumps.

Transfer the dough to a warm, oiled, clean bowl and leave it to rise for at least another hour. Your dough will be getting full of itself by now so you need to knock it back and teach it some discipline. Repeat this step (rising and knocking back) twice more only if using fresh yeast. Now your dough is ready to use or it can be covered and refrigerated overnight.

Oil your hands and a greaseproof-paper-lined baking tray. Take the dough and manipulate into a large dome. Place on the tray, smear a generous amount of olive oil over the top, cover in clingfilm and leave to rise in a warm place.

Preheat an oven to 200 degrees Celsius/Gas 6 (or 400 degrees Fahrenheit). When the dough has increased in size by one third, remove the clingfilm, oil your hands and lightly press your fingers into the dough so that you leave dimples in the surface. Scatter with sea salt and rosemary, pushing the sprigs into the dough.


Bake the dough in the preheated oven until golden brown (about 1 hour but you should check at 45 minutes). To test the bread's 'doneness', tap it on the bottom - it should sound hollow.

Sunday, January 12, 2020

Potato Pancakes

Leftovers are a thing in my house with my little family of three. Especially when it comes to mashed potatoes since I overestimate the quantity pretty much always.

Mashed potatoes are a cinch to transform into super yummy Potato Pancakes. These are great for a light lunch with a salad or just a little snack. Serve with a little sour cream on the side.

My son and husband both love them. And, so do I, natch. They would be so amaze with salmon caviar.


Potato Pancakes
Makes about 12

2 cups leftover mashed potatoes
1/4 cup all purpose flour
1 egg lightly beaten
3 scallions, minced
3/4 cup shredded cheddar cheese
Salt and pepper to taste
2 tsp. vegetable oil per batch

In a bowl, combine mashed potatoes, flour, egg, scallions, cheese, salt and pepper. Mix gently with your hands or a spoon. Set aside in fridge until ready to cook.


Form potato mixture into small patties, about 2-3 Tbsp. each. In a pan over medium high heat, add oil. Once hot, add patties about 4-6 at a time. Cook 2 to 3 minutes per side. They are ready to flip when they do not stick to the pan.


Serve with sour cream.

Sunday, January 5, 2020

The Lowdown on Chocolate Chip Cookies

There are two types of people: Bakers and non-bakers. I am 150 percent totally a baker.

So, I bring to you with great joy the most fantastic recipe for classic chocolate chip cookies ever. Of course, it's from my girl Betty Crocker. Look how gorg:


Perfect color and texture!

Now, I was born and bred on the chocolate chip recipe right on the back of the Nestle's chocolate chips. And sometimes, the final result was awesome but more often than not, the cookies were flat, sticking to the pan and not to my level of perfection that I often reach when baking.

So, I declared in November the Nestle's recipe was officially dead to me, and it was time to move on. Afterall, I do have a reputation to protect.

I also did extensive research on how to produce desirable chocolate chip cookies. Because I go big or go home on topics of which I obsess. So it seems this fact is key: Bake one cookie sheet at a time. All of these years I was doing the top-bottom switcharoo. Of course, baking one sheet solo adds more minutes to the whole process, but I do try to bake when I'm free as a bird (ha).

Also at issue is the number of eggs. Nestle's calls for two; Betty calls for one. I use extra large eggs in baking and cooking and life, so I think that is one reason the Nestle's recipe doesn't work out for me.

The Betty Crocker cookies turned out crispy on the outside, chewy and delicious on the inside and the best part was they totally did not stick to the pan upon removal. Score!


Chocolate Chip Cookies
From "Betty Crocker's Cookbook"
Makes 4 dozen cookies

3/4 cup granulated sugar
3/4 cup packed brown sugar
1 cup unsalted butter, softened
1 tsp. vanilla
1 egg
2 1/4 cup all purpose flour
1 tsp. baking soda
1/2 tsp. salt
1 bag (12 ounces) semisweet or dark chocolate chips (2 cups)
1 cup coarsely chopped nuts, if desired

Heat oven to 375 degrees Fahrenheit. In large bowl, beat sugars, butter, vanilla and egg with electric mixer on medium speed, or mix with spoon, until well blended. Stir in flour, baking soda and salt (dough will be stiff). Stir in chocolate chips and nuts.

On ungreased cookie sheets, drop dough by rounded tablespoonfuls about 2 inches apart. For perfectly sized and shaped cookies, use a #70 cookie scoop.

Bake 8 to 10 minutes or until light brown (centers will be soft). Cool 1 to 2 minutes; remove from cookie sheets to cooling racks.

Monday, December 30, 2019

Party Dip Oh Yeah

This White Bean Dip with Pita Chips makes a frequent appearance at my get-togethers. First of all, it's a quick vegetarian dish to have on hand. The dip can totally be made the day before.


You certainly can skip the homemade pita chips and just buy a bag, but the homemade chips are always a hit. The oregano on the chips works perfectly with the dip.

Do keep a close eye on the oven when making the chips as each oven is different, and I have found that different brands of pita cook faster or slower than others.

I like to use Cento beans, which are actually a 19-ounce can. I just up the lemon juice and olive oil to accommodate. I love the green of the parsley in this dip. It adds a nice brightness. This is also a good one to make if any of your guests have an allergy to sesame, which is often present in traditional hummus.


White Bean Dip with Pita Chips
From "Everyday Italian"
By Giada DeLaurentiis
Makes 6 appetizer servings

4-6 pita breads, cut into 8 triangular wedges
2 Tbsp. plus 1/3 cup olive oil
1 tsp. dried oregano
Salt and freshly ground pepper to taste
1 (15 ounce) can cannellini beans, drained and rinsed
1/4 cup flat leaf parsley
2 Tbsp. fresh lemon juice
1 garlic clove

To make the pita chips:
Preheat oven to 400 degrees Fahrenheit. Arrange the pita wedges over a large baking sheet. Drizzle the pita wedges with 2 Tbsp. olive oil, then sprinkle with oregano and salt and pepper to taste. Toss and spread out evenly over baking sheet. Bake the pita wedges for 8-12 minutes, checking on them at the 4-5 minute mark, and tossing them to redistribute on the pan before returning the pan back to the oven to finish baking. Be sure to keep a close eye on the chips!

To the make the puree:
Meanwhile, in the bowl of a food processor, combine the beans, parsley, lemon juice, garlic, and salt and pepper to taste. Pulse on and off until the mixture is coarsely chopped. With the machine running, gradually mix in the remaining 1/3 cup of oil until the mixture is creamy. Season the puree with salt and pepper to taste if desired. Transfer the puree to a small bowl and serve the pita toasts warm or at room temperature alongside. (The pita wedges and bean puree can be made 1 day ahead. Store the pita wedges airtight at room temperature. Cover and refrigerate the bean puree.)

Sunday, December 29, 2019

Your New Fave Din

Here's an easy peasy chicken din: Grilled Chicken with Basil Parsley Sauce. It is literally my son's favorite dish right now. He asked if I could make it every day. He ate three servings of this the first night, and all of the leftovers the second night.


As long as you remember to marinate the chicken at least thirty minutes ahead, you are good to go. This uses thin cut chicken breast so it cooks up super quick. Just make sure you cook it in batches because overcrowding your grill pan is no bueno. Your chicken will end up poached rather than grilled.

I always keep fresh basil on my windowsill and parsley in my veg drawer so making this is a cinch. It goes great with pasta, rice, a salad. Whatevs!

And you can make the basil parsley sauce ahead as well. I'm a big big fan of make-ahead things because I like to have as much cleaned in the kitchen before I sit my bootie down to actually eat. One of my OCD qualities. For sure.

When I made this, I served the super amazing Lemon Fusilli with Arugula by Barefoot Contessa.


Link to that awesomeness is here: Lemon Fusilli with Arugula

And here's the chicken recipe below!


Grilled Chicken with Basil Parsley Sauce
Makes 3-4 servings

For the chicken:
6-8 thin-cut boneless, skinless chicken breast
2 tsp. fresh thyme, minced or 3/4 tsp. dried thyme
Juice from 1 lemon, about 3 Tbsp.
1/4 cup extra virgin olive oil
Salt and pepper to taste

In a glass bowl, whisk together thyme, lemon juice, olive oil and salt and pepper to make a marinade. Place chicken breasts in the bowl. Coat the chicken with the marinade. Cover with a lid or plastic wrap. Set in refrigerator for at least 30 minutes up to 8 hours.


When ready to cook, place a grill pan over medium high heat. Grill chicken in batches about 4 minutes per side. Chicken should be nicely browned and cooked through. Set aside cooked chicken in a covered dish while grilling the second or third batch.


Serve immediately or at room temp with the sauce listed below.

Basil Parsley Sauce
1cup fresh basil
1/2 cup flat leaf parsley
1 garlic clove
Zest and juice of one lemon
1/2 cup extra virgin olive oil
Salt and pepper to taste

In a blender or a food processor, place basil, parsley, garlic clove, lemon zest and juice, olive oil and salt and pepper. Puree until smooth. Scrape sides if necessary and puree again for 20 seconds. Adjust seasonings if necessary.


To serve: Plate a slice of chicken with a tablespoon or two of the bright basil parsley sauce. Devour!